映射UV节点

映射UV节点。
在渲染后,使用此节点可以将对象进行“重新贴图”。
将贴图应用到某个单独物体上,可使用 ID遮罩节点。
输入
图像
新的二维贴图。
UV
UV渲染通道的输入。参见 Cycles渲染通道.
Hint
多图层OpenEXR图像格式可以使用存储的UV通道。
属性
Alpha通道
Alpha阈值用于边界淡出。
输出
图像
输入纹理贴图匹配UV坐标生成结果图像。这个图像覆盖在原始图像之上给其进行纹理着色。调节alpha和图层融合因数可以控制新旧贴图之间的混合程度。
Hint
当进行新贴图着色时,为了更好的将UV贴图和场景中原始物体进行融合,一种推荐的方法是保持UV贴图的边界不变。
范例
In the example below, we have overlaid a grid pattern on top of the two heads after they have been rendered. During rendering, we enabled the UV layer in the Properties Render Layer ‣ Passes. Using a Mix node (“Overlay” in figure), we mix that new UV texture over the original face. We can use this grid texture to help in any motion tracking that we need to do.

给运动追踪添加网格UV贴图。
在下面的例子中,在由两个交叉的立方体组成的网格上叠加一个logo,确保勾选混合节点上的Alpha预乘选项。将logo作为现有纹理上方的UV纹理。其他例子包括在原始的动画中使用了一个未授权的产品盒子,需要在渲染后替换为另一个产品赞助商。
Hint
由于该节点的限制,不推荐“UV纹理匹配后”进行快速产品预渲染。
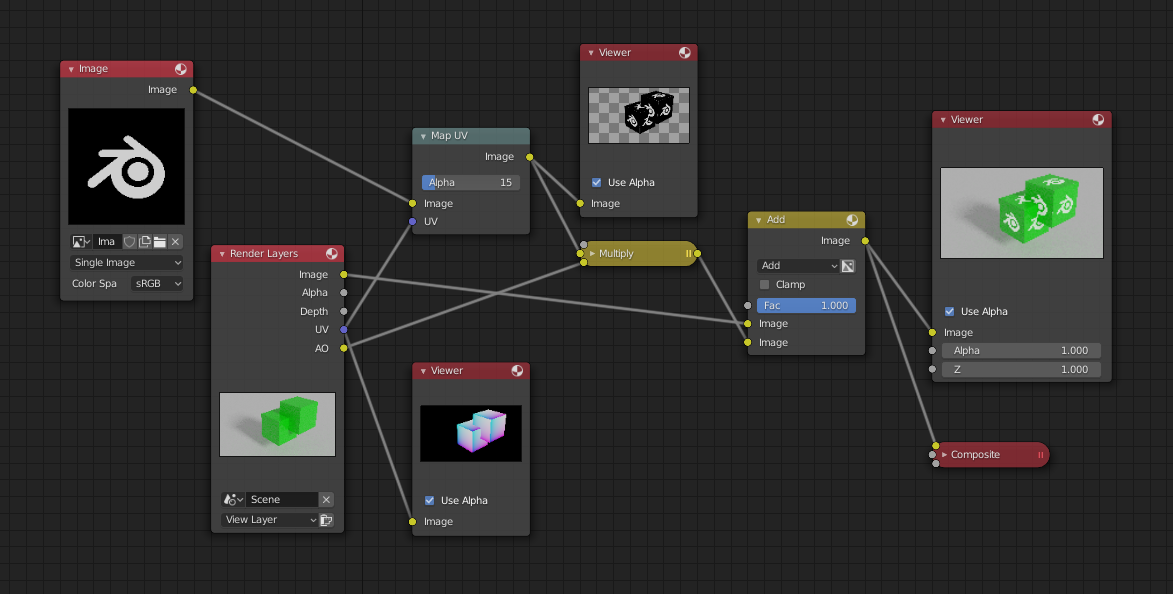
在后期合成中添加UV贴图.