Using UV Maps
Sooner or later, you may want to use an image texture on your model. The UV Editor allows you to map textures directly to the mesh faces. The 3D Viewport shows you the object being textured. If you set the 3D Viewport into Textured viewport shading, you will immediately see any changes made in the UV Editor, and vice versa. This is because no real rendering is taking place; it is all just viewport shading. If you were to apply an image to UVs then render, the texture would not show up by default. So to render an image, you must:
为物体创建材质。
告诉Blender在渲染时对物体表面使用UV贴图。
要创建材质,在材质标签页单击 添加新的 材质即可。
There are two ways to tell Blender to use the UV texture when rendering; the quick way and the proper way.
The quick way is to use generated UV coordinates. Generated coordinates is used by default by all Texture nodes, with the exception of Image textures that use UV coordinates by default. To use generated coordinates for images as well use the Generated output of the Texture Coordinate node.
The proper way is to use UV Unwrapping to manually generate UV coordinates. To use UV mapping, use the Texture Coordinate node (UV output) or the UV Map node and select the UV map to use, “UVMap” by default.
更多使用图像纹理的细节参考 图像纹理 页面。
Note
渲染必须要有材质
无需指定材质,你就可以在Blender中处理网格上的UV贴图,甚至还可以在3D视图中使用纹理着色进行预览。然而,在渲染时,如果没有对物体指定材质,默认的渲染结果是灰色的。如果没有载入图像,渲染结果是黑色的。如果没有使用图像创建纹理,物体将根据程序化材质进行渲染。
使用测试栅格
If your image is a base uniform pattern and you want the application of that image to your model to look like cloth, you do not want any stretching (unless you want the cloth to look like spandex). You may also need to test your UV mapping with a test image:
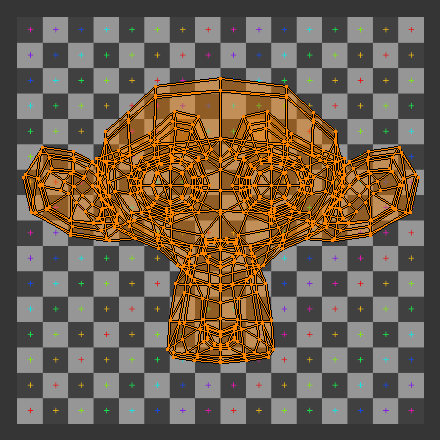 对UV应用测试栅格图。 | 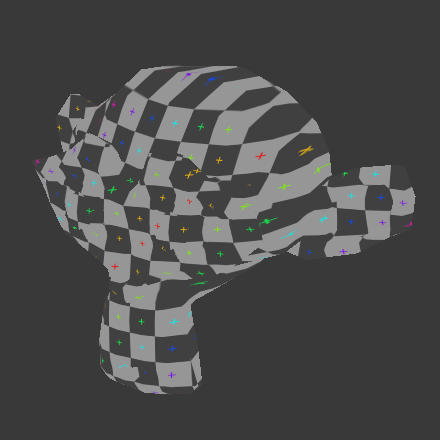 在几何体上预览贴图。 |
渲染时,网格中的测试网格替换为颜色,UV贴图的大小也需要与你指定的图像尺寸一样。
修改图像纹理
See also
保存贴图为单独文件的好处是你可以通过覆盖图像文件轻松切换贴图,并且使用外部程序处理贴图。打包的好处是整个工程都存在一个blend文件中,你需要管理一个文件。