
在 productpage 启用 Istio
正如您在上一个模块所见,Istio 通过增强 Kubernetes 功能,让您能更高效的操作微服务。
在这个模块中,您可以在 productpage 微服务中,启用Istio。这个应用的其他部分会继续照原样运行。注意您可以一个微服务一个微服务的逐步启用 Istio。启用 Istio 在微服务中是无侵入的,您不用修改微服务代码或者破坏您的应用,它也能够持续运行并且为用户请求服务。
应用默认目标规则:
$ kubectl apply -f https://raw.githubusercontent.com/istio/istio/release-1.10/samples/bookinfo/networking/destination-rule-all.yaml
重新部署
productpage微服务,启用 Istio:本教程为了教学目的将会逐步演示手动注入 Sidecar 去启用 Istio,但是 自动注入 Sidecar 更加方便.
$ curl -s https://raw.githubusercontent.com/istio/istio/release-1.10/samples/bookinfo/platform/kube/bookinfo.yaml | istioctl kube-inject -f - | sed 's/replicas: 1/replicas: 3/g' | kubectl apply -l app=productpage,version=v1 -f -deployment.apps/productpage-v1 configured
进入应用的网页去验证应用是否在工作。Istio 是在没有改变原应用代码的情况下添加的。
检查
productpage的 Pod 并且查看每个副本的两个容器。第一个容器是微服务本身的,第二个是连接到它的 Sidecar 代理:$ kubectl get podsdetails-v1-68868454f5-8nbjv 1/1 Running 0 7hdetails-v1-68868454f5-nmngq 1/1 Running 0 7hdetails-v1-68868454f5-zmj7j 1/1 Running 0 7hproductpage-v1-6dcdf77948-6tcbf 2/2 Running 0 7hproductpage-v1-6dcdf77948-t9t97 2/2 Running 0 7hproductpage-v1-6dcdf77948-tjq5d 2/2 Running 0 7hratings-v1-76f4c9765f-khlvv 1/1 Running 0 7hratings-v1-76f4c9765f-ntvkx 1/1 Running 0 7hratings-v1-76f4c9765f-zd5mp 1/1 Running 0 7hreviews-v2-56f6855586-cnrjp 1/1 Running 0 7hreviews-v2-56f6855586-lxc49 1/1 Running 0 7hreviews-v2-56f6855586-qh84k 1/1 Running 0 7hsleep-88ddbcfdd-cc85s 1/1 Running 0 7h
Kubernetes 采取无侵入的和逐步的滚动更新方式用启用 Istio 的 Pod 替换了原有的 Pod。Kubernetes 只有在新的 Pod 开始运行的时候才会终止老的 Pod,它透明地将流量一个一个地切换到新的 Pod 上。也就是说,它不会在声明一个新的 Pod 之前结束一个或者以上的 Pod。这些操作都是为了防止破坏您的应用,因此在注入 Istio 的过程中应用能够持续工作。
检查
productpageIstio Sidecar 的日志:$ kubectl logs -l app=productpage -c istio-proxy | grep GET...[2019-02-15T09:06:04.079Z] "GET /details/0 HTTP/1.1" 200 - 0 178 5 3 "-" "Mozilla/5.0 (Macintosh; Intel Mac OS X 10_14) AppleWebKit/605.1.15 (KHTML, like Gecko) Version/12.0 Safari/605.1.15" "18710783-58a1-9e5f-992c-9ceff05b74c5" "details:9080" "172.30.230.51:9080" outbound|9080||details.tutorial.svc.cluster.local - 172.21.109.216:9080 172.30.146.104:58698 -[2019-02-15T09:06:04.088Z] "GET /reviews/0 HTTP/1.1" 200 - 0 379 22 22 "-" "Mozilla/5.0 (Macintosh; Intel Mac OS X 10_14) AppleWebKit/605.1.15 (KHTML, like Gecko) Version/12.0 Safari/605.1.15" "18710783-58a1-9e5f-992c-9ceff05b74c5" "reviews:9080" "172.30.230.27:9080" outbound|9080||reviews.tutorial.svc.cluster.local - 172.21.185.48:9080 172.30.146.104:41442 -[2019-02-15T09:06:04.053Z] "GET /productpage HTTP/1.1" 200 - 0 5723 90 83 "10.127.220.66" "Mozilla/5.0 (Macintosh; Intel Mac OS X 10_14) AppleWebKit/605.1.15 (KHTML, like Gecko) Version/12.0 Safari/605.1.15" "18710783-58a1-9e5f-992c-9ceff05b74c5" "tutorial.bookinfo.com" "127.0.0.1:9080" inbound|9080|http|productpage.tutorial.svc.cluster.local - 172.30.146.104:9080 10.127.220.66:0 -
输出命名空间,您将会在 Istio 仪表盘中通过它来识别您的微服务:
$ echo $(kubectl config view -o jsonpath="{.contexts[?(@.name == \"$(kubectl config current-context)\")].context.namespace}")tutorial
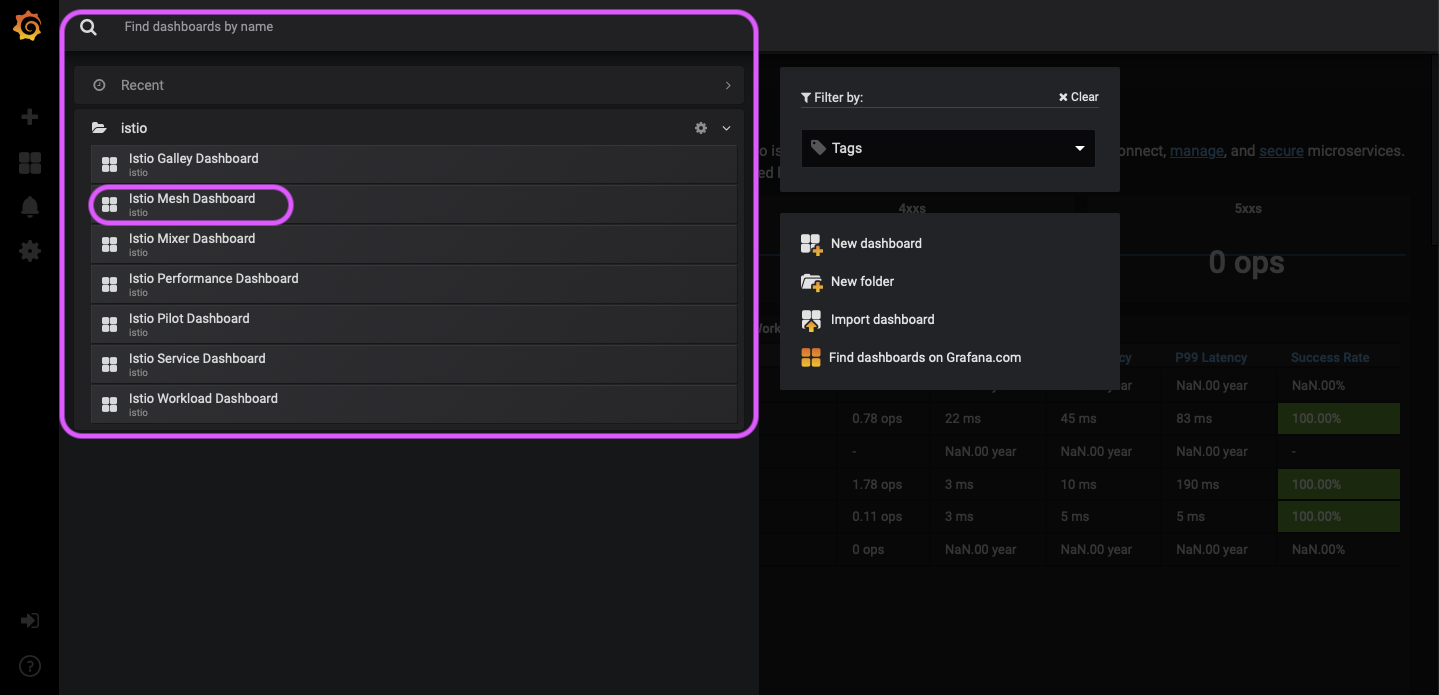
检查 Istio 仪表盘,通过自定义的 URL, 它配置在您之前配置的
/etc/hosts文件中:http://my-istio-dashboard.io/dashboard/db/istio-mesh-dashboard
在左上角的下拉菜单中,选择 Istio Mesh Dashboard 。

在左上角的下拉菜单中,选择 Istio Mesh Dashboard
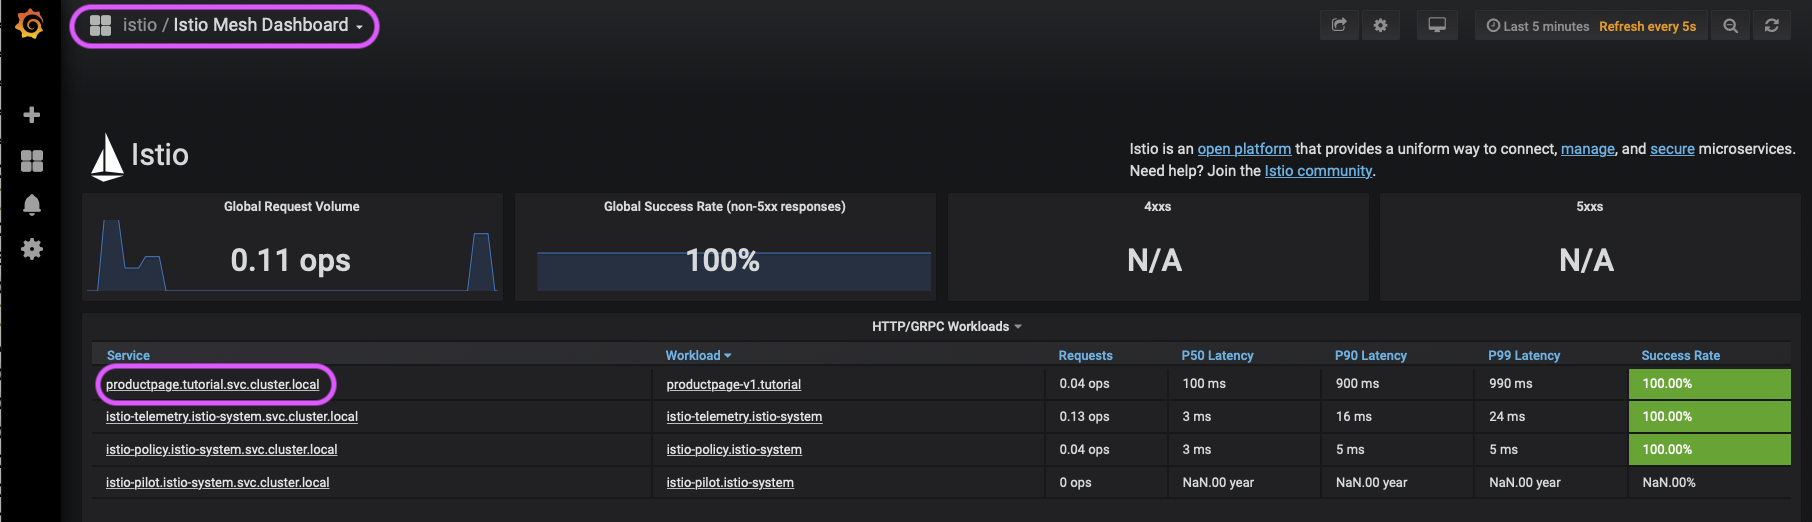
注意 在命名空间中的
productpage服务,它的命名应该是productpage.<your namespace>.svc.cluster.local。Istio Mesh Dashboard
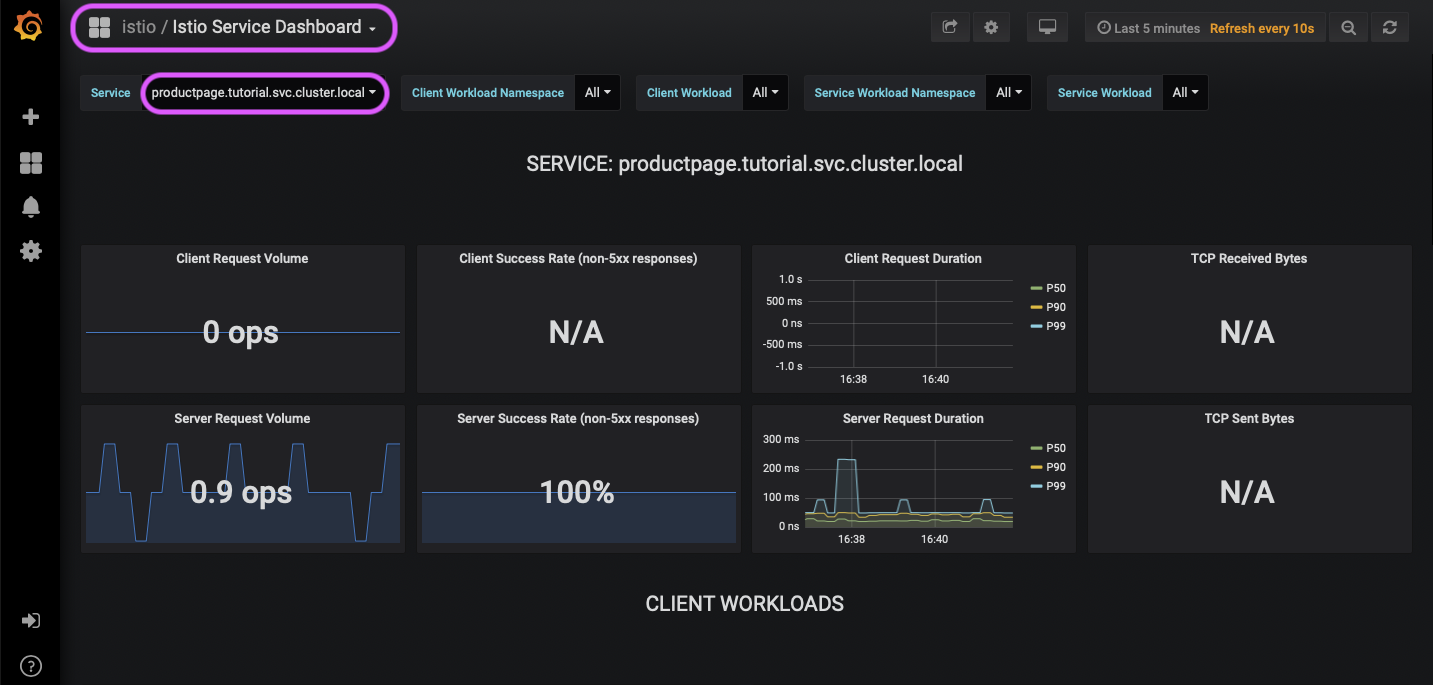
在 Istio Mesh 仪表盘中,在
Service列下,单击productpage服务。Istio Service Dashboard, `productpage` selected
向下滚动到 Service Workloads 部分。观察到仪表盘图表已经更新。
Istio Service Dashboard
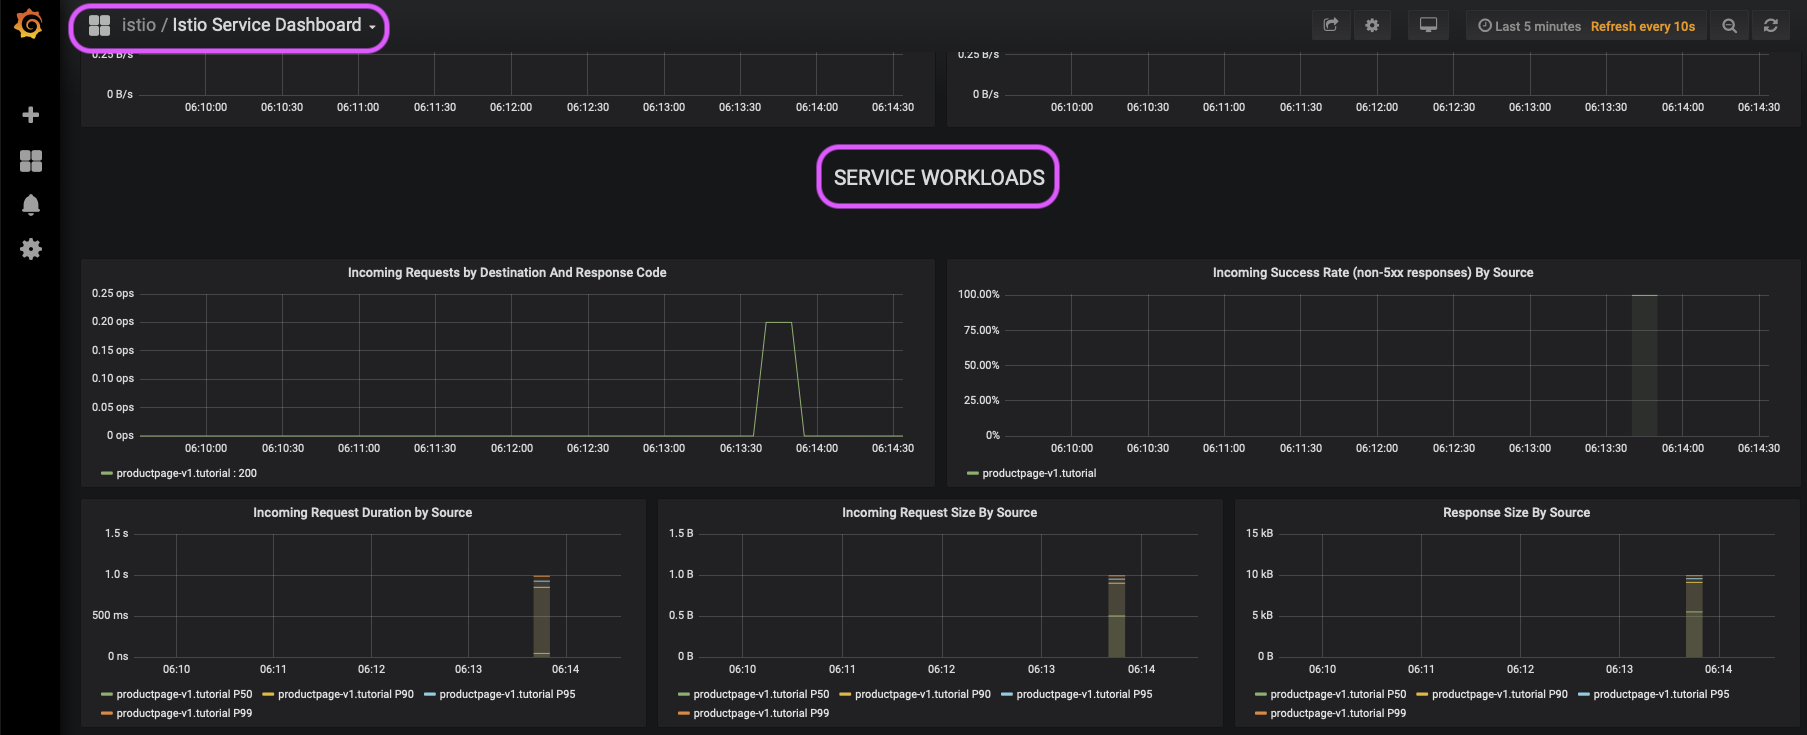
这是在一个微服务中应用 Istio 的直接优点,您可以收到进出微服务的流量日志,包括时间、HTTP方法、路径和响应代码。您可以用 Istio 仪表盘监控您的微服务。
在下一个模块,您将会学习到关于 Istio 可以为您的应用提供的功能。当 Istio 的功能对微服务是有益的时候,您将学习如何在整个应用程序上使用 Istio 来实现其全部潜力。
您已经准备好所有微服务上启用 Istio。


