Gatsby E-commerce Tutorial
In this advanced tutorial, you’ll learn how to use Gatsby to build the UI for a basic e-commerce site that can accept payments, with Stripe as the backend for processing payments.
- Demo running on Netlify
- Code hosted on GitHub
Why use Gatsby for an e-commerce site?
Benefits of using Gatsby for e-commerce sites include the following:
- Security inherent in static sites.
- Blazing fast performance when your pages are converted from React into static files.
- No server component required with Stripe’s client-only Checkout.
- Cost-efficient hosting of static sites.
Prerequisites
- Since this is a more advanced tutorial, building a site with Gatsby before will likely make this tutorial less time-consuming (see the main tutorial here)
- Stripe account: register for an account here
How does Gatsby work with Stripe?
Stripe is a payment processing service that allows you to securely collect and process payment information from your customers. To try out Stripe for yourself, go to Stripe’s Quick Start Guide.
Stripe offers a hosted checkout that doesn’t require any backend component. You can configure products, SKUs, and subscription plans in the Stripe Dashboard. If you’re selling a single product or subscription (like an eBook) you can hardcode the product’s SKU ID in your Gatsby site. If you’re selling multiple products, you can use the Stripe source plugin to retrieve all SKUs at build time. If you want your Gatsby site to automatically update, you can use the Stripe webhook event to trigger a redeploy when a new product or SKU is added.
Setting up a Gatsby site
Create a new Gatsby project by running the gatsby new command in the terminal and change directories into the new project you just started:
See your site hot reload in the browser!
Run gatsby develop in the terminal, which starts a development server and reloads changes you make to your site so you can preview them in the browser. Open up your browser to http://localhost:8000/ and you should see a default homepage.
Loading Stripe.js
Stripe provides a JavaScript library that allows you to securely redirect your customer to the Stripe hosted checkout page. Due to PCI compliance requirements, the Stripe.js library has to be loaded from Stripe’s servers. Stripe provides a loading wrapper that allows you to import Stripe.js like an ES module:
Stripe.js is loaded as a side effect of the import '@stripe/stripe-js'; statement. To best leverage Stripe’s advanced fraud functionality, ensure that Stripe.js is loaded on every page of your customer’s checkout journey, not just your checkout page. This allows Stripe to detect anomalous behavior that may be indicative of fraud as customers browse your website.
To make use of this, install the stripe-js module:
Getting your Stripe test keys
View your API credentials by logging into your Stripe account, and then going to Developers > API Keys.
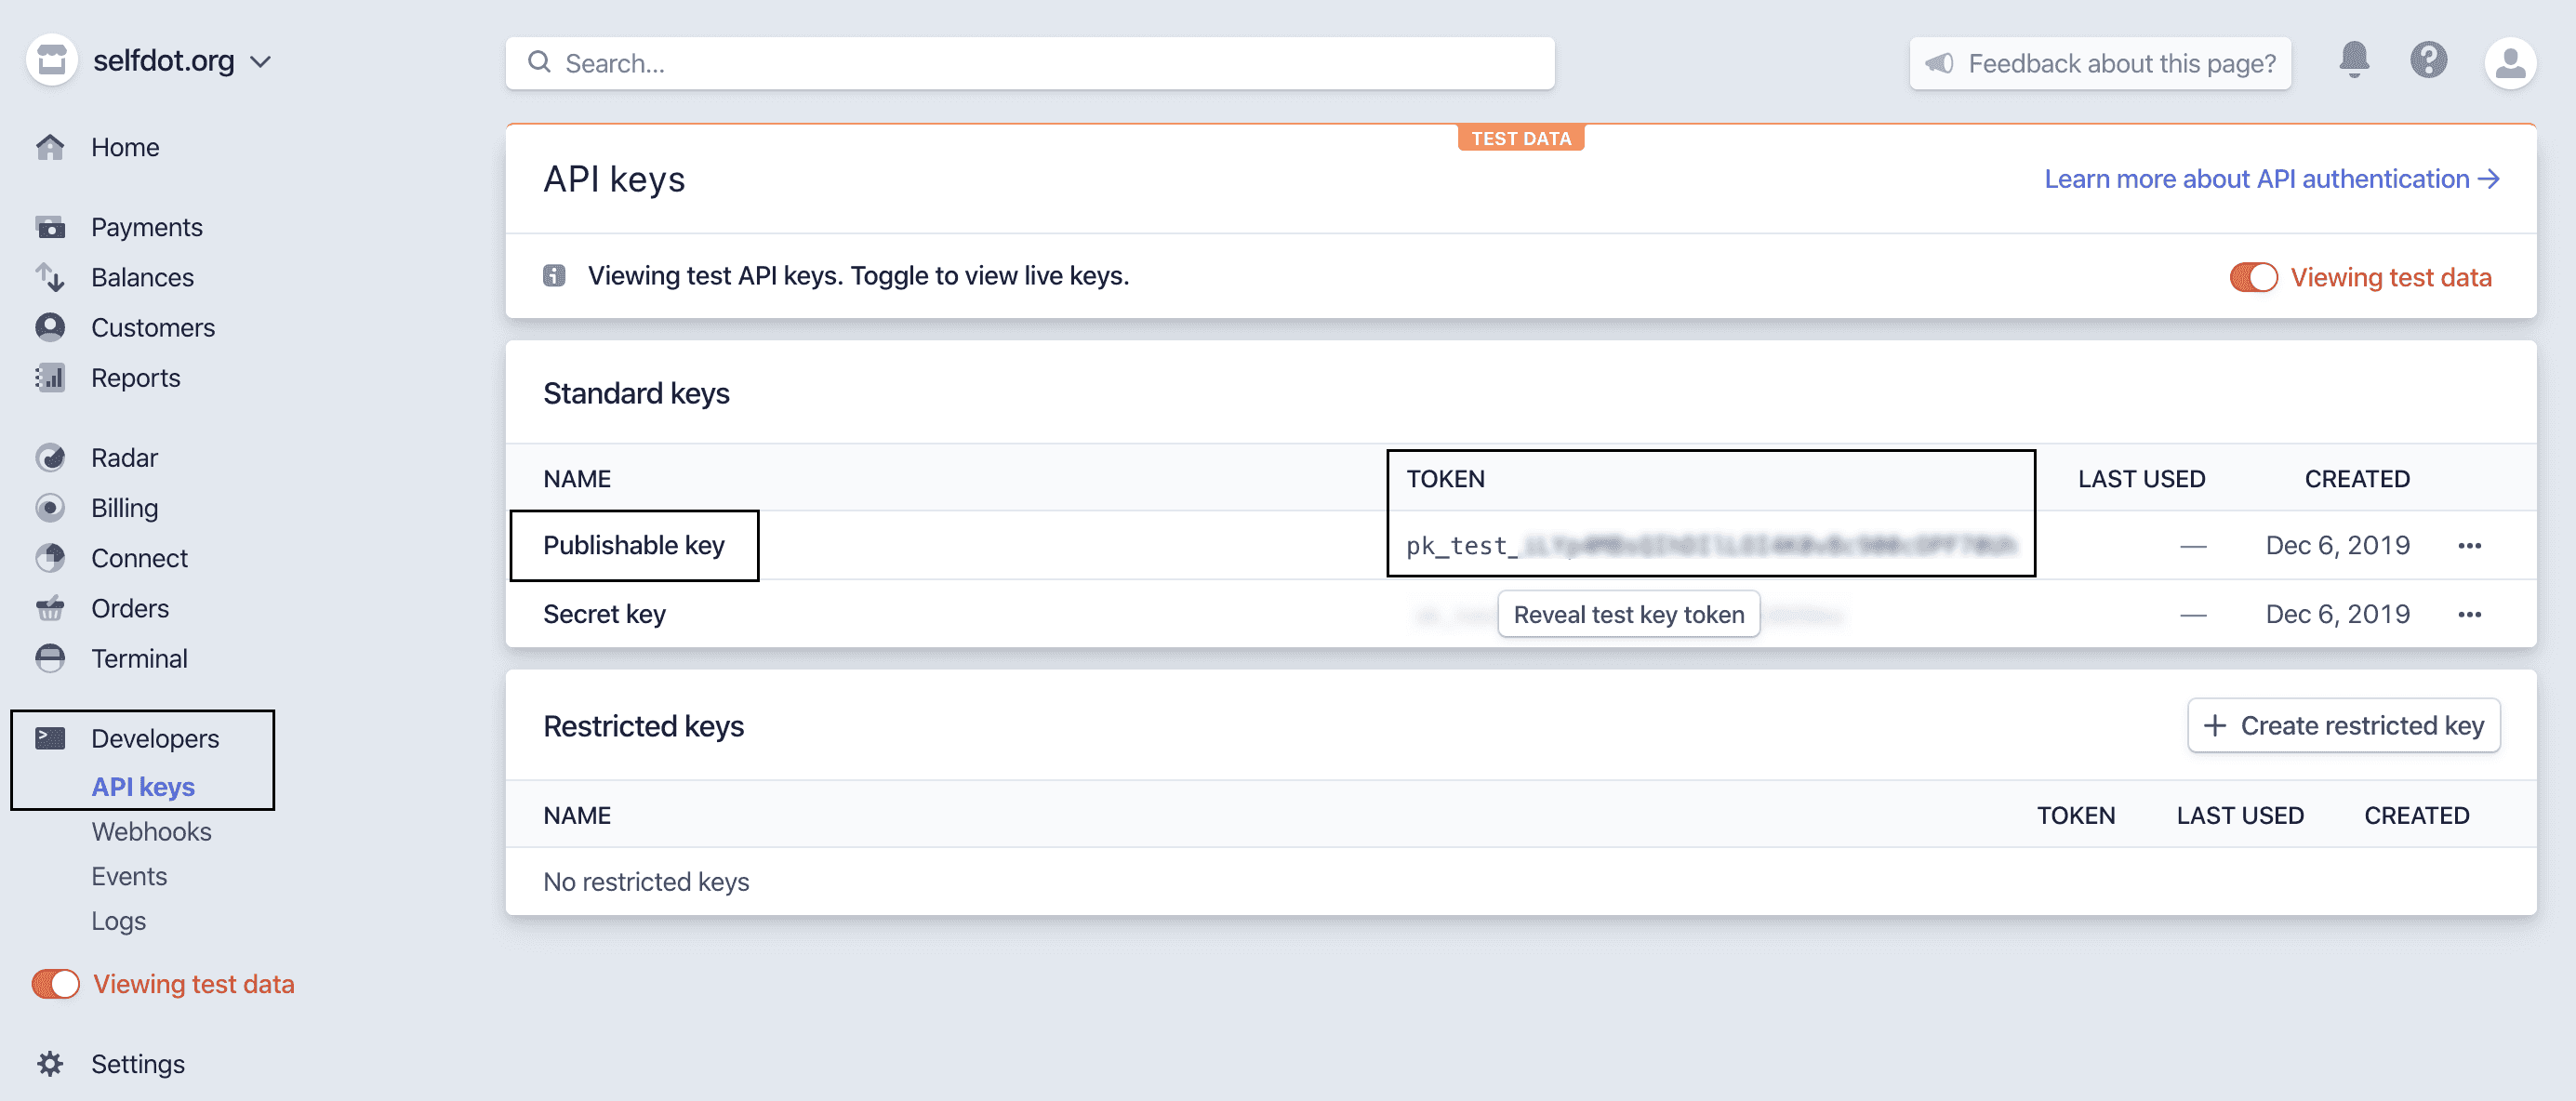
You have 2 keys in both test mode and production mode:
- a publishable key
- a secret key
While testing, you must use the key(s) that include test. For production code, you will need to use the live keys. As the names imply, your publishable key may be included in code that you share publicly (for example, on the frontend, and in GitHub), whereas your secret key should not be shared with anyone or committed to any public repo. It’s important to restrict access to this secret key because anyone who has it could potentially read or send requests from your Stripe account and see information about charges or purchases or even refund customers.
Enabling the “Checkout client-only integration” for your Stripe account
In this tutorial you will be using Stripe Checkout in client-only mode. You need to enable client-only mode in the Checkout settings.
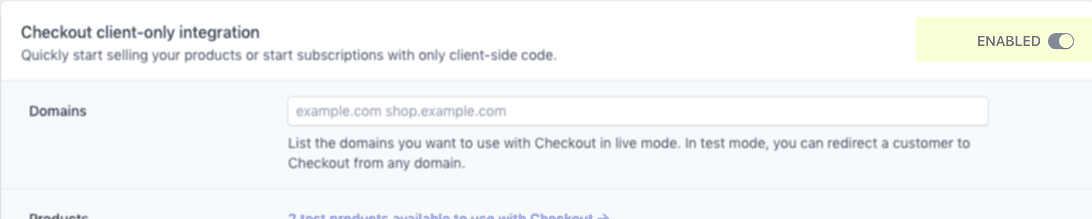
💡 This change will also modify the interface that Stripe provides to administer your products: keep this in mind in case you have previously used this tool. If you have never used the product administrator, you don’t need to worry.
Additionally, you need to set a name for your Stripe account in your Account settings. You can find more configuration details in the Stripe docs.
Examples
You can find an implementation of these examples on GitHub.
Example 1: One Button
If you’re selling a single product, like an eBook for example, you can create a single button that will perform a redirect to the Stripe Checkout page:
Create a product and SKU
To sell your products, you need to create them in your Stripe account using the Stripe Dashboard or the Stripe API. This is required for Stripe to validate that the request coming from the frontend is legitimate and to charge the correct amount for the selected product/SKU. Stripe requires every SKU used with Stripe Checkout to have a name: be sure to add one to all of your SKUs.
You will need to create both test and live product SKUs separately in the Stripe Dashboard. Make sure you toggle to “Viewing test data”, then create your products for local development.
Create a checkout component that loads Stripe.js and redirects to the checkout
Create a new file at src/components/checkout.js. Your checkout.js file should look like this:
What did you just do?
You imported React, created a function component that returns a button with some styles, and added a redirectToCheckout handler that is executed when the button is clicked. The loadStripe function returns a Promise that resolves with a newly created Stripe object once Stripe.js has loaded.
This identifies you with the Stripe platform, validates the checkout request against your products and security settings, and processes the payment on your Stripe account.
The redirectToCheckout() function validates your checkout request and either redirects to the Stripe hosted checkout page or resolves with an error object. Make sure to replace successUrl and cancelUrl with the appropriate URLs for your application.
Importing the checkout component into the homepage
Now go to your src/pages/index.js file. This is your homepage that shows at the root URL. Import your new checkout component in the file underneath the other imports and add your <Checkout /> component within the <Layout> element. Your index.js file should now look similar to this:
If you go back to http://localhost:8000/ in your browser and you have gatsby develop running, you should now see a big, enticing “BUY MY BOOK” button. C’mon and give it a click!
Example 2: Import SKUs via source plugin
Instead of hardcoding the SKU IDs, you can use the gatsby-source-stripe plugin to retrieve your SKUs at build time.
Add the Stripe source plugin
Add the gatsby-source-stripe plugin which you can use to pull in the SKUs from your Stripe account.
Now you can add the plugin configuration in your gatsby-config file:
To retrieve your SKUs from your Stripe account you will need to provide your secret API key. This key needs to be kept secret and must never be shared on the frontend or on GitHub. Therefore you need to set an environment variable to store the secret key. You can read more about the usage of env variables in the Gatsby docs.
In the root directory of your project add a .env.development file:
To use the defined env variable you need to require it in your gatsby-config.js or gatsby-node.js like this:
Lastly, make sure that your .gitignore file excludes all of your .env.* files:
Create a component that lists your SKUs
In your components folder add a new Products folder. This folder will include the components that interact with the Stripe SKUs. First, you need a component that queries and lists your SKUs:
You can validate your query and see what data is being returned in GraphiQL, which is available at http://localhost:8000/___graphql when running gatsby develop.
Once you’re happy with your query, create a new page where you can import the newly created Sku component:
When navigating to http://localhost:8000/advanced/ you should now see a list of paragraphs with your SKU names.
Create a component that presents a single SKU
To make your SKUs more visually appealing and interactive, create a new SkuCard component in your Products folder:
This component renders a neat card for each individual SKU, with the SKU name, nicely formatted pricing, and a “BUY ME” button. The button triggers the redirectToCheckout function with the corresponding SKU ID.
Lastly, you need to refactor your Skus component to loadStripe, and render SkuCards while handing down the Stripe promise in the props:
Adding a cart component
You can call redirectToCheckout() providing an array of SKUs and their quantities to charge for multiple items at the same time. Instead of each “BUY ME” button redirecting to the checkout page, you can therefore provide a central “GO TO CHECKOUT” button that uses the state of a cart component. You can see the necessary changes for this example on GitHub.
Testing Payments
In test mode (when using the API key that includes test) Stripe provides test cards for you to test different checkout scenarios.