- Collection of Recipes
- Images
- How to Make Images from Document Pages
- How to Increase Image Resolution
- How to Create Partial Pixmaps (Clips)
- How to Zoom a Clip to a GUI Window
- How to Create or Suppress Annotation Images
- How to Extract Images: Non-PDF Documents
- How to Extract Images: PDF Documents
- How to Handle Image Masks
- How to Make one PDF of all your Pictures (or Files)
- How to Create Vector Images
- How to Convert Images
- How to Use Pixmaps: Glueing Images
- How to Use Pixmaps: Making a Fractal
- How to Interface with NumPy
- How to Add Images to a PDF Page
- Text
- Annotations
- Drawing and Graphics
- Extracting Drawings
- Multiprocessing
- General
- How to Open with a Wrong File Extension
- How to Embed or Attach Files
- How to Delete and Re-Arrange Pages
- How to Join PDFs
- How to Add Pages
- How To Dynamically Clean Up Corrupt PDFs
- How to Split Single Pages
- How to Combine Single Pages
- How to Convert Any Document to PDF
- How to Deal with Messages Issued by MuPDF
- How to Deal with PDF Encryption
- Common Issues and their Solutions
- Low-Level Interfaces
- Journalling
- Images
Collection of Recipes
A collection of recipes in “How-To” format for using PyMuPDF. We aim to extend this section over time. Where appropriate we will refer to the corresponding Wiki pages, but some duplication may still occur.
Images
How to Make Images from Document Pages
This little script will take a document filename and generate a PNG file from each of its pages.
The document can be any supported type like PDF, XPS, etc.
The script works as a command line tool which expects the filename being supplied as a parameter. The generated image files (1 per page) are stored in the directory of the script:
import sys, fitz # import the bindingsfname = sys.argv[1] # get filename from command linedoc = fitz.open(fname) # open documentfor page in doc: # iterate through the pagespix = page.get_pixmap() # render page to an imagepix.save("page-%i.png" % page.number) # store image as a PNG
The script directory will now contain PNG image files named page-0.png, page-1.png, etc. Pictures have the dimension of their pages with width and height rounded to integers, e.g. 595 x 842 pixels for an A4 portrait sized page. They will have a resolution of 96 dpi in x and y dimension and have no transparency. You can change all that – for how to do this, read the next sections.
How to Increase Image Resolution
The image of a document page is represented by a Pixmap, and the simplest way to create a pixmap is via method Page.get_pixmap().
This method has many options to influence the result. The most important among them is the Matrix, which lets you zoom, rotate, distort or mirror the outcome.
Page.get_pixmap() by default will use the Identity matrix, which does nothing.
In the following, we apply a zoom factor of 2 to each dimension, which will generate an image with a four times better resolution for us (and also about 4 times the size):
zoom_x = 2.0 # horizontal zoomzoom_y = 2.0 # vertical zoommat = fitz.Matrix(zoom_x, zoom_y) # zoom factor 2 in each dimensionpix = page.get_pixmap(matrix=mat) # use 'mat' instead of the identity matrix
Since version 1.19.2 there is a more direct way to set the resolution: Parameter "dpi" (dots per inch) can be used in place of "matrix". To create a 300 dpi image of a page specify pix = page.get_pixmap(dpi=300). Apart from notation brevity, this approach has the additonal advantage that the dpi value is saved with the image file – which does not happen automatically when using the Matrix notation.
How to Create Partial Pixmaps (Clips)
You do not always need or want the full image of a page. This is the case e.g. when you display the image in a GUI and would like to fill the respective window with a zoomed part of the page.
Let’s assume your GUI window has room to display a full document page, but you now want to fill this room with the bottom right quarter of your page, thus using a four times better resolution.
To achieve this, define a rectangle equal to the area you want to appear in the GUI and call it “clip”. One way of constructing rectangles in PyMuPDF is by providing two diagonally opposite corners, which is what we are doing here.
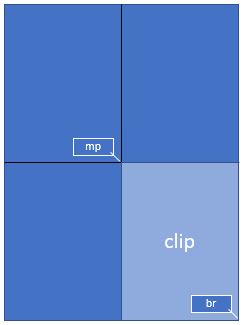
mat = fitz.Matrix(2, 2) # zoom factor 2 in each directionrect = page.rect # the page rectanglemp = (rect.tl + rect.br) / 2 # its middle point, becomes top-left of clipclip = fitz.Rect(mp, rect.br) # the area we wantpix = page.get_pixmap(matrix=mat, clip=clip)
In the above we construct clip by specifying two diagonally opposite points: the middle point mp of the page rectangle, and its bottom right, rect.br.
How to Zoom a Clip to a GUI Window
Please also read the previous section. This time we want to compute the zoom factor for a clip, such that its image best fits a given GUI window. This means, that the image’s width or height (or both) will equal the window dimension. For the following code snippet you need to provide the WIDTH and HEIGHT of your GUI’s window that should receive the page’s clip rectangle.
# WIDTH: width of the GUI window# HEIGHT: height of the GUI window# clip: a subrectangle of the document page# compare width/height ratios of image and windowif clip.width / clip.height < WIDTH / HEIGHT:# clip is narrower: zoom to window HEIGHTzoom = HEIGHT / clip.heightelse: # clip is broader: zoom to window WIDTHzoom = WIDTH / clip.widthmat = fitz.Matrix(zoom, zoom)pix = page.get_pixmap(matrix=mat, clip=clip)
For the other way round, now assume you have the zoom factor and need to compute the fitting clip.
In this case we have zoom = HEIGHT/clip.height = WIDTH/clip.width, so we must set clip.height = HEIGHT/zoom and, clip.width = WIDTH/zoom. Choose the top-left point tl of the clip on the page to compute the right pixmap:
width = WIDTH / zoomheight = HEIGHT / zoomclip = fitz.Rect(tl, tl.x + width, tl.y + height)# ensure we still are inside the pageclip &= page.rectmat = fitz.Matrix(zoom, zoom)pix = fitz.Pixmap(matrix=mat, clip=clip)
How to Create or Suppress Annotation Images
Normally, the pixmap of a page also shows the page’s annotations. Occasionally, this may not be desirable.
To suppress the annotation images on a rendered page, just specify annots=False in Page.get_pixmap().
You can also render annotations separately: they have their own Annot.get_pixmap() method. The resulting pixmap has the same dimensions as the annotation rectangle.
How to Extract Images: Non-PDF Documents
In contrast to the previous sections, this section deals with extracting images contained in documents, so they can be displayed as part of one or more pages.
If you want recreate the original image in file form or as a memory area, you have basically two options:
Convert your document to a PDF, and then use one of the PDF-only extraction methods. This snippet will convert a document to PDF:
>>> pdfbytes = doc.convert_to_pdf() # this a bytes object>>> pdf = fitz.open("pdf", pdfbytes) # open it as a PDF document>>> # now use 'pdf' like any PDF document
Use Page.get_text() with the “dict” parameter. This works for all document types. It will extract all text and images shown on the page, formatted as a Python dictionary. Every image will occur in an image block, containing meta information and the binary image data. For details of the dictionary’s structure, see TextPage. The method works equally well for PDF files. This creates a list of all images shown on a page:
>>> d = page.get_text("dict")>>> blocks = d["blocks"] # the list of block dictionaries>>> imgblocks = [b for b in blocks if b["type"] == 1]>>> pprint(imgblocks[0]){'bbox': (100.0, 135.8769989013672, 300.0, 364.1230163574219),'bpc': 8,'colorspace': 3,'ext': 'jpeg','height': 501,'image': b'\xff\xd8\xff\xe0\x00\x10JFIF\...', # CAUTION: LARGE!'size': 80518,'transform': (200.0, 0.0, -0.0, 228.2460174560547, 100.0, 135.8769989013672),'type': 1,'width': 439,'xres': 96,'yres': 96}
How to Extract Images: PDF Documents
Like any other “object” in a PDF, images are identified by a cross reference number (xref, an integer). If you know this number, you have two ways to access the image’s data:
Create a Pixmap of the image with instruction pix = fitz.Pixmap(doc, xref). This method is very fast (single digit micro-seconds). The pixmap’s properties (width, height, …) will reflect the ones of the image. In this case there is no way to tell which image format the embedded original has.
Extract the image with img = doc.extract_image(xref). This is a dictionary containing the binary image data as img[“image”]. A number of meta data are also provided – mostly the same as you would find in the pixmap of the image. The major difference is string img[“ext”], which specifies the image format: apart from “png”, strings like “jpeg”, “bmp”, “tiff”, etc. can also occur. Use this string as the file extension if you want to store to disk. The execution speed of this method should be compared to the combined speed of the statements pix = fitz.Pixmap(doc, xref);pix.tobytes(). If the embedded image is in PNG format, the speed of Document.extract_image() is about the same (and the binary image data are identical). Otherwise, this method is thousands of times faster, and the image data is much smaller.
The question remains: “How do I know those ‘xref’ numbers of images?”. There are two answers to this:
“Inspect the page objects:” Loop through the items of Page.get_images(). It is a list of list, and its items look like [xref, smask, …], containing the xref of an image. This xref can then be used with one of the above methods. Use this method for valid (undamaged) documents. Be wary however, that the same image may be referenced multiple times (by different pages), so you might want to provide a mechanism avoiding multiple extracts.
“No need to know:” Loop through the list of all xrefs of the document and perform a Document.extract_image() for each one. If the returned dictionary is empty, then continue – this xref is no image. Use this method if the PDF is damaged (unusable pages). Note that a PDF often contains “pseudo-images” (“stencil masks”) with the special purpose of defining the transparency of some other image. You may want to provide logic to exclude those from extraction. Also have a look at the next section.
For both extraction approaches, there exist ready-to-use general purpose scripts:
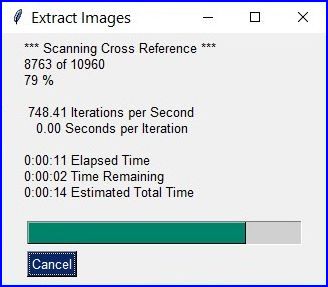
extract-imga.py extracts images page by page:
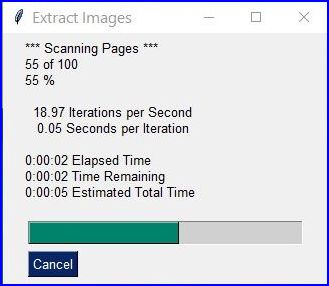
and extract-imgb.py extracts images by xref table:
How to Handle Image Masks
Some images in PDFs are accompanied by image masks. In their simplest form, masks represent alpha (transparency) bytes stored as separate images. In order to reconstruct the original of an image, which has a mask, it must be “enriched” with transparency bytes taken from its mask.
Whether an image does have such a mask can be recognized in one of two ways in PyMuPDF:
An item of Document.get_page_images() has the general format
(xref, smask, ...), where xref is the image’s xref and smask, if positive, is the xref of a mask.The (dictionary) results of Document.extract_image() have a key “smask”, which also contains any mask’s xref if positive.
If smask == 0 then the image encountered via xref can be processed as it is.
To recover the original image using PyMuPDF, the procedure depicted as follows must be executed:
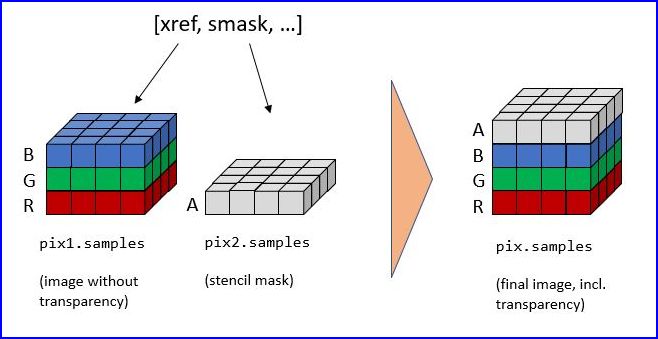
>>> pix1 = fitz.Pixmap(doc.extract_image(xref)["image"]) # (1) pixmap of image w/o alpha>>> mask = fitz.Pixmap(doc.extract_image(smask)["image"]) # (2) mask pixmap>>> pix = fitz.Pixmap(pix1, mask) # (3) copy of pix1, image mask added
Step (1) creates a pixmap of the basic image. Step (2) does the same with the image mask. Step (3) adds an alpha channel and fills it with transparency information.
The scripts extract-imga.py, and extract-imgb.py above also contain this logic.
How to Make one PDF of all your Pictures (or Files)
We show here three scripts that take a list of (image and other) files and put them all in one PDF.
Method 1: Inserting Images as Pages
The first one converts each image to a PDF page with the same dimensions. The result will be a PDF with one page per image. It will only work for supported image file formats:
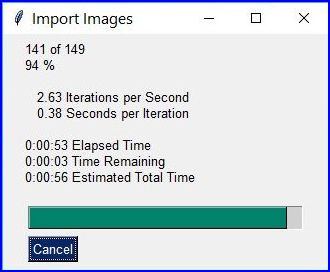
import os, fitzimport PySimpleGUI as psg # for showing a progress bardoc = fitz.open() # PDF with the picturesimgdir = "D:/2012_10_05" # where the pics areimglist = os.listdir(imgdir) # list of themimgcount = len(imglist) # pic countfor i, f in enumerate(imglist):img = fitz.open(os.path.join(imgdir, f)) # open pic as documentrect = img[0].rect # pic dimensionpdfbytes = img.convert_to_pdf() # make a PDF streamimg.close() # no longer neededimgPDF = fitz.open("pdf", pdfbytes) # open stream as PDFpage = doc.new_page(width = rect.width, # new page with ...height = rect.height) # pic dimensionpage.show_pdf_page(rect, imgPDF, 0) # image fills the pagepsg.EasyProgressMeter("Import Images", # show our progressi+1, imgcount)doc.save("all-my-pics.pdf")
This will generate a PDF only marginally larger than the combined pictures’ size. Some numbers on performance:
The above script needed about 1 minute on my machine for 149 pictures with a total size of 514 MB (and about the same resulting PDF size).
Look here for a more complete source code: it offers a directory selection dialog and skips unsupported files and non-file entries.
Note
We might have used Page.insert_image() instead of Page.show_pdf_page(), and the result would have been a similar looking file. However, depending on the image type, it may store images uncompressed. Therefore, the save option deflate = True must be used to achieve a reasonable file size, which hugely increases the runtime for large numbers of images. So this alternative cannot be recommended here.
Method 2: Embedding Files
The second script embeds arbitrary files – not only images. The resulting PDF will have just one (empty) page, required for technical reasons. To later access the embedded files again, you would need a suitable PDF viewer that can display and / or extract embedded files:
import os, fitzimport PySimpleGUI as psg # for showing progress bardoc = fitz.open() # PDF with the picturesimgdir = "D:/2012_10_05" # where my files areimglist = os.listdir(imgdir) # list of picturesimgcount = len(imglist) # pic countimglist.sort() # nicely sort themfor i, f in enumerate(imglist):img = open(os.path.join(imgdir,f), "rb").read() # make pic streamdoc.embfile_add(img, f, filename=f, # and embed itufilename=f, desc=f)psg.EasyProgressMeter("Embedding Files", # show our progressi+1, imgcount)page = doc.new_page() # at least 1 page is neededdoc.save("all-my-pics-embedded.pdf")
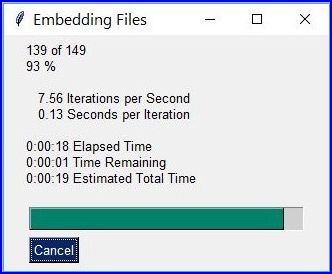
This is by far the fastest method, and it also produces the smallest possible output file size. The above pictures needed 20 seconds on my machine and yielded a PDF size of 510 MB. Look here for a more complete source code: it offers a directory selection dialog and skips non-file entries.
Method 3: Attaching Files
A third way to achieve this task is attaching files via page annotations see here for the complete source code.
This has a similar performance as the previous script and it also produces a similar file size. It will produce PDF pages which show a ‘FileAttachment’ icon for each attached file.

Note
Both, the embed and the attach methods can be used for arbitrary files – not just images.
Note
We strongly recommend using the awesome package PySimpleGUI to display a progress meter for tasks that may run for an extended time span. It’s pure Python, uses Tkinter (no additional GUI package) and requires just one more line of code!
How to Create Vector Images
The usual way to create an image from a document page is Page.get_pixmap(). A pixmap represents a raster image, so you must decide on its quality (i.e. resolution) at creation time. It cannot be changed later.
PyMuPDF also offers a way to create a vector image of a page in SVG format (scalable vector graphics, defined in XML syntax). SVG images remain precise across zooming levels (of course with the exception of any raster graphic elements embedded therein).
Instruction svg = page.get_svg_image(matrix=fitz.Identity) delivers a UTF-8 string svg which can be stored with extension “.svg”.
How to Convert Images
Just as a feature among others, PyMuPDF’s image conversion is easy. It may avoid using other graphics packages like PIL/Pillow in many cases.
Notwithstanding that interfacing with Pillow is almost trivial.
Input Formats | Output Formats | Description |
|---|---|---|
BMP | . | Windows Bitmap |
JPEG | . | Joint Photographic Experts Group |
JXR | . | JPEG Extended Range |
JPX/JP2 | . | JPEG 2000 |
GIF | . | Graphics Interchange Format |
TIFF | . | Tagged Image File Format |
PNG | PNG | Portable Network Graphics |
PNM | PNM | Portable Anymap |
PGM | PGM | Portable Graymap |
PBM | PBM | Portable Bitmap |
PPM | PPM | Portable Pixmap |
PAM | PAM | Portable Arbitrary Map |
. | PSD | Adobe Photoshop Document |
. | PS | Adobe Postscript |
The general scheme is just the following two lines:
pix = fitz.Pixmap("input.xxx") # any supported input formatpix.save("output.yyy") # any supported output format
Remarks
The input argument of fitz.Pixmap(arg) can be a file or a bytes / io.BytesIO object containing an image.
Instead of an output file, you can also create a bytes object via pix.tobytes(“yyy”) and pass this around.
As a matter of course, input and output formats must be compatible in terms of colorspace and transparency. The Pixmap class has batteries included if adjustments are needed.
Note
Convert JPEG to Photoshop:
pix = fitz.Pixmap("myfamily.jpg")pix.save("myfamily.psd")
Note
Save to JPEG using PIL/Pillow:
pix = fitz.Pixmap(...)pix.pil_save("output.jpg")
Note
Convert JPEG to Tkinter PhotoImage. Any RGB / no-alpha image works exactly the same. Conversion to one of the Portable Anymap formats (PPM, PGM, etc.) does the trick, because they are supported by all Tkinter versions:
import tkinter as tkpix = fitz.Pixmap("input.jpg") # or any RGB / no-alpha imagetkimg = tk.PhotoImage(data=pix.tobytes("ppm"))
Note
Convert PNG with alpha to Tkinter PhotoImage. This requires removing the alpha bytes, before we can do the PPM conversion:
import tkinter as tkpix = fitz.Pixmap("input.png") # may have an alpha channelif pix.alpha: # we have an alpha channel!pix = fitz.Pixmap(pix, 0) # remove ittkimg = tk.PhotoImage(data=pix.tobytes("ppm"))
How to Use Pixmaps: Glueing Images
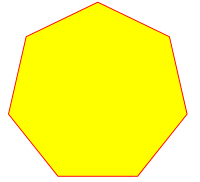
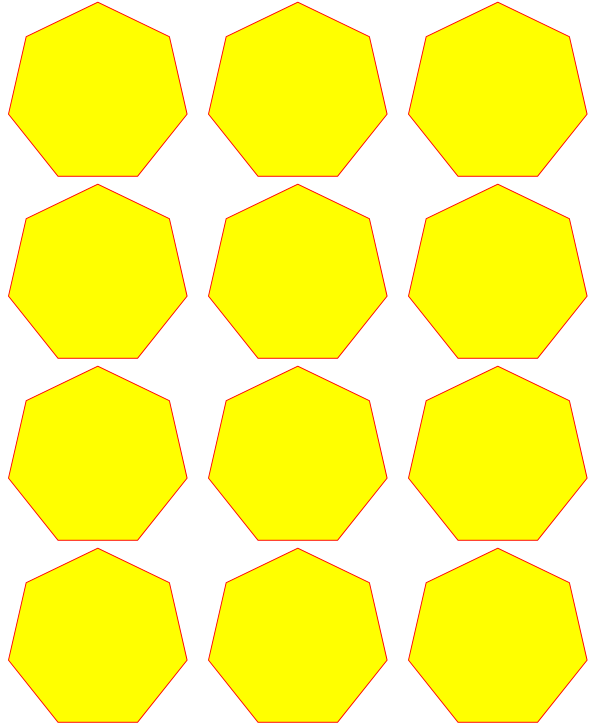
This shows how pixmaps can be used for purely graphical, non-document purposes. The script reads an image file and creates a new image which consist of 3 * 4 tiles of the original:
import fitzsrc = fitz.Pixmap("img-7edges.png") # create pixmap from a picturecol = 3 # tiles per rowlin = 4 # tiles per columntar_w = src.width * col # width of targettar_h = src.height * lin # height of target# create target pixmaptar_pix = fitz.Pixmap(src.colorspace, (0, 0, tar_w, tar_h), src.alpha)# now fill target with the tilesfor i in range(col):for j in range(lin):src.set_origin(src.width * i, src.height * j)tar_pix.copy(src, src.irect) # copy input to new loctar_pix.save("tar.png")
This is the input picture:
Here is the output:
How to Use Pixmaps: Making a Fractal
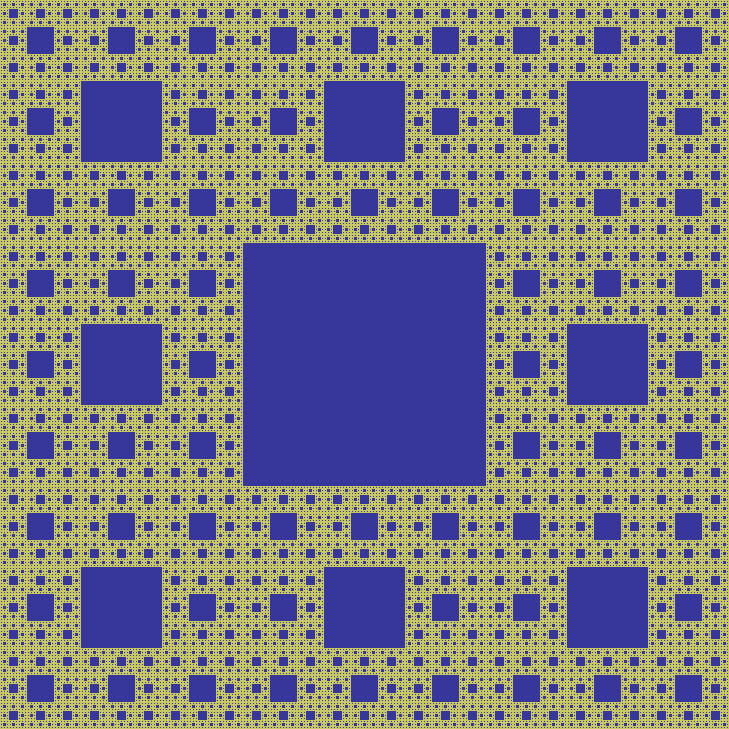
Here is another Pixmap example that creates Sierpinski’s Carpet – a fractal generalizing the Cantor Set to two dimensions. Given a square carpet, mark its 9 sub-suqares (3 times 3) and cut out the one in the center. Treat each of the remaining eight sub-squares in the same way, and continue ad infinitum. The end result is a set with area zero and fractal dimension 1.8928…
This script creates an approximate image of it as a PNG, by going down to one-pixel granularity. To increase the image precision, change the value of n (precision):
import fitz, timeif not list(map(int, fitz.VersionBind.split("."))) >= [1, 14, 8]:raise SystemExit("need PyMuPDF v1.14.8 for this script")n = 6 # depth (precision)d = 3**n # edge lengtht0 = time.perf_counter()ir = (0, 0, d, d) # the pixmap rectanglepm = fitz.Pixmap(fitz.csRGB, ir, False)pm.set_rect(pm.irect, (255,255,0)) # fill it with some background colorcolor = (0, 0, 255) # color to fill the punch holes# alternatively, define a 'fill' pixmap for the punch holes# this could be anything, e.g. some photo image ...fill = fitz.Pixmap(fitz.csRGB, ir, False) # same size as 'pm'fill.set_rect(fill.irect, (0, 255, 255)) # put some color indef punch(x, y, step):"""Recursively "punch a hole" in the central square of a pixmap.Arguments are top-left coords and the step width.Some alternative punching methods are commented out."""s = step // 3 # the new step# iterate through the 9 sub-squares# the central one will be filled with the colorfor i in range(3):for j in range(3):if i != j or i != 1: # this is not the central cubeif s >= 3: # recursing needed?punch(x+i*s, y+j*s, s) # recurseelse: # punching alternatives are:pm.set_rect((x+s, y+s, x+2*s, y+2*s), color) # fill with a color#pm.copy(fill, (x+s, y+s, x+2*s, y+2*s)) # copy from fill#pm.invert_irect((x+s, y+s, x+2*s, y+2*s)) # invert colorsreturn#==============================================================================# main program#==============================================================================# now start punching holes into the pixmappunch(0, 0, d)t1 = time.perf_counter()pm.save("sierpinski-punch.png")t2 = time.perf_counter()print ("%g sec to create / fill the pixmap" % round(t1-t0,3))print ("%g sec to save the image" % round(t2-t1,3))
The result should look something like this:
How to Interface with NumPy
This shows how to create a PNG file from a numpy array (several times faster than most other methods):
import numpy as npimport fitz#==============================================================================# create a fun-colored width * height PNG with fitz and numpy#==============================================================================height = 150width = 100bild = np.ndarray((height, width, 3), dtype=np.uint8)for i in range(height):for j in range(width):# one pixel (some fun coloring)bild[i, j] = [(i+j)%256, i%256, j%256]samples = bytearray(bild.tostring()) # get plain pixel data from numpy arraypix = fitz.Pixmap(fitz.csRGB, width, height, samples, alpha=False)pix.save("test.png")
How to Add Images to a PDF Page
There are two methods to add images to a PDF page: Page.insert_image() and Page.show_pdf_page(). Both methods have things in common, but there also exist differences.
Criterion | ||
|---|---|---|
displayable content | image file, image in memory, pixmap | PDF page |
display resolution | image resolution | vectorized (except raster page content) |
rotation | 0, 90, 180 or 270 degrees | any angle |
clipping | no (full image only) | yes |
keep aspect ratio | yes (default option) | yes (default option) |
transparency (water marking) | depends on the image | depends on the page |
location / placement | scaled to fit target rectangle | scaled to fit target rectangle |
performance | automatic prevention of duplicates; | automatic prevention of duplicates; |
multi-page image support | no | yes |
ease of use | simple, intuitive; | simple, intuitive; usable for all document types (including images!) after conversion to PDF via Document.convert_to_pdf() |
Basic code pattern for Page.insert_image(). Exactly one of the parameters filename / stream / pixmap must be given, if not re-inserting an existing image:
page.insert_image(rect, # where to place the image (rect-like)filename=None, # image in a filestream=None, # image in memory (bytes)pixmap=None, # image from pixmapmask=None, # specify alpha channel separatelyrotate=0, # rotate (int, multiple of 90)xref=0, # re-use existing imageoc=0, # control visibility via OCG / OCMDkeep_proportion=True, # keep aspect ratiooverlay=True, # put in foreground)
Basic code pattern for Page.show_pdf_page(). Source and target PDF must be different Document objects (but may be opened from the same file):
page.show_pdf_page(rect, # where to place the image (rect-like)src, # source PDFpno=0, # page number in source PDFclip=None, # only display this area (rect-like)rotate=0, # rotate (float, any value)oc=0, # control visibility via OCG / OCMDkeep_proportion=True, # keep aspect ratiooverlay=True, # put in foreground)
Text
How to Extract all Document Text
This script will take a document filename and generate a text file from all of its text.
The document can be any supported type like PDF, XPS, etc.
The script works as a command line tool which expects the document filename supplied as a parameter. It generates one text file named “filename.txt” in the script directory. Text of pages is separated by a form feed character:
import sys, fitzfname = sys.argv[1] # get document filenamedoc = fitz.open(fname) # open documentout = open(fname + ".txt", "wb") # open text outputfor page in doc: # iterate the document pagestext = page.get_text().encode("utf8") # get plain text (is in UTF-8)out.write(text) # write text of pageout.write(bytes((12,))) # write page delimiter (form feed 0x0C)out.close()
The output will be plain text as it is coded in the document. No effort is made to prettify in any way. Specifically for PDF, this may mean output not in usual reading order, unexpected line breaks and so forth.
You have many options to cure this – see chapter Appendix 2: Considerations on Embedded Files. Among them are:
Extract text in HTML format and store it as a HTML document, so it can be viewed in any browser.
Extract text as a list of text blocks via Page.get_text(“blocks”). Each item of this list contains position information for its text, which can be used to establish a convenient reading order.
Extract a list of single words via Page.get_text(“words”). Its items are words with position information. Use it to determine text contained in a given rectangle – see next section.
See the following two section for examples and further explanations.
How to Extract Text from within a Rectangle
There is now (v1.18.0) more than one way to achieve this. We therefore have created a folder in the PyMuPDF-Utilities repository specifically dealing with this topic.
How to Extract Text in Natural Reading Order
One of the common issues with PDF text extraction is, that text may not appear in any particular reading order.
Responsible for this effect is the PDF creator (software or a human). For example, page headers may have been inserted in a separate step – after the document had been produced. In such a case, the header text will appear at the end of a page text extraction (although it will be correctly shown by PDF viewer software). For example, the following snippet will add some header and footer lines to an existing PDF:
doc = fitz.open("some.pdf")header = "Header" # text in headerfooter = "Page %i of %i" # text in footerfor page in doc:page.insert_text((50, 50), header) # insert headerpage.insert_text( # insert footer 50 points above page bottom(50, page.rect.height - 50),footer % (page.number + 1, doc.page_count),)
The text sequence extracted from a page modified in this way will look like this:
original text
header line
footer line
PyMuPDF has several means to re-establish some reading sequence or even to re-generate a layout close to the original:
Use
sortparameter of Page.get_text(). It will sort the output from top-left to bottom-right (ignored for XHTML, HTML and XML output).Use the
fitzmodule in CLI:python -m fitz gettext ..., which produces a text file where text has been re-arranged in layout-preserving mode. Many options are available to control the output.
You can also use the above mentioned script with your modifications.
How to Extract Tables from Documents
If you see a table in a document, you are not normally looking at something like an embedded Excel or other identifiable object. It usually is just text, formatted to appear as appropriate.
Extracting a tabular data from such a page area therefore means that you must find a way to (1) graphically indicate table and column borders, and (2) then extract text based on this information.
The wxPython GUI script wxTableExtract.py strives to exactly do that. You may want to have a look at it and adjust it to your liking.
How to Mark Extracted Text
There is a standard search function to search for arbitrary text on a page: Page.search_for(). It returns a list of Rect objects which surround a found occurrence. These rectangles can for example be used to automatically insert annotations which visibly mark the found text.
This method has advantages and drawbacks. Pros are
The search string can contain blanks and wrap across lines
Upper or lower case characters are treated equal
Word hyphenation at line ends is detected and resolved
return may also be a list of Quad objects to precisely locate text that is not parallel to either axis – using Quad output is also recommend, when page rotation is not zero.
But you also have other options:
import sysimport fitzdef mark_word(page, text):"""Underline each word that contains 'text'."""found = 0wlist = page.getTex("words") # make the word listfor w in wlist: # scan through all words on pageif text in w[4]: # w[4] is the word's stringfound += 1 # countr = fitz.Rect(w[:4]) # make rect from word bboxpage.add_underline_annot(r) # underlinereturn foundfname = sys.argv[1] # filenametext = sys.argv[2] # search stringdoc = fitz.open(fname)print("underlining words containing '%s' in document '%s'" % (word, doc.name))new_doc = False # indicator if anything found at allfor page in doc: # scan through the pagesfound = mark_word(page, text) # mark the page's wordsif found: # if anything found ...new_doc = Trueprint("found '%s' %i times on page %i" % (text, found, page.number + 1))if new_doc:doc.save("marked-" + doc.name)
This script uses Page.get_text("words")() to look for a string, handed in via cli parameter. This method separates a page’s text into “words” using spaces and line breaks as delimiters. Therefore the words in this lists do not contain these characters. Further remarks:
If found, the complete word containing the string is marked (underlined) – not only the search string.
The search string may not contain spaces or other white space.
As shown here, upper / lower cases are respected. But this can be changed by using the string method lower() (or even regular expressions) in function mark_word.
There is no upper limit: all occurrences will be detected.
You can use anything to mark the word: ‘Underline’, ‘Highlight’, ‘StrikeThrough’ or ‘Square’ annotations, etc.
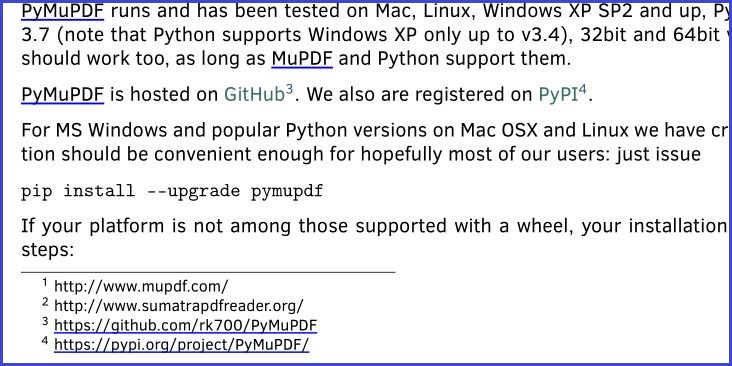
Here is an example snippet of a page of this manual, where “MuPDF” has been used as the search string. Note that all strings containing “MuPDF” have been completely underlined (not just the search string).
How to Mark Searched Text
This script searches for text and marks it:
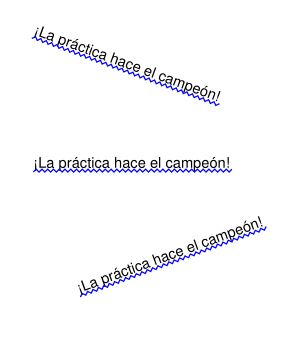
# -*- coding: utf-8 -*-import fitz# the document to annotatedoc = fitz.open("tilted-text.pdf")# the text to be markedt = "¡La práctica hace el campeón!"# work with first page onlypage = doc[0]# get list of text locations# we use "quads", not rectangles because text may be tilted!rl = page.search_for(t, quads = True)# mark all found quads with one annotationpage.add_squiggly_annot(rl)# save to a new PDFdoc.save("a-squiggly.pdf")
The result looks like this:
How to Mark Non-horizontal Text
The previous section already shows an example for marking non-horizontal text, that was detected by text searching.
But text extraction with the “dict” / “rawdict” options of Page.get_text() may also return text with a non-zero angle to the x-axis. This is indicated by the value of the line dictionary’s "dir" key: it is the tuple (cosine, sine) for that angle. If line["dir"] != (1, 0), then the text of all its spans is rotated by (the same) angle != 0.
The “bboxes” returned by the method however are rectangles only – not quads. So, to mark span text correctly, its quad must be recovered from the data contained in the line and span dictionary. Do this with the following utility function (new in v1.18.9):
span_quad = fitz.recover_quad(line["dir"], span)annot = page.add_highlight_annot(span_quad) # this will mark the complete span text
If you want to mark the complete line or a subset of its spans in one go, use the following snippet (works for v1.18.10 or later):
line_quad = fitz.recover_line_quad(line, spans=line["spans"][1:-1])page.add_highlight_annot(line_quad)
The spans argument above may specify any sub-list of line["spans"]. In the example above, the second to second-to-last span are marked. If omitted, the complete line is taken.
How to Analyze Font Characteristics
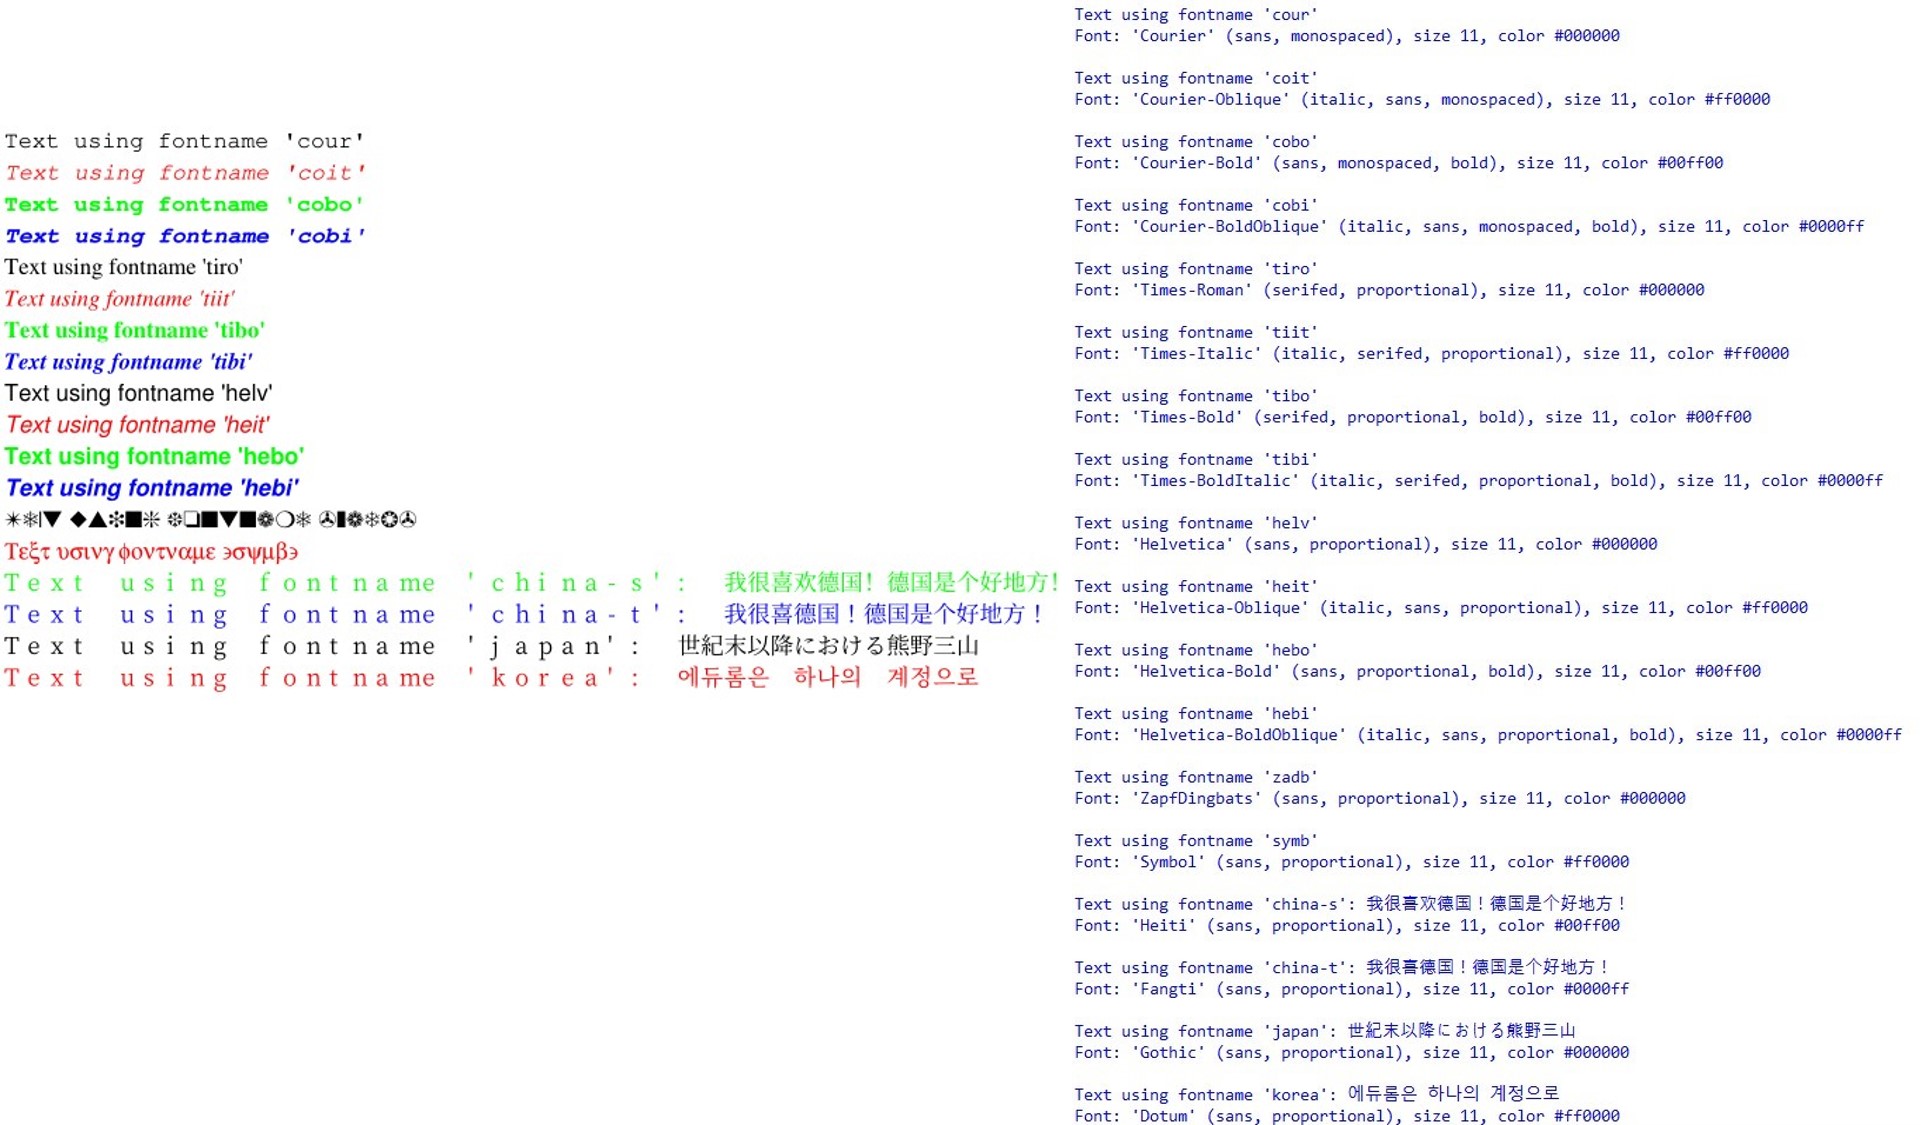
To analyze the characteristics of text in a PDF use this elementary script as a starting point:
import fitzdef flags_decomposer(flags):"""Make font flags human readable."""l = []if flags & 2 ** 0:l.append("superscript")if flags & 2 ** 1:l.append("italic")if flags & 2 ** 2:l.append("serifed")else:l.append("sans")if flags & 2 ** 3:l.append("monospaced")else:l.append("proportional")if flags & 2 ** 4:l.append("bold")return ", ".join(l)doc = fitz.open("text-tester.pdf")page = doc[0]# read page text as a dictionary, suppressing extra spaces in CJK fontsblocks = page.get_text("dict", flags=11)["blocks"]for b in blocks: # iterate through the text blocksfor l in b["lines"]: # iterate through the text linesfor s in l["spans"]: # iterate through the text spansprint("")font_properties = "Font: '%s' (%s), size %g, color #%06x" % (s["font"], # font nameflags_decomposer(s["flags"]), # readable font flagss["size"], # font sizes["color"], # font color)print("Text: '%s'" % s["text"]) # simple print of textprint(font_properties)
Here is the PDF page and the script output:
How to Insert Text
PyMuPDF provides ways to insert text on new or existing PDF pages with the following features:
choose the font, including built-in fonts and fonts that are available as files
choose text characteristics like bold, italic, font size, font color, etc.
position the text in multiple ways:
either as simple line-oriented output starting at a certain point,
or fitting text in a box provided as a rectangle, in which case text alignment choices are also available,
choose whether text should be put in foreground (overlay existing content),
all text can be arbitrarily “morphed”, i.e. its appearance can be changed via a Matrix, to achieve effects like scaling, shearing or mirroring,
independently from morphing and in addition to that, text can be rotated by integer multiples of 90 degrees.
All of the above is provided by three basic Page, resp. Shape methods:
Page.insert_font() – install a font for the page for later reference. The result is reflected in the output of Document.get_page_fonts(). The font can be:
provided as a file,
via Font (then use Font.buffer)
already present somewhere in this or another PDF, or
be a built-in font.
Page.insert_text() – write some lines of text. Internally, this uses Shape.insert_text().
Page.insert_textbox() – fit text in a given rectangle. Here you can choose text alignment features (left, right, centered, justified) and you keep control as to whether text actually fits. Internally, this uses Shape.insert_textbox().
Note
Both text insertion methods automatically install the font as necessary.
How to Write Text Lines
Output some text lines on a page:
import fitzdoc = fitz.open(...) # new or existing PDFpage = doc.new_page() # new or existing page via doc[n]p = fitz.Point(50, 72) # start point of 1st linetext = "Some text,\nspread across\nseveral lines."# the same result is achievable by# text = ["Some text", "spread across", "several lines."]rc = page.insert_text(p, # bottom-left of 1st chartext, # the text (honors '\n')fontname = "helv", # the default fontfontsize = 11, # the default font sizerotate = 0, # also available: 90, 180, 270)print("%i lines printed on page %i." % (rc, page.number))doc.save("text.pdf")
With this method, only the number of lines will be controlled to not go beyond page height. Surplus lines will not be written and the number of actual lines will be returned. The calculation uses a line height calculated from the fontsize and 36 points (0.5 inches) as bottom margin.
Line width is ignored. The surplus part of a line will simply be invisible.
However, for built-in fonts there are ways to calculate the line width beforehand - see get_text_length().
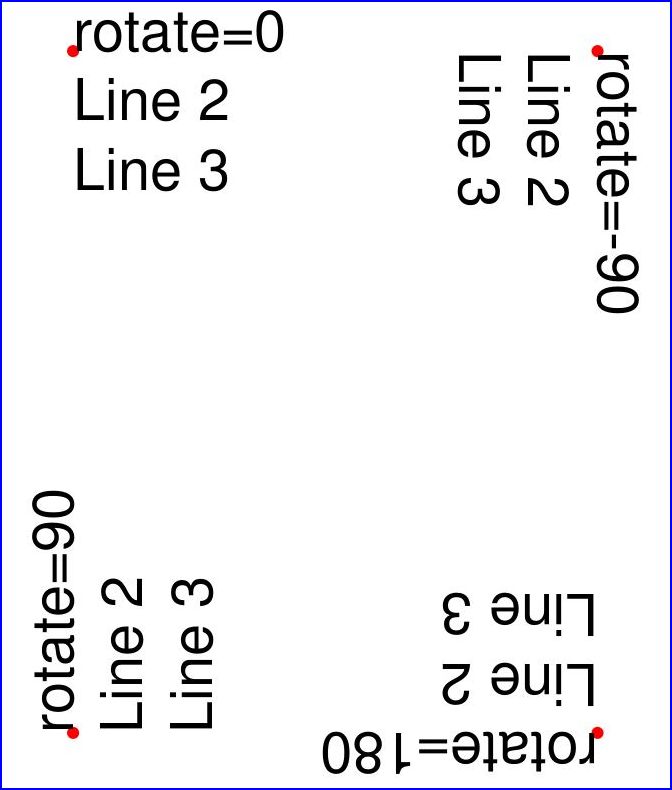
Here is another example. It inserts 4 text strings using the four different rotation options, and thereby explains, how the text insertion point must be chosen to achieve the desired result:
import fitzdoc = fitz.open()page = doc.new_page()# the text strings, each having 3 linestext1 = "rotate=0\nLine 2\nLine 3"text2 = "rotate=90\nLine 2\nLine 3"text3 = "rotate=-90\nLine 2\nLine 3"text4 = "rotate=180\nLine 2\nLine 3"red = (1, 0, 0) # the color for the red dots# the insertion points, each with a 25 pix distance from the cornersp1 = fitz.Point(25, 25)p2 = fitz.Point(page.rect.width - 25, 25)p3 = fitz.Point(25, page.rect.height - 25)p4 = fitz.Point(page.rect.width - 25, page.rect.height - 25)# create a Shape to draw onshape = page.new_shape()# draw the insertion points as red, filled dotsshape.draw_circle(p1,1)shape.draw_circle(p2,1)shape.draw_circle(p3,1)shape.draw_circle(p4,1)shape.finish(width=0.3, color=red, fill=red)# insert the text stringsshape.insert_text(p1, text1)shape.insert_text(p3, text2, rotate=90)shape.insert_text(p2, text3, rotate=-90)shape.insert_text(p4, text4, rotate=180)# store our work to the pageshape.commit()doc.save(...)
This is the result:
How to Fill a Text Box
This script fills 4 different rectangles with text, each time choosing a different rotation value:
import fitzdoc = fitz.open(...) # new or existing PDFpage = doc.new_page() # new page, or choose doc[n]r1 = fitz.Rect(50,100,100,150) # a 50x50 rectangledisp = fitz.Rect(55, 0, 55, 0) # add this to get more rectsr2 = r1 + disp # 2nd rectr3 = r1 + disp * 2 # 3rd rectr4 = r1 + disp * 3 # 4th rectt1 = "text with rotate = 0." # the texts we will put int2 = "text with rotate = 90."t3 = "text with rotate = -90."t4 = "text with rotate = 180."red = (1,0,0) # some colorsgold = (1,1,0)blue = (0,0,1)"""We use a Shape object (something like a canvas) to output the text andthe rectangles surrounding it for demonstration."""shape = page.new_shape() # create Shapeshape.draw_rect(r1) # draw rectanglesshape.draw_rect(r2) # giving themshape.draw_rect(r3) # a yellow backgroundshape.draw_rect(r4) # and a red bordershape.finish(width = 0.3, color = red, fill = gold)# Now insert text in the rectangles. Font "Helvetica" will be used# by default. A return code rc < 0 indicates insufficient space (not checked here).rc = shape.insert_textbox(r1, t1, color = blue)rc = shape.insert_textbox(r2, t2, color = blue, rotate = 90)rc = shape.insert_textbox(r3, t3, color = blue, rotate = -90)rc = shape.insert_textbox(r4, t4, color = blue, rotate = 180)shape.commit() # write all stuff to page /Contentsdoc.save("...")
Several default values were used above: font “Helvetica”, font size 11 and text alignment “left”. The result will look like this:

How to Use Non-Standard Encoding
Since v1.14, MuPDF allows Greek and Russian encoding variants for the Base14_Fonts. In PyMuPDF this is supported via an additional encoding argument. Effectively, this is relevant for Helvetica, Times-Roman and Courier (and their bold / italic forms) and characters outside the ASCII code range only. Elsewhere, the argument is ignored. Here is how to request Russian encoding with the standard font Helvetica:
page.insert_text(point, russian_text, encoding=fitz.TEXT_ENCODING_CYRILLIC)
The valid encoding values are TEXT_ENCODING_LATIN (0), TEXT_ENCODING_GREEK (1), and TEXT_ENCODING_CYRILLIC (2, Russian) with Latin being the default. Encoding can be specified by all relevant font and text insertion methods.
By the above statement, the fontname helv is automatically connected to the Russian font variant of Helvetica. Any subsequent text insertion with this fontname will use the Russian Helvetica encoding.
If you change the fontname just slightly, you can also achieve an encoding “mixture” for the same base font on the same page:
import fitzdoc=fitz.open()page = doc.new_page()shape = page.new_shape()t="Sômé tèxt wìth nöñ-Lâtîn characterß."shape.insert_text((50,70), t, fontname="helv", encoding=fitz.TEXT_ENCODING_LATIN)shape.insert_text((50,90), t, fontname="HElv", encoding=fitz.TEXT_ENCODING_GREEK)shape.insert_text((50,110), t, fontname="HELV", encoding=fitz.TEXT_ENCODING_CYRILLIC)shape.commit()doc.save("t.pdf")
The result:

The snippet above indeed leads to three different copies of the Helvetica font in the PDF. Each copy is uniquely identified (and referenceable) by using the correct upper-lower case spelling of the reserved word “helv”:
for f in doc.get_page_fonts(0): print(f)[6, 'n/a', 'Type1', 'Helvetica', 'helv', 'WinAnsiEncoding'][7, 'n/a', 'Type1', 'Helvetica', 'HElv', 'WinAnsiEncoding'][8, 'n/a', 'Type1', 'Helvetica', 'HELV', 'WinAnsiEncoding']
Annotations
In v1.14.0, annotation handling has been considerably extended:
New annotation type support for ‘Ink’, ‘Rubber Stamp’ and ‘Squiggly’ annotations. Ink annots simulate handwriting by combining one or more lists of interconnected points. Stamps are intended to visually inform about a document’s status or intended usage (like “draft”, “confidential”, etc.). ‘Squiggly’ is a text marker annot, which underlines selected text with a zigzagged line.
Extended ‘FreeText’ support:
all characters from the Latin character set are now available,
colors of text, rectangle background and rectangle border can be independently set
text in rectangle can be rotated by either +90 or -90 degrees
text is automatically wrapped (made multi-line) in available rectangle
all Base-14 fonts are now available (normal variants only, i.e. no bold, no italic).
MuPDF now supports line end icons for ‘Line’ annots (only). PyMuPDF supported that in v1.13.x already – and for (almost) the full range of applicable types. So we adjusted the appearance of ‘Polygon’ and ‘PolyLine’ annots to closely resemble the one of MuPDF for ‘Line’.
MuPDF now provides its own annotation icons where relevant. PyMuPDF switched to using them (for ‘FileAttachment’ and ‘Text’ [“sticky note”] so far).
MuPDF now also supports ‘Caret’, ‘Movie’, ‘Sound’ and ‘Signature’ annotations, which we may include in PyMuPDF at some later time.
How to Add and Modify Annotations
In PyMuPDF, new annotations can be added via Page methods. Once an annotation exists, it can be modified to a large extent using methods of the Annot class.
In contrast to many other tools, initial insert of annotations happens with a minimum number of properties. We leave it to the programmer to e.g. set attributes like author, creation date or subject.
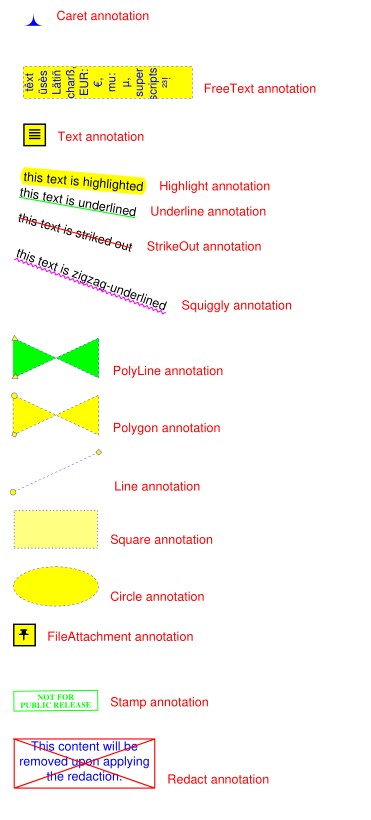
As an overview for these capabilities, look at the following script that fills a PDF page with most of the available annotations. Look in the next sections for more special situations:
# -*- coding: utf-8 -*-"""-------------------------------------------------------------------------------Demo script showing how annotations can be added to a PDF using PyMuPDF.It contains the following annotation types:Caret, Text, FreeText, text markers (underline, strike-out, highlight,squiggle), Circle, Square, Line, PolyLine, Polygon, FileAttachment, Stampand Redaction.There is some effort to vary appearances by adding colors, line ends,opacity, rotation, dashed lines, etc.Dependencies------------PyMuPDF v1.17.0-------------------------------------------------------------------------------"""from __future__ import print_functionimport gcimport sysimport fitzprint(fitz.__doc__)if fitz.VersionBind.split(".") < ["1", "17", "0"]:sys.exit("PyMuPDF v1.17.0+ is needed.")gc.set_debug(gc.DEBUG_UNCOLLECTABLE)highlight = "this text is highlighted"underline = "this text is underlined"strikeout = "this text is striked out"squiggled = "this text is zigzag-underlined"red = (1, 0, 0)blue = (0, 0, 1)gold = (1, 1, 0)green = (0, 1, 0)displ = fitz.Rect(0, 50, 0, 50)r = fitz.Rect(72, 72, 220, 100)t1 = u"têxt üsès Lätiñ charß,\nEUR: €, mu: µ, super scripts: ²³!"def print_descr(annot):"""Print a short description to the right of each annot rect."""annot.parent.insert_text(annot.rect.br + (10, -5), "%s annotation" % annot.type[1], color=red)doc = fitz.open()page = doc.new_page()page.set_rotation(0)annot = page.add_caret_annot(r.tl)print_descr(annot)r = r + displannot = page.add_freetext_annot(r,t1,fontsize=10,rotate=90,text_color=blue,fill_color=gold,align=fitz.TEXT_ALIGN_CENTER,)annot.set_border(width=0.3, dashes=[2])annot.update(text_color=blue, fill_color=gold)print_descr(annot)r = annot.rect + displannot = page.add_text_annot(r.tl, t1)print_descr(annot)# Adding text marker annotations:# first insert a unique text, then search for it, then mark itpos = annot.rect.tl + displ.tlpage.insert_text(pos, # insertion pointhighlight, # inserted textmorph=(pos, fitz.Matrix(-5)), # rotate around insertion point)rl = page.search_for(highlight, quads=True) # need a quad b/o tilted textannot = page.add_highlight_annot(rl[0])print_descr(annot)pos = annot.rect.bl # next insertion pointpage.insert_text(pos, underline, morph=(pos, fitz.Matrix(-10)))rl = page.search_for(underline, quads=True)annot = page.add_underline_annot(rl[0])print_descr(annot)pos = annot.rect.blpage.insert_text(pos, strikeout, morph=(pos, fitz.Matrix(-15)))rl = page.search_for(strikeout, quads=True)annot = page.add_strikeout_annot(rl[0])print_descr(annot)pos = annot.rect.blpage.insert_text(pos, squiggled, morph=(pos, fitz.Matrix(-20)))rl = page.search_for(squiggled, quads=True)annot = page.add_squiggly_annot(rl[0])print_descr(annot)pos = annot.rect.blr = fitz.Rect(pos, pos.x + 75, pos.y + 35) + (0, 20, 0, 20)annot = page.add_polyline_annot([r.bl, r.tr, r.br, r.tl]) # 'Polyline'annot.set_border(width=0.3, dashes=[2])annot.set_colors(stroke=blue, fill=green)annot.set_line_ends(fitz.PDF_ANNOT_LE_CLOSED_ARROW, fitz.PDF_ANNOT_LE_R_CLOSED_ARROW)annot.update(fill_color=(1, 1, 0))print_descr(annot)r += displannot = page.add_polygon_annot([r.bl, r.tr, r.br, r.tl]) # 'Polygon'annot.set_border(width=0.3, dashes=[2])annot.set_colors(stroke=blue, fill=gold)annot.set_line_ends(fitz.PDF_ANNOT_LE_DIAMOND, fitz.PDF_ANNOT_LE_CIRCLE)annot.update()print_descr(annot)r += displannot = page.add_line_annot(r.tr, r.bl) # 'Line'annot.set_border(width=0.3, dashes=[2])annot.set_colors(stroke=blue, fill=gold)annot.set_line_ends(fitz.PDF_ANNOT_LE_DIAMOND, fitz.PDF_ANNOT_LE_CIRCLE)annot.update()print_descr(annot)r += displannot = page.add_rect_annot(r) # 'Square'annot.set_border(width=1, dashes=[1, 2])annot.set_colors(stroke=blue, fill=gold)annot.update(opacity=0.5)print_descr(annot)r += displannot = page.add_circle_annot(r) # 'Circle'annot.set_border(width=0.3, dashes=[2])annot.set_colors(stroke=blue, fill=gold)annot.update()print_descr(annot)r += displannot = page.add_file_annot(r.tl, b"just anything for testing", "testdata.txt" # 'FileAttachment')print_descr(annot) # annot.rectr += displannot = page.add_stamp_annot(r, stamp=10) # 'Stamp'annot.set_colors(stroke=green)annot.update()print_descr(annot)r += displ + (0, 0, 50, 10)rc = page.insert_textbox(r,"This content will be removed upon applying the redaction.",color=blue,align=fitz.TEXT_ALIGN_CENTER,)annot = page.add_redact_annot(r)print_descr(annot)doc.save(__file__.replace(".py", "-%i.pdf" % page.rotation), deflate=True)
This script should lead to the following output:
How to Use FreeText
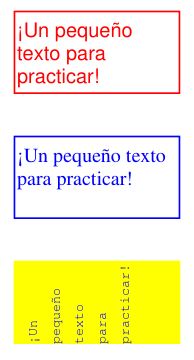
This script shows a couple of ways to deal with ‘FreeText’ annotations:
# -*- coding: utf-8 -*-import fitz# some colorsblue = (0,0,1)green = (0,1,0)red = (1,0,0)gold = (1,1,0)# a new PDF with 1 pagedoc = fitz.open()page = doc.new_page()# 3 rectangles, same size, above each otherr1 = fitz.Rect(100,100,200,150)r2 = r1 + (0,75,0,75)r3 = r2 + (0,75,0,75)# the text, Latin alphabett = "¡Un pequeño texto para practicar!"# add 3 annots, modify the last one somewhata1 = page.add_freetext_annot(r1, t, color=red)a2 = page.add_freetext_annot(r2, t, fontname="Ti", color=blue)a3 = page.add_freetext_annot(r3, t, fontname="Co", color=blue, rotate=90)a3.set_border(width=0)a3.update(fontsize=8, fill_color=gold)# save the PDFdoc.save("a-freetext.pdf")
The result looks like this:
Using Buttons and JavaScript
Since MuPDF v1.16, ‘FreeText’ annotations no longer support bold or italic versions of the Times-Roman, Helvetica or Courier fonts.
A big thank you to our user @kurokawaikki, who contributed the following script to circumvent this restriction.
"""Problem: Since MuPDF v1.16 a 'Freetext' annotation font is restricted to the"normal" versions (no bold, no italics) of Times-Roman, Helvetica, Courier.It is impossible to use PyMuPDF to modify this.Solution: Using Adobe's JavaScript API, it is possible to manipulate propertiesof Freetext annotations. Check out these references:https://www.adobe.com/content/dam/acom/en/devnet/acrobat/pdfs/js_api_reference.pdf,or https://www.adobe.com/devnet/acrobat/documentation.html.Function 'this.getAnnots()' will return all annotations as an array. We loopover this array to set the properties of the text through the 'richContents'attribute.There is no explicit property to set text to bold, but it is possible to setfontWeight=800 (400 is the normal size) of richContents.Other attributes, like color, italics, etc. can also be set via richContents.If we have 'FreeText' annotations created with PyMuPDF, we can make use of thisJavaScript feature to modify the font - thus circumventing the above restriction.Use PyMuPDF v1.16.12 to create a push button that executes a Javascriptcontaining the desired code. This is what this program does.Then open the resulting file with Adobe reader (!).After clicking on the button, all Freetext annotations will be bold, and thefile can be saved.If desired, the button can be removed again, using free tools like PyMuPDF orPDF XChange editor.Note / Caution:---------------The JavaScript will **only** work if the file is opened with Adobe Acrobat reader!When using other PDF viewers, the reaction is unforeseeable."""import sysimport fitz# this JavaScript will execute when the button is clicked:jscript = """var annt = this.getAnnots();annt.forEach(function (item, index) {try {var span = item.richContents;span.forEach(function (it, dx) {it.fontWeight = 800;})item.richContents = span;} catch (err) {}});app.alert('Done');"""i_fn = sys.argv[1] # input file nameo_fn = "bold-" + i_fn # output filenamedoc = fitz.open(i_fn) # open inputpage = doc[0] # get desired page# ------------------------------------------------# make a push button for invoking the JavaScript# ------------------------------------------------widget = fitz.Widget() # create widget# make it a 'PushButton'widget.field_type = fitz.PDF_WIDGET_TYPE_BUTTONwidget.field_flags = fitz.PDF_BTN_FIELD_IS_PUSHBUTTONwidget.rect = fitz.Rect(5, 5, 20, 20) # button positionwidget.script = jscript # fill in JavaScript source textwidget.field_name = "Make bold" # arbitrary namewidget.field_value = "Off" # arbitrary valuewidget.fill_color = (0, 0, 1) # make button visibleannot = page.add_widget(widget) # add the widget to the pagedoc.save(o_fn) # output the file
How to Use Ink Annotations
Ink annotations are used to contain freehand scribbling. A typical example maybe an image of your signature consisting of first name and last name. Technically an ink annotation is implemented as a list of lists of points. Each point list is regarded as a continuous line connecting the points. Different point lists represent independent line segments of the annotation.
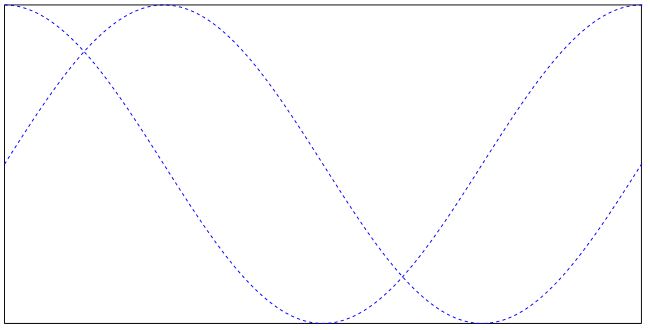
The following script creates an ink annotation with two mathematical curves (sine and cosine function graphs) as line segments:
import mathimport fitz#------------------------------------------------------------------------------# preliminary stuff: create function value lists for sine and cosine#------------------------------------------------------------------------------w360 = math.pi * 2 # go through full circledeg = w360 / 360 # 1 degree as radiansrect = fitz.Rect(100,200, 300, 300) # use this rectanglefirst_x = rect.x0 # x starts from leftfirst_y = rect.y0 + rect.height / 2. # rect middle means y = 0x_step = rect.width / 360 # rect width means 360 degreesy_scale = rect.height / 2. # rect height means 2sin_points = [] # sine values go herecos_points = [] # cosine values go herefor x in range(362): # now fill in the valuesx_coord = x * x_step + first_x # current x coordinatey = -math.sin(x * deg) # sinep = (x_coord, y * y_scale + first_y) # corresponding pointsin_points.append(p) # appendy = -math.cos(x * deg) # cosinep = (x_coord, y * y_scale + first_y) # corresponding pointcos_points.append(p) # append#------------------------------------------------------------------------------# create the document with one page#------------------------------------------------------------------------------doc = fitz.open() # make new PDFpage = doc.new_page() # give it a page#------------------------------------------------------------------------------# add the Ink annotation, consisting of 2 curve segments#------------------------------------------------------------------------------annot = page.addInkAnnot((sin_points, cos_points))# let it look a little nicerannot.set_border(width=0.3, dashes=[1,]) # line thickness, some dashingannot.set_colors(stroke=(0,0,1)) # make the lines blueannot.update() # update the appearancepage.draw_rect(rect, width=0.3) # only to demonstrate we did OKdoc.save("a-inktest.pdf")
This is the result:
Drawing and Graphics
PDF files support elementary drawing operations as part of their syntax. This includes basic geometrical objects like lines, curves, circles, rectangles including specifying colors.
The syntax for such operations is defined in “A Operator Summary” on page 643 of the Adobe PDF References. Specifying these operators for a PDF page happens in its contents objects.
PyMuPDF implements a large part of the available features via its Shape class, which is comparable to notions like “canvas” in other packages (e.g. reportlab).
A shape is always created as a child of a page, usually with an instruction like shape = page.new_shape(). The class defines numerous methods that perform drawing operations on the page’s area. For example, last_point = shape.draw_rect(rect) draws a rectangle along the borders of a suitably defined rect = fitz.Rect(…).
The returned last_point always is the Point where drawing operation ended (“last point”). Every such elementary drawing requires a subsequent Shape.finish() to “close” it, but there may be multiple drawings which have one common finish() method.
In fact, Shape.finish() defines a group of preceding draw operations to form one – potentially rather complex – graphics object. PyMuPDF provides several predefined graphics in shapes_and_symbols.py which demonstrate how this works.
If you import this script, you can also directly use its graphics as in the following example:
# -*- coding: utf-8 -*-"""Created on Sun Dec 9 08:34:06 2018@author: Jorj@license: GNU AFFERO GPL V3Create a list of available symbols defined in shapes_and_symbols.pyThis also demonstrates an example usage: how these symbols could be usedas bullet-point symbols in some text."""import fitzimport shapes_and_symbols as sas# list of available symbol functions and their descriptionstlist = [(sas.arrow, "arrow (easy)"),(sas.caro, "caro (easy)"),(sas.clover, "clover (easy)"),(sas.diamond, "diamond (easy)"),(sas.dontenter, "do not enter (medium)"),(sas.frowney, "frowney (medium)"),(sas.hand, "hand (complex)"),(sas.heart, "heart (easy)"),(sas.pencil, "pencil (very complex)"),(sas.smiley, "smiley (easy)"),]r = fitz.Rect(50, 50, 100, 100) # first rect to contain a symbold = fitz.Rect(0, r.height + 10, 0, r.height + 10) # displacement to next rectp = (15, -r.height * 0.2) # starting point of explanation textrlist = [r] # rectangle listfor i in range(1, len(tlist)): # fill in all the rectanglesrlist.append(rlist[i-1] + d)doc = fitz.open() # create empty PDFpage = doc.new_page() # create an empty pageshape = page.new_shape() # start a Shape (canvas)for i, r in enumerate(rlist):tlist[i][0](shape, rlist[i]) # execute symbol creationshape.insert_text(rlist[i].br + p, # insert description texttlist[i][1], fontsize=r.height/1.2)# store everything to the page's /Contents objectshape.commit()import osscriptdir = os.path.dirname(__file__)doc.save(os.path.join(scriptdir, "symbol-list.pdf")) # save the PDF
This is the script’s outcome:
Extracting Drawings
- New in v1.18.0
The drawing commands issued by a page can be extracted. Interestingly, this is possible for all supported document types – not just PDF: so you can use it for XPS, EPUB and others as well.
Page method, Page.get_drawings() accesses draw commands and converts them into a list of Python dictionaries. Each dictionary – called a “path” – represents a separate drawing – it may be simple like a single line, or a complex combination of lines and curves representing one of the shapes of the previous section.
The path dictionary has been designed such that it can easily be used by the Shape class and its methods. Here is an example for a page with one path, that draws a red-bordered yellow circle inside rectangle Rect(100, 100, 200, 200):
>>> pprint(page.get_drawings())[{'closePath': True,'color': [1.0, 0.0, 0.0],'dashes': '[] 0','even_odd': False,'fill': [1.0, 1.0, 0.0],'items': [('c',Point(100.0, 150.0),Point(100.0, 177.614013671875),Point(122.38600158691406, 200.0),Point(150.0, 200.0)),('c',Point(150.0, 200.0),Point(177.61399841308594, 200.0),Point(200.0, 177.614013671875),Point(200.0, 150.0)),('c',Point(200.0, 150.0),Point(200.0, 122.385986328125),Point(177.61399841308594, 100.0),Point(150.0, 100.0)),('c',Point(150.0, 100.0),Point(122.38600158691406, 100.0),Point(100.0, 122.385986328125),Point(100.0, 150.0))],'lineCap': (0, 0, 0),'lineJoin': 0,'opacity': 1.0,'rect': Rect(100.0, 100.0, 200.0, 200.0),'width': 1.0}]>>>
Note
You need (at least) 4 Bézier curves (of 3rd order) to draw a circle with acceptable precision. See this `Wikipedia article<https://en.wikipedia.org/wiki/B%C3%A9zier_curve>`_ for some background.
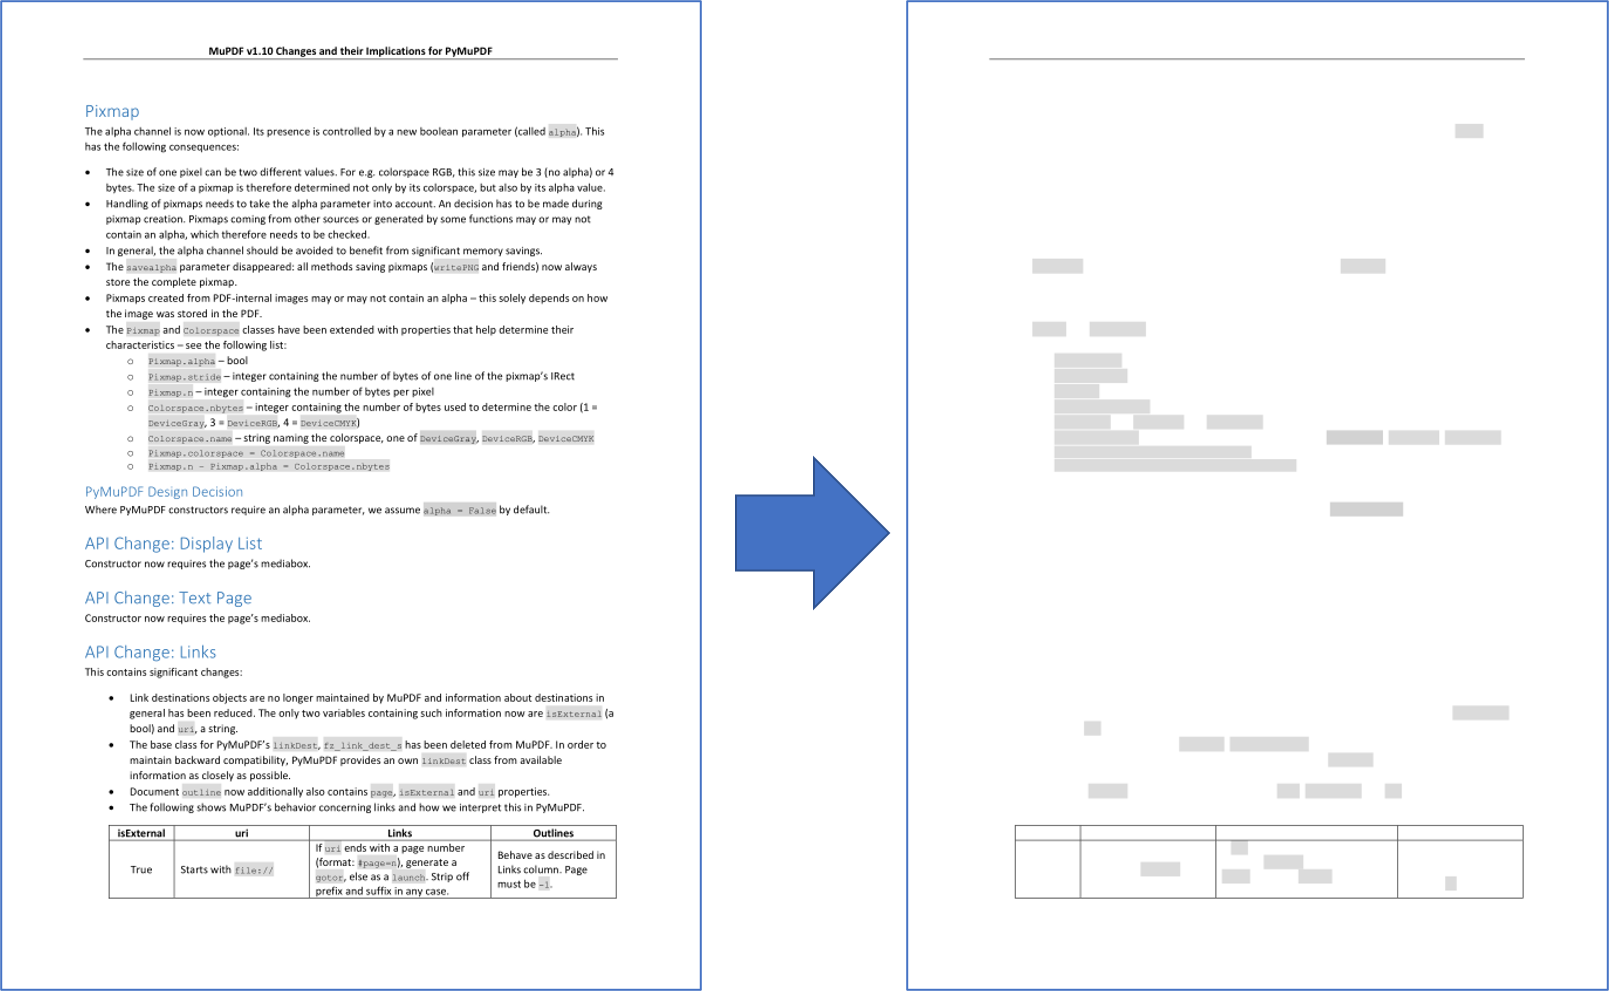
The following is a code snippet which extracts the drawings of a page and re-draws them on a new page:
import fitzdoc = fitz.open("some.file")page = doc[0]paths = page.get_drawings() # extract existing drawings# this is a list of "paths", which can directly be drawn again using Shape# -------------------------------------------------------------------------## define some output page with the same dimensionsoutpdf = fitz.open()outpage = outpdf.new_page(width=page.rect.width, height=page.rect.height)shape = outpage.new_shape() # make a drawing canvas for the output page# --------------------------------------# loop through the paths and draw them# --------------------------------------for path in paths:# ------------------------------------# draw each entry of the 'items' list# ------------------------------------for item in path["items"]: # these are the draw commandsif item[0] == "l": # lineshape.draw_line(item[1], item[2])elif item[0] == "re": # rectangleshape.draw_rect(item[1])elif item[0] == "qu": # quadshape.draw_quad(item[1])elif item[0] == "c": # curveshape.draw_bezier(item[1], item[2], item[3], item[4])else:raise ValueError("unhandled drawing", item)# ------------------------------------------------------# all items are drawn, now apply the common properties# to finish the path# ------------------------------------------------------shape.finish(fill=path["fill"], # fill colorcolor=path["color"], # line colordashes=path["dashes"], # line dashingeven_odd=path.get("even_odd", True), # control color of overlapsclosePath=path["closePath"], # whether to connect last and first pointlineJoin=path["lineJoin"], # how line joins should look likelineCap=max(path["lineCap"]), # how line ends should look likewidth=path["width"], # line widthstroke_opacity=path.get("stroke_opacity", 1), # same value for bothfill_opacity=path.get("fill_opacity", 1), # opacity parameters)# all paths processed - commit the shape to its pageshape.commit()outpdf.save("drawings-page-0.pdf")
As can bee seen, there is a high congruence level with the Shape class. With one exception: For technical reasons lineCap is a tuple of 3 numbers here, whereas it is an integer in Shape (and in PDF). So we simply take the maximum value of that tuple.
Here is a comparison between input and output of an example page, created by the previous script:
Note
The reconstruction of graphics like shown here is not perfect. The following aspects will not be reproduced as of this version:
- Page definitions can be complex and include instructions for not showing / hiding certain areas to keep them invisible. Things like this are ignored by Page.get_drawings() - it will always return all paths.
Note
You can use the path list to make your own lists of e.g. all lines or all rectangles on the page, subselect them by criteria like color or position on the page etc.
Multiprocessing
MuPDF has no integrated support for threading - they call themselves “threading-agnostic”. While there do exist tricky possibilities to still use threading with MuPDF, the baseline consequence for PyMuPDF is:
No Python threading support.
Using PyMuPDF in a Python threading environment will lead to blocking effects for the main thread.
However, there exists the option to use Python’s multiprocessing module in a variety of ways.
If you are looking to speed up page-oriented processing for a large document, use this script as a starting point. It should be at least twice as fast as the corresponding sequential processing.
"""Demonstrate the use of multiprocessing with PyMuPDF.Depending on the number of CPUs, the document is divided in page ranges.Each range is then worked on by one process.The type of work would typically be text extraction or page rendering. Eachprocess must know where to put its results, because this processing patterndoes not include inter-process communication or data sharing.Compared to sequential processing, speed improvements in range of 100% (ie.twice as fast) or better can be expected."""from __future__ import print_function, divisionimport sysimport osimport timefrom multiprocessing import Pool, cpu_countimport fitz# choose a version specific timer function (bytes == str in Python 2)mytime = time.clock if str is bytes else time.perf_counterdef render_page(vector):"""Render a page range of a document.Notes:The PyMuPDF document cannot be part of the argument, because thatcannot be pickled. So we are being passed in just its filename.This is no performance issue, because we are a separate process andneed to open the document anyway.Any page-specific function can be processed here - rendering is justan example - text extraction might be another.The work must however be self-contained: no inter-process communicationor synchronization is possible with this design.Care must also be taken with which parameters are contained in theargument, because it will be passed in via pickling by the Pool class.So any large objects will increase the overall duration.Args:vector: a list containing required parameters."""# recreate the argumentsidx = vector[0] # this is the segment number we have to processcpu = vector[1] # number of CPUsfilename = vector[2] # document filenamemat = vector[3] # the matrix for renderingdoc = fitz.open(filename) # open the documentnum_pages = doc.page_count # get number of pages# pages per segment: make sure that cpu * seg_size >= num_pages!seg_size = int(num_pages / cpu + 1)seg_from = idx * seg_size # our first page numberseg_to = min(seg_from + seg_size, num_pages) # last page numberfor i in range(seg_from, seg_to): # work through our page segmentpage = doc[i]# page.get_text("rawdict") # use any page-related type of work here, egpix = page.get_pixmap(alpha=False, matrix=mat)# store away the result somewhere ...# pix.save("p-%i.png" % i)print("Processed page numbers %i through %i" % (seg_from, seg_to - 1))if __name__ == "__main__":t0 = mytime() # start a timerfilename = sys.argv[1]mat = fitz.Matrix(0.2, 0.2) # the rendering matrix: scale down to 20%cpu = cpu_count()# make vectors of arguments for the processesvectors = [(i, cpu, filename, mat) for i in range(cpu)]print("Starting %i processes for '%s'." % (cpu, filename))pool = Pool() # make pool of 'cpu_count()' processespool.map(render_page, vectors, 1) # start processes passing each a vectort1 = mytime() # stop the timerprint("Total time %g seconds" % round(t1 - t0, 2))
Here is a more complex example involving inter-process communication between a main process (showing a GUI) and a child process doing PyMuPDF access to a document.
"""Created on 2019-05-01@author: yinkaisheng@live.com@copyright: 2019 yinkaisheng@live.com@license: GNU AFFERO GPL 3.0Demonstrate the use of multiprocessing with PyMuPDF-----------------------------------------------------This example shows some more advanced use of multiprocessing.The main process show a Qt GUI and establishes a 2-way communication withanother process, which accesses a supported document."""import osimport sysimport timeimport multiprocessing as mpimport queueimport fitz''' PyQt and PySide namespace unifier shimhttps://www.pythonguis.com/faq/pyqt6-vs-pyside6/simple "if 'PyQt6' in sys.modules:" test fails for me, so the more complex pkgutil useoverkill for most people who might have one or the other, why both?'''from pkgutil import iter_modulesdef module_exists(module_name):return module_name in (name for loader, name, ispkg in iter_modules())if module_exists("PyQt6"):# PyQt6from PyQt6 import QtGui, QtWidgets, QtCorefrom PyQt6.QtCore import pyqtSignal as Signal, pyqtSlot as Slotwrapper = "PyQt6"elif module_exists("PySide6"):# PySide6from PySide6 import QtGui, QtWidgets, QtCorefrom PySide6.QtCore import Signal, Slotwrapper = "PySide6"my_timer = time.clock if str is bytes else time.perf_counterclass DocForm(QtWidgets.QWidget):def __init__(self):super().__init__()self.process = Noneself.queNum = mp.Queue()self.queDoc = mp.Queue()self.page_count = 0self.curPageNum = 0self.lastDir = ""self.timerSend = QtCore.QTimer(self)self.timerSend.timeout.connect(self.onTimerSendPageNum)self.timerGet = QtCore.QTimer(self)self.timerGet.timeout.connect(self.onTimerGetPage)self.timerWaiting = QtCore.QTimer(self)self.timerWaiting.timeout.connect(self.onTimerWaiting)self.initUI()def initUI(self):vbox = QtWidgets.QVBoxLayout()self.setLayout(vbox)hbox = QtWidgets.QHBoxLayout()self.btnOpen = QtWidgets.QPushButton("OpenDocument", self)self.btnOpen.clicked.connect(self.openDoc)hbox.addWidget(self.btnOpen)self.btnPlay = QtWidgets.QPushButton("PlayDocument", self)self.btnPlay.clicked.connect(self.playDoc)hbox.addWidget(self.btnPlay)self.btnStop = QtWidgets.QPushButton("Stop", self)self.btnStop.clicked.connect(self.stopPlay)hbox.addWidget(self.btnStop)self.label = QtWidgets.QLabel("0/0", self)self.label.setFont(QtGui.QFont("Verdana", 20))hbox.addWidget(self.label)vbox.addLayout(hbox)self.labelImg = QtWidgets.QLabel("Document", self)sizePolicy = QtWidgets.QSizePolicy(QtWidgets.QSizePolicy.Policy.Preferred, QtWidgets.QSizePolicy.Policy.Expanding)self.labelImg.setSizePolicy(sizePolicy)vbox.addWidget(self.labelImg)self.setGeometry(100, 100, 400, 600)self.setWindowTitle("PyMuPDF Document Player")self.show()def openDoc(self):path, _ = QtWidgets.QFileDialog.getOpenFileName(self,"Open Document",self.lastDir,"All Supported Files (*.pdf;*.epub;*.xps;*.oxps;*.cbz;*.fb2);;PDF Files (*.pdf);;EPUB Files (*.epub);;XPS Files (*.xps);;OpenXPS Files (*.oxps);;CBZ Files (*.cbz);;FB2 Files (*.fb2)",#options=QtWidgets.QFileDialog.Options(),)if path:self.lastDir, self.file = os.path.split(path)if self.process:self.queNum.put(-1) # use -1 to notify the process to exitself.timerSend.stop()self.curPageNum = 0self.page_count = 0self.process = mp.Process(target=openDocInProcess, args=(path, self.queNum, self.queDoc))self.process.start()self.timerGet.start(40)self.label.setText("0/0")self.queNum.put(0)self.startTime = time.perf_counter()self.timerWaiting.start(40)def playDoc(self):self.timerSend.start(500)def stopPlay(self):self.timerSend.stop()def onTimerSendPageNum(self):if self.curPageNum < self.page_count - 1:self.queNum.put(self.curPageNum + 1)else:self.timerSend.stop()def onTimerGetPage(self):try:ret = self.queDoc.get(False)if isinstance(ret, int):self.timerWaiting.stop()self.page_count = retself.label.setText("{}/{}".format(self.curPageNum + 1, self.page_count))else: # tuple, pixmap infonum, samples, width, height, stride, alpha = retself.curPageNum = numself.label.setText("{}/{}".format(self.curPageNum + 1, self.page_count))fmt = (QtGui.QImage.Format.Format_RGBA8888if alphaelse QtGui.QImage.Format.Format_RGB888)qimg = QtGui.QImage(samples, width, height, stride, fmt)self.labelImg.setPixmap(QtGui.QPixmap.fromImage(qimg))except queue.Empty as ex:passdef onTimerWaiting(self):self.labelImg.setText('Loading "{}", {:.2f}s'.format(self.file, time.perf_counter() - self.startTime))def closeEvent(self, event):self.queNum.put(-1)event.accept()def openDocInProcess(path, queNum, quePageInfo):start = my_timer()doc = fitz.open(path)end = my_timer()quePageInfo.put(doc.page_count)while True:num = queNum.get()if num < 0:breakpage = doc.load_page(num)pix = page.get_pixmap()quePageInfo.put((num, pix.samples, pix.width, pix.height, pix.stride, pix.alpha))doc.close()print("process exit")if __name__ == "__main__":app = QtWidgets.QApplication(sys.argv)form = DocForm()sys.exit(app.exec())
General
How to Open with a Wrong File Extension
If you have a document with a wrong file extension for its type, you can still correctly open it.
Assume that “some.file” is actually an XPS. Open it like so:
>>> doc = fitz.open("some.file", filetype="xps")
Note
MuPDF itself does not try to determine the file type from the file contents. You are responsible for supplying the filetype info in some way – either implicitly via the file extension, or explicitly as shown. There are pure Python packages like filetype that help you doing this. Also consult the Document chapter for a full description.
If MuPDF encounters a file with an unknown / missing extension, it will try to open it as a PDF. So in these cases there is no need to for additional precautions. Similarly, for memory documents, you can just specify doc=fitz.open(stream=mem_area) to open it as a PDF document.
How to Embed or Attach Files
PDF supports incorporating arbitrary data. This can be done in one of two ways: “embedding” or “attaching”. PyMuPDF supports both options.
Attached Files: data are attached to a page by way of a FileAttachment annotation with this statement: annot = page.add_file_annot(pos, …), for details see Page.add_file_annot(). The first parameter “pos” is the Point, where a “PushPin” icon should be placed on the page.
Embedded Files: data are embedded on the document level via method Document.embfile_add().
The basic differences between these options are (1) you need edit permission to embed a file, but only annotation permission to attach, (2) like all annotations, attachments are visible on a page, embedded files are not.
There exist several example scripts: embedded-list.py, new-annots.py.
Also look at the sections above and at chapter Appendix 3.
How to Delete and Re-Arrange Pages
With PyMuPDF you have all options to copy, move, delete or re-arrange the pages of a PDF. Intuitive methods exist that allow you to do this on a page-by-page level, like the Document.copy_page() method.
Or you alternatively prepare a complete new page layout in form of a Python sequence, that contains the page numbers you want, in the sequence you want, and as many times as you want each page. The following may illustrate what can be done with Document.select():
doc.select([1, 1, 1, 5, 4, 9, 9, 9, 0, 2, 2, 2])
Now let’s prepare a PDF for double-sided printing (on a printer not directly supporting this):
The number of pages is given by len(doc) (equal to doc.page_count). The following lists represent the even and the odd page numbers, respectively:
>>> p_even = [p in range(doc.page_count) if p % 2 == 0]>>> p_odd = [p in range(doc.page_count) if p % 2 == 1]
This snippet creates the respective sub documents which can then be used to print the document:
>>> doc.select(p_even) # only the even pages left over>>> doc.save("even.pdf") # save the "even" PDF>>> doc.close() # recycle the file>>> doc = fitz.open(doc.name) # re-open>>> doc.select(p_odd) # and do the same with the odd pages>>> doc.save("odd.pdf")
For more information also have a look at this Wiki article.
The following example will reverse the order of all pages (extremely fast: sub-second time for the 756 pages of the Adobe PDF References):
>>> lastPage = doc.page_count - 1>>> for i in range(lastPage):doc.move_page(lastPage, i) # move current last page to the front
This snippet duplicates the PDF with itself so that it will contain the pages 0, 1, …, n, 0, 1, …, n (extremely fast and without noticeably increasing the file size!):
>>> page_count = len(doc)>>> for i in range(page_count):doc.copy_page(i) # copy this page to after last page
How to Join PDFs
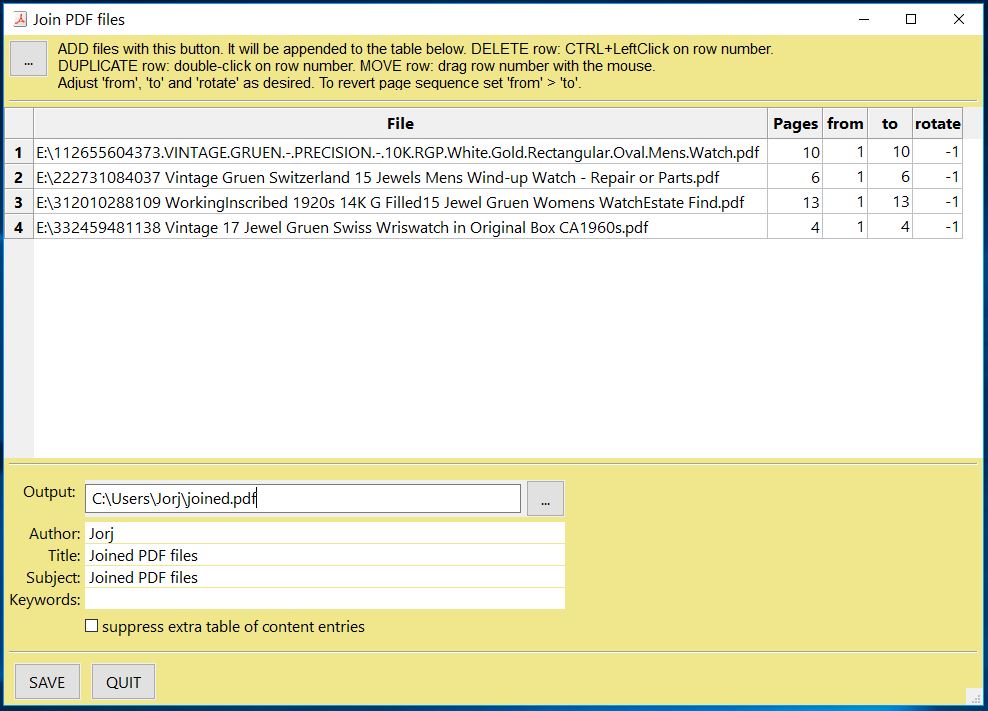
It is easy to join PDFs with method Document.insert_pdf(). Given open PDF documents, you can copy page ranges from one to the other. You can select the point where the copied pages should be placed, you can revert the page sequence and also change page rotation. This Wiki article contains a full description.
The GUI script PDFjoiner.py uses this method to join a list of files while also joining the respective table of contents segments. It looks like this:
How to Add Pages
There two methods for adding new pages to a PDF: Document.insert_page() and Document.new_page() (and they share a common code base).
new_page
Document.new_page() returns the created Page object. Here is the constructor showing defaults:
>>> doc = fitz.open(...) # some new or existing PDF document>>> page = doc.new_page(to = -1, # insertion point: end of documentwidth = 595, # page dimension: A4 portraitheight = 842)
The above could also have been achieved with the short form page = doc.new_page(). The to parameter specifies the document’s page number (0-based) in front of which to insert.
To create a page in landscape format, just exchange the width and height values.
Use this to create the page with another pre-defined paper format:
>>> w, h = fitz.paper_size("letter-l") # 'Letter' landscape>>> page = doc.new_page(width = w, height = h)
The convenience function paper_size() knows over 40 industry standard paper formats to choose from. To see them, inspect dictionary paperSizes. Pass the desired dictionary key to paper_size() to retrieve the paper dimensions. Upper and lower case is supported. If you append “-L” to the format name, the landscape version is returned.
Note
Here is a 3-liner that creates a PDF with one empty page. Its file size is 470 bytes:
>>> doc = fitz.open()>>> doc.new_page()>>> doc.save("A4.pdf")
insert_page
Document.insert_page() also inserts a new page and accepts the same parameters to, width and height. But it lets you also insert arbitrary text into the new page and returns the number of inserted lines:
>>> doc = fitz.open(...) # some new or existing PDF document>>> n = doc.insert_page(to = -1, # default insertion pointtext = None, # string or sequence of stringsfontsize = 11,width = 595,height = 842,fontname = "Helvetica", # default fontfontfile = None, # any font file namecolor = (0, 0, 0)) # text color (RGB)
The text parameter can be a (sequence of) string (assuming UTF-8 encoding). Insertion will start at Point (50, 72), which is one inch below top of page and 50 points from the left. The number of inserted text lines is returned. See the method definition for more details.
How To Dynamically Clean Up Corrupt PDFs
This shows a potential use of PyMuPDF with another Python PDF library (the excellent pure Python package pdfrw is used here as an example).
If a clean, non-corrupt / decompressed PDF is needed, one could dynamically invoke PyMuPDF to recover from many problems like so:
import sysfrom io import BytesIOfrom pdfrw import PdfReaderimport fitz#---------------------------------------# 'Tolerant' PDF reader#---------------------------------------def reader(fname, password = None):idata = open(fname, "rb").read() # read the PDF into memory andibuffer = BytesIO(idata) # convert to streamif password is None:try:return PdfReader(ibuffer) # if this works: fine!except:pass# either we need a password or it is a problem-PDF# create a repaired / decompressed / decrypted versiondoc = fitz.open("pdf", ibuffer)if password is not None: # decrypt if password providedrc = doc.authenticate(password)if not rc > 0:raise ValueError("wrong password")c = doc.tobytes(garbage=3, deflate=True)del doc # close & delete docreturn PdfReader(BytesIO(c)) # let pdfrw retry#---------------------------------------# Main program#---------------------------------------pdf = reader("pymupdf.pdf", password = None) # include a password if necessaryprint pdf.Info# do further processing
With the command line utility pdftk (available for Windows only, but reported to also run under Wine) a similar result can be achieved, see here. However, you must invoke it as a separate process via subprocess.Popen, using stdin and stdout as communication vehicles.
How to Split Single Pages
This deals with splitting up pages of a PDF in arbitrary pieces. For example, you may have a PDF with Letter format pages which you want to print with a magnification factor of four: each page is split up in 4 pieces which each go to a separate PDF page in Letter format again:
"""Create a PDF copy with split-up pages (posterize)---------------------------------------------------License: GNU AFFERO GPL V3(c) 2018 Jorj X. McKieUsage------python posterize.py input.pdfResult-------A file "poster-input.pdf" with 4 output pages for every input page.Notes-----(1) Output file is chosen to have page dimensions of 1/4 of input.(2) Easily adapt the example to make n pages per input, or decide per eachinput page or whatever.Dependencies------------PyMuPDF 1.12.2 or later"""import fitz, sysinfile = sys.argv[1] # input file namesrc = fitz.open(infile)doc = fitz.open() # empty output PDFfor spage in src: # for each page in inputr = spage.rect # input page rectangled = fitz.Rect(spage.cropbox_position, # CropBox displacement if notspage.cropbox_position) # starting at (0, 0)#--------------------------------------------------------------------------# example: cut input page into 2 x 2 parts#--------------------------------------------------------------------------r1 = r / 2 # top left rectr2 = r1 + (r1.width, 0, r1.width, 0) # top right rectr3 = r1 + (0, r1.height, 0, r1.height) # bottom left rectr4 = fitz.Rect(r1.br, r.br) # bottom right rectrect_list = [r1, r2, r3, r4] # put them in a listfor rx in rect_list: # run thru rect listrx += d # add the CropBox displacementpage = doc.new_page(-1, # new output page with rx dimensionswidth = rx.width,height = rx.height)page.show_pdf_page(page.rect, # fill all new page with the imagesrc, # input documentspage.number, # input page numberclip = rx, # which part to use of input page)# that's it, save output filedoc.save("poster-" + src.name,garbage=3, # eliminate duplicate objectsdeflate=True, # compress stuff where possible)
This shows what happens to an input page:
How to Combine Single Pages
This deals with joining PDF pages to form a new PDF with pages each combining two or four original ones (also called “2-up”, “4-up”, etc.). This could be used to create booklets or thumbnail-like overviews:
'''Copy an input PDF to output combining every 4 pages---------------------------------------------------License: GNU AFFERO GPL V3(c) 2018 Jorj X. McKieUsage------python 4up.py input.pdfResult-------A file "4up-input.pdf" with 1 output page for every 4 input pages.Notes-----(1) Output file is chosen to have A4 portrait pages. Input pages are scaledmaintaining side proportions. Both can be changed, e.g. based on inputpage size. However, note that not all pages need to have the same size, etc.(2) Easily adapt the example to combine just 2 pages (like for a booklet) ormake the output page dimension dependent on input, or whatever.Dependencies-------------PyMuPDF 1.12.1 or later'''import fitz, sysinfile = sys.argv[1]src = fitz.open(infile)doc = fitz.open() # empty output PDFwidth, height = fitz.paper_size("a4") # A4 portrait output page formatr = fitz.Rect(0, 0, width, height)# define the 4 rectangles per pager1 = r / 2 # top left rectr2 = r1 + (r1.width, 0, r1.width, 0) # top rightr3 = r1 + (0, r1.height, 0, r1.height) # bottom leftr4 = fitz.Rect(r1.br, r.br) # bottom right# put them in a listr_tab = [r1, r2, r3, r4]# now copy input pages to outputfor spage in src:if spage.number % 4 == 0: # create new output pagepage = doc.new_page(-1,width = width,height = height)# insert input page into the correct rectanglepage.show_pdf_page(r_tab[spage.number % 4], # select output rectsrc, # input documentspage.number) # input page number# by all means, save new file using garbage collection and compressiondoc.save("4up-" + infile, garbage=3, deflate=True)
Example effect:
How to Convert Any Document to PDF
Here is a script that converts any PyMuPDF supported document to a PDF. These include XPS, EPUB, FB2, CBZ and all image formats, including multi-page TIFF images.
It features maintaining any metadata, table of contents and links contained in the source document:
"""Demo script: Convert input file to a PDF-----------------------------------------Intended for multi-page input files like XPS, EPUB etc.Features:---------Recovery of table of contents and links of input file.While this works well for bookmarks (outlines, table of contents),links will only work if they are not of type "LINK_NAMED".This link type is skipped by the script.For XPS and EPUB input, internal links however **are** of type "LINK_NAMED".Base library MuPDF does not resolve them to page numbers.So, for anyone expert enough to know the internal structure of thesedocument types, can further interpret and resolve these link types.Dependencies--------------PyMuPDF v1.14.0+"""import sysimport fitzif not (list(map(int, fitz.VersionBind.split("."))) >= [1,14,0]):raise SystemExit("need PyMuPDF v1.14.0+")fn = sys.argv[1]print("Converting '%s' to '%s.pdf'" % (fn, fn))doc = fitz.open(fn)b = doc.convert_to_pdf() # convert to pdfpdf = fitz.open("pdf", b) # open as pdftoc= doc.het_toc() # table of contents of inputpdf.set_toc(toc) # simply set it for outputmeta = doc.metadata # read and set metadataif not meta["producer"]:meta["producer"] = "PyMuPDF v" + fitz.VersionBindif not meta["creator"]:meta["creator"] = "PyMuPDF PDF converter"meta["modDate"] = fitz.get_pdf_now()meta["creationDate"] = meta["modDate"]pdf.set_metadata(meta)# now process the linkslink_cnti = 0link_skip = 0for pinput in doc: # iterate through input pageslinks = pinput.get_links() # get list of linkslink_cnti += len(links) # count how manypout = pdf[pinput.number] # read corresp. output pagefor l in links: # iterate though the linksif l["kind"] == fitz.LINK_NAMED: # we do not handle named linksprint("named link page", pinput.number, l)link_skip += 1 # count themcontinuepout.insert_link(l) # simply output the others# save the conversion resultpdf.save(fn + ".pdf", garbage=4, deflate=True)# say how many named links we skippedif link_cnti > 0:print("Skipped %i named links of a total of %i in input." % (link_skip, link_cnti))
How to Deal with Messages Issued by MuPDF
Since PyMuPDF v1.16.0, error messages issued by the underlying MuPDF library are being redirected to the Python standard device sys.stderr. So you can handle them like any other output going to this devices.
In addition, these messages go to the internal buffer together with any MuPDF warnings – see below.
We always prefix these messages with an identifying string “mupdf:”. If you prefer to not see recoverable MuPDF errors at all, issue the command fitz.TOOLS.mupdf_display_errors(False).
MuPDF warnings continue to be stored in an internal buffer and can be viewed using Tools.mupdf_warnings().
Please note that MuPDF errors may or may not lead to Python exceptions. In other words, you may see error messages from which MuPDF can recover and continue processing.
Example output for a recoverable error. We are opening a damaged PDF, but MuPDF is able to repair it and gives us a few information on what happened. Then we illustrate how to find out whether the document can later be saved incrementally. Checking the Document.is_dirty attribute at this point also indicates that the open had to repair the document:
>>> import fitz>>> doc = fitz.open("damaged-file.pdf") # leads to a sys.stderr message:mupdf: cannot find startxref>>> print(fitz.TOOLS.mupdf_warnings()) # check if there is more info:cannot find startxreftrying to repair broken xrefrepairing PDF documentobject missing 'endobj' token>>> doc.can_save_incrementally() # this is to be expected:False>>> # the following indicates whether there are updates so far>>> # this is the case because of the repair actions:>>> doc.is_dirtyTrue>>> # the document has nevertheless been created:>>> docfitz.Document('damaged-file.pdf')>>> # we now know that any save must occur to a new file
Example output for an unrecoverable error:
>>> import fitz>>> doc = fitz.open("does-not-exist.pdf")mupdf: cannot open does-not-exist.pdf: No such file or directoryTraceback (most recent call last):File "<pyshell#1>", line 1, in <module>doc = fitz.open("does-not-exist.pdf")File "C:\Users\Jorj\AppData\Local\Programs\Python\Python37\lib\site-packages\fitz\fitz.py", line 2200, in __init___fitz.Document_swiginit(self, _fitz.new_Document(filename, stream, filetype, rect, width, height, fontsize))RuntimeError: cannot open does-not-exist.pdf: No such file or directory>>>
How to Deal with PDF Encryption
Starting with version 1.16.0, PDF decryption and encryption (using passwords) are fully supported. You can do the following:
Check whether a document is password protected / (still) encrypted (Document.needs_pass, Document.is_encrypted).
Gain access authorization to a document (Document.authenticate()).
Set encryption details for PDF files using Document.save() or
Document.write()anddecrypt or encrypt the content
set password(s)
set the encryption method
set permission details
Note
A PDF document may have two different passwords:
The owner password provides full access rights, including changing passwords, encryption method, or permission detail.
The user password provides access to document content according to the established permission details. If present, opening the PDF in a viewer will require providing it.
Method Document.authenticate() will automatically establish access rights according to the password used.
The following snippet creates a new PDF and encrypts it with separate user and owner passwords. Permissions are granted to print, copy and annotate, but no changes are allowed to someone authenticating with the user password:
import fitztext = "some secret information" # keep this data secretperm = int(fitz.PDF_PERM_ACCESSIBILITY # always use this| fitz.PDF_PERM_PRINT # permit printing| fitz.PDF_PERM_COPY # permit copying| fitz.PDF_PERM_ANNOTATE # permit annotations)owner_pass = "owner" # owner passworduser_pass = "user" # user passwordencrypt_meth = fitz.PDF_ENCRYPT_AES_256 # strongest algorithmdoc = fitz.open() # empty pdfpage = doc.new_page() # empty pagepage.insert_text((50, 72), text) # insert the datadoc.save("secret.pdf",encryption=encrypt_meth, # set the encryption methodowner_pw=owner_pass, # set the owner passworduser_pw=user_pass, # set the user passwordpermissions=perm, # set permissions)
Opening this document with some viewer (Nitro Reader 5) reflects these settings:
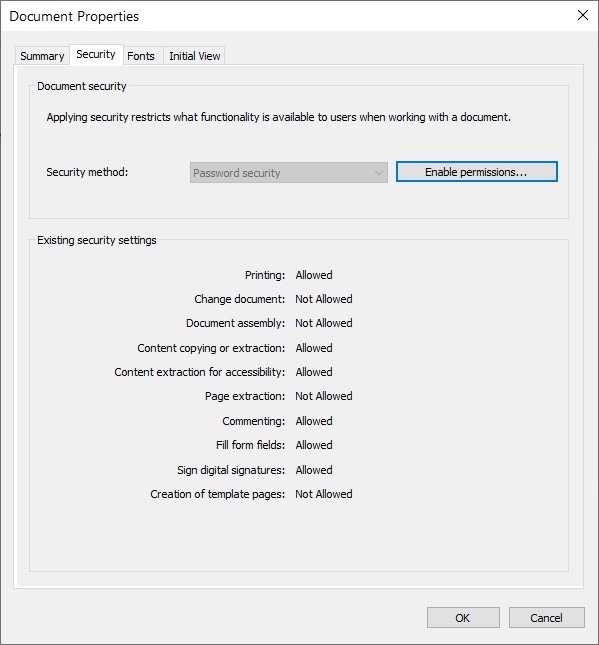
Decrypting will automatically happen on save as before when no encryption parameters are provided.
To keep the encryption method of a PDF save it using encryption=fitz.PDF_ENCRYPT_KEEP. If doc.can_save_incrementally() == True, an incremental save is also possible.
To change the encryption method specify the full range of options above (encryption, owner_pw, user_pw, permissions). An incremental save is not possible in this case.
Common Issues and their Solutions
Changing Annotations: Unexpected Behaviour
Problem
There are two scenarios:
Updating an annotation with PyMuPDF which was created by some other software.
Creating an annotation with PyMuPDF and later changing it with some other software.
In both cases you may experience unintended changes, like a different annotation icon or text font, the fill color or line dashing have disappeared, line end symbols have changed their size or even have disappeared too, etc.
Cause
Annotation maintenance is handled differently by each PDF maintenance application. Some annotation types may not be supported, or not be supported fully or some details may be handled in a different way than in another application. There is no standard.
Almost always a PDF application also comes with its own icons (file attachments, sticky notes and stamps) and its own set of supported text fonts. For example:
(Py-) MuPDF only supports these 5 basic fonts for ‘FreeText’ annotations: Helvetica, Times-Roman, Courier, ZapfDingbats and Symbol – no italics / no bold variations. When changing a ‘FreeText’ annotation created by some other app, its font will probably not be recognized nor accepted and be replaced by Helvetica.
PyMuPDF supports all PDF text markers (highlight, underline, strikeout, squiggly), but these types cannot be updated with Adobe Acrobat Reader.
In most cases there also exists limited support for line dashing which causes existing dashes to be replaced by straight lines. For example:
- PyMuPDF fully supports all line dashing forms, while other viewers only accept a limited subset.
Solutions
Unfortunately there is not much you can do in most of these cases.
Stay with the same software for creating and changing an annotation.
When using PyMuPDF to change an “alien” annotation, try to avoid Annot.update(). The following methods can be used without it, so that the original appearance should be maintained:
Annot.set_rect() (location changes)
Annot.set_flags() (annotation behaviour)
Annot.set_info() (meta information, except changes to content)
Annot.set_popup() (create popup or change its rect)
Annot.set_optional_content()(add / remove reference to optional content information)Annot.update_file() (file attachment changes)
Misplaced Item Insertions on PDF Pages
Problem
You inserted an item (like an image, an annotation or some text) on an existing PDF page, but later you find it being placed at a different location than intended. For example an image should be inserted at the top, but it unexpectedly appears near the bottom of the page.
Cause
The creator of the PDF has established a non-standard page geometry without keeping it “local” (as they should!). Most commonly, the PDF standard point (0,0) at bottom-left has been changed to the top-left point. So top and bottom are reversed – causing your insertion to be misplaced.
The visible image of a PDF page is controlled by commands coded in a special mini-language. For an overview of this language consult “Operator Summary” on pp. 643 of the Adobe PDF References. These commands are stored in contents objects as strings (bytes in PyMuPDF).
There are commands in that language, which change the coordinate system of the page for all the following commands. In order to limit the scope of such commands local, they must be wrapped by the command pair q (“save graphics state”, or “stack”) and Q (“restore graphics state”, or “unstack”).
So the PDF creator did this:
stream1 0 0 -1 0 792 cm % <=== change of coordinate system:... % letter page, top / bottom reversed... % remains active beyond these linesendstream
where they should have done this:
streamq % put the following in a stack1 0 0 -1 0 792 cm % <=== scope of this is limited by Q command... % here, a different geometry existsQ % after this line, geometry of outer scope prevailsendstream
Note
In the mini-language’s syntax, spaces and line breaks are equally accepted token delimiters.
Multiple consecutive delimiters are treated as one.
Keywords “stream” and “endstream” are inserted automatically – not by the programmer.
Solutions
Since v1.16.0, there is the property Page.is_wrapped, which lets you check whether a page’s contents are wrapped in that string pair.
If it is False or if you want to be on the safe side, pick one of the following:
The easiest way: in your script, do a Page.clean_contents() before you do your first item insertion.
Pre-process your PDF with the MuPDF command line utility mutool clean -c … and work with its output file instead.
Directly wrap the page’s contents with the stacking commands before you do your first item insertion.
Solutions 1. and 2. use the same technical basis and do a lot more than what is required in this context: they also clean up other inconsistencies or redundancies that may exist, multiple /Contents objects will be concatenated into one, and much more.
Note
For incremental saves, solution 1. has an unpleasant implication: it will bloat the update delta, because it changes so many things and, in addition, stores the cleaned contents uncompressed. So, if you use Page.clean_contents() you should consider saving to a new file with (at least) garbage=3 and deflate=True.
Solution 3. is completely under your control and only does the minimum corrective action. There exists a handy low-level utility function which you can use for this. Suggested procedure:
Prepend the missing stacking command by executing fitz.TOOLS._insert_contents(page, b”qn”, False).
Append an unstacking command by executing fitz.TOOLS._insert_contents(page, b”nQ”, True).
Alternatively, just use
Page._wrap_contents(), which executes the previous two functions.
Note
If small incremental update deltas are a concern, this approach is the most effective. Other contents objects are not touched. The utility method creates two new PDF stream objects and inserts them before, resp. after the page’s other contents. We therefore recommend the following snippet to get this situation under control:
>>> if not page.is_wrapped:page.wrap_contents()>>> # start inserting text, images or annotations here
Missing or Unreadable Extracted Text
Fairly often, text extraction does not work text as you would expect: text may be missing at all, or may not appear in the reading sequence visible on your screen, or contain garbled characters (like a ? or a “TOFU” symbol), etc. This can be caused by a number of different problems.
Problem: no text is extracted
Your PDF viewer does display text, but you cannot select it with your cursor, and text extraction delivers nothing.
Cause
You may be looking at an image embedded in the PDF page (e.g. a scanned PDF).
The PDF creator used no font, but simulated text by painting it, using little lines and curves. E.g. a capital “D” could be painted by a line “|” and a left-open semi-circle, an “o” by an ellipse, and so on.
Solution
Use an OCR software like OCRmyPDF to insert a hidden text layer underneath the visible page. The resulting PDF should behave as expected.
Problem: unreadable text
Text extraction does not deliver the text in readable order, duplicates some text, or is otherwise garbled.
Cause
The single characters are redable as such (no “<?>” symbols), but the sequence in which the text is coded in the file deviates from the reading order. The motivation behind may be technical or protection of data against unwanted copies.
Many “<?>” symbols occur, indicating MuPDF could not interpret these characters. The font may indeed be unsupported by MuPDF, or the PDF creator may haved used a font that displays readable text, but on purpose obfuscates the originating corresponding unicode character.
Solution
Use layout preserving text extraction:
python -m fitz gettext file.pdf.If other text extraction tools also don’t work, then the only solution again is OCRing the page.
Low-Level Interfaces
Numerous methods are available to access and manipulate PDF files on a fairly low level. Admittedly, a clear distinction between “low level” and “normal” functionality is not always possible or subject to personal taste.
It also may happen, that functionality previously deemed low-level is later on assessed as being part of the normal interface. This has happened in v1.14.0 for the class Tools – you now find it as an item in the Classes chapter.
Anyway – it is a matter of documentation only: in which chapter of the documentation do you find what. Everything is available always and always via the same interface.
How to Iterate through the xref Table
A PDF’s xref table is a list of all objects defined in the file. This table may easily contain many thousand entries – the manual Adobe PDF References for example has 127’000 objects. Table entry “0” is reserved and must not be touched. The following script loops through the xref table and prints each object’s definition:
>>> xreflen = doc.xref_length() # length of objects table>>> for xref in range(1, xreflen): # skip item 0!print("")print("object %i (stream: %s)" % (xref, doc.is_stream(xref)))print(doc.xref_object(i, compressed=False))
This produces the following output:
object 1 (stream: False)<</ModDate (D:20170314122233-04'00')/PXCViewerInfo (PDF-XChange Viewer;2.5.312.1;Feb 9 2015;12:00:06;D:20170314122233-04'00')>>object 2 (stream: False)<</Type /Catalog/Pages 3 0 R>>object 3 (stream: False)<</Kids [ 4 0 R 5 0 R ]/Type /Pages/Count 2>>object 4 (stream: False)<</Type /Page/Annots [ 6 0 R ]/Parent 3 0 R/Contents 7 0 R/MediaBox [ 0 0 595 842 ]/Resources 8 0 R>>...object 7 (stream: True)<</Length 494/Filter /FlateDecode>>...
A PDF object definition is an ordinary ASCII string.
How to Handle Object Streams
Some object types contain additional data apart from their object definition. Examples are images, fonts, embedded files or commands describing the appearance of a page.
Objects of these types are called “stream objects”. PyMuPDF allows reading an object’s stream via method Document.xref_stream() with the object’s xref as an argument. It is also possible to write back a modified version of a stream using Document.update_stream().
Assume that the following snippet wants to read all streams of a PDF for whatever reason:
>>> xreflen = doc.xref_length() # number of objects in file>>> for xref in range(1, xreflen): # skip item 0!if stream := doc.xref_stream(xref):# do something with it (it is a bytes object or None)# e.g. just write it back:doc.update_stream(xref, stream)
Document.xref_stream() automatically returns a stream decompressed as a bytes object – and Document.update_stream() automatically compresses it if beneficial.
How to Handle Page Contents
A PDF page can have zero or multiple contents objects. These are stream objects describing what appears where and how on a page (like text and images). They are written in a special mini-language described e.g. in chapter “APPENDIX A - Operator Summary” on page 643 of the Adobe PDF References.
Every PDF reader application must be able to interpret the contents syntax to reproduce the intended appearance of the page.
If multiple contents objects are provided, they must be interpreted in the specified sequence in exactly the same way as if they were provided as a concatenation of the several.
There are good technical arguments for having multiple contents objects:
It is a lot easier and faster to just add new contents objects than maintaining a single big one (which entails reading, decompressing, modifying, recompressing, and rewriting it for each change).
When working with incremental updates, a modified big contents object will bloat the update delta and can thus easily negate the efficiency of incremental saves.
For example, PyMuPDF adds new, small contents objects in methods Page.insert_image(), Page.show_pdf_page() and the Shape methods.
However, there are also situations when a single contents object is beneficial: it is easier to interpret and better compressible than multiple smaller ones.
Here are two ways of combining multiple contents of a page:
>>> # method 1: use the MuPDF clean function>>> page.clean_contents() # cleans and combines multiple Contents>>> xref = page.get_contents()[0] # only one /Contents now!>>> cont = doc.xref_stream(xref)>>> # this has also reformatted the PDF commands>>> # method 2: extract concatenated contents>>> cont = page.read_contents()>>> # the /Contents source itself is unmodified
The clean function Page.clean_contents() does a lot more than just glueing contents objects: it also corrects and optimizes the PDF operator syntax of the page and removes any inconsistencies with the page’s object definition.
How to Access the PDF Catalog
This is a central (“root”) object of a PDF. It serves as a starting point to reach important other objects and it also contains some global options for the PDF:
>>> import fitz>>> doc=fitz.open("PyMuPDF.pdf")>>> cat = doc.pdf_catalog() # get xref of the /Catalog>>> print(doc.xref_object(cat)) # print object definition<</Type/Catalog % object type/Pages 3593 0 R % points to page tree/OpenAction 225 0 R % action to perform on open/Names 3832 0 R % points to global names tree/PageMode /UseOutlines % initially show the TOC/PageLabels<</Nums[0<</S/D>>2<</S/r>>8<</S/D>>]>> % labels given to pages/Outlines 3835 0 R % points to outline tree>>
Note
Indentation, line breaks and comments are inserted here for clarification purposes only and will not normally appear. For more information on the PDF catalog see section 7.7.2 on page 71 of the Adobe PDF References.
How to Access the PDF File Trailer
The trailer of a PDF file is a dictionary located towards the end of the file. It contains special objects, and pointers to important other information. See Adobe PDF References p. 42. Here is an overview:
Key | Type | Value |
|---|---|---|
Size | int | Number of entries in the cross-reference table + 1. |
Prev | int | Offset to previous xref section (indicates incremental updates). |
Root | dictionary | (indirect) Pointer to the catalog. See previous section. |
Encrypt | dictionary | Pointer to encryption object (encrypted files only). |
Info | dictionary | (indirect) Pointer to information (metadata). |
ID | array | File identifier consisting of two byte strings. |
XRefStm | int | Offset of a cross-reference stream. See Adobe PDF References p. 49. |
Access this information via PyMuPDF with Document.pdf_trailer() or, equivalently, via Document.xref_object() using -1 instead of a valid xref number.
>>> import fitz>>> doc=fitz.open("PyMuPDF.pdf")>>> print(doc.xref_object(-1)) # or: print(doc.pdf_trailer())<</Type /XRef/Index [ 0 8263 ]/Size 8263/W [ 1 3 1 ]/Root 8260 0 R/Info 8261 0 R/ID [ <4339B9CEE46C2CD28A79EBDDD67CC9B3> <4339B9CEE46C2CD28A79EBDDD67CC9B3> ]/Length 19883/Filter /FlateDecode>>>>>
How to Access XML Metadata
A PDF may contain XML metadata in addition to the standard metadata format. In fact, most PDF viewer or modification software adds this type of information when saving the PDF (Adobe, Nitro PDF, PDF-XChange, etc.).
PyMuPDF has no way to interpret or change this information directly, because it contains no XML features. XML metadata is however stored as a stream object, so it can be read, modified with appropriate software and written back.
>>> xmlmetadata = doc.get_xml_metadata()>>> print(xmlmetadata)<?xpacket begin="\ufeff" id="W5M0MpCehiHzreSzNTczkc9d"?><x:xmpmeta xmlns:x="adobe:ns:meta/" x:xmptk="3.1-702"><rdf:RDF xmlns:rdf="http://www.w3.org/1999/02/22-rdf-syntax-ns#">...omitted data...<?xpacket end="w"?>
Using some XML package, the XML data can be interpreted and / or modified and then stored back. The following also works, if the PDF previously had no XML metadata:
>>> # write back modified XML metadata:>>> doc.set_xml_metadata(xmlmetadata)>>>>>> # XML metadata can be deleted like this:>>> doc.del_xml_metadata()
How to Extend PDF Metadata
Attribute Document.metadata is designed so it works for all supported document types in the same way: it is a Python dictionary with a fixed set of key-value pairs. Correspondingly, Document.set_metadata() only accepts standard keys.
However, PDFs may contain items not accessible like this. Also, there may be reasons to store additional information, like copyrights. Here is a way to handle arbitrary metadata items by using PyMuPDF low-level functions.
As an example, look at this standard metadata output of some PDF:
# ---------------------# standard metadata# ---------------------pprint(doc.metadata){'author': 'PRINCE','creationDate': "D:2010102417034406'-30'",'creator': 'PrimoPDF http://www.primopdf.com/','encryption': None,'format': 'PDF 1.4','keywords': '','modDate': "D:20200725062431-04'00'",'producer': 'macOS Version 10.15.6 (Build 19G71a) Quartz PDFContext, ''AppendMode 1.1','subject': '','title': 'Full page fax print','trapped': ''}
Use the following code to see all items stored the metadata object:
# ----------------------------------# metadata including private items# ----------------------------------metadata = {} # make my own metadata dictwhat, value = doc.xref_get_key(-1, "Info") # /Info key in the trailerif what != "xref":pass # PDF has no metadataelse:xref = int(value.replace("0 R", "")) # extract the metadata xreffor key in doc.xref_get_keys(xref):metadata[key] = doc.xref_get_key(xref, key)[1]pprint(metadata){'Author': 'PRINCE','CreationDate': "D:2010102417034406'-30'",'Creator': 'PrimoPDF http://www.primopdf.com/','ModDate': "D:20200725062431-04'00'",'PXCViewerInfo': 'PDF-XChange Viewer;2.5.312.1;Feb 9 '"2015;12:00:06;D:20200725062431-04'00'",'Producer': 'macOS Version 10.15.6 (Build 19G71a) Quartz PDFContext, ''AppendMode 1.1','Title': 'Full page fax print'}# ---------------------------------------------------------------# note the additional 'PXCViewerInfo' key - ignored in standard!# ---------------------------------------------------------------
Vice cersa, you can also store private metadata items in a PDF. It is your responsibility making sure, that these items do conform to PDF specifications - especially they must be (unicode) strings. Consult section 14.3 (p. 548) of the Adobe PDF References for details and caveats:
what, value = doc.xref_get_key(-1, "Info") # /Info key in the trailerif what != "xref":raise ValueError("PDF has no metadata")xref = int(value.replace("0 R", "")) # extract the metadata xref# add some private informationdoc.xref_set_key(xref, "mykey", fitz.get_pdf_str("北京 is Beijing"))## after executing the previous code snippet, we will see this:pprint(metadata){'Author': 'PRINCE','CreationDate': "D:2010102417034406'-30'",'Creator': 'PrimoPDF http://www.primopdf.com/','ModDate': "D:20200725062431-04'00'",'PXCViewerInfo': 'PDF-XChange Viewer;2.5.312.1;Feb 9 '"2015;12:00:06;D:20200725062431-04'00'",'Producer': 'macOS Version 10.15.6 (Build 19G71a) Quartz PDFContext, ''AppendMode 1.1','Title': 'Full page fax print','mykey': '北京 is Beijing'}
To delete selected keys, use doc.xref_set_key(xref, "mykey", "null"). As explained in the next section, string “null” is the PDF equivalent to Python’s None. A key with that value will be treated like being not specified – and physically removed in garbage collections.
How to Read and Update PDF Objects
There also exist granular, elegant ways to access and manipulate selected PDF dictionary keys.
Document.xref_get_keys() returns the PDF keys of the object at xref:
In [1]: import fitzIn [2]: doc = fitz.open("pymupdf.pdf")In [3]: page = doc[0]In [4]: from pprint import pprintIn [5]: pprint(doc.xref_get_keys(page.xref))('Type', 'Contents', 'Resources', 'MediaBox', 'Parent')
Compare with the full object definition:
In [6]: print(doc.xref_object(page.xref))<</Type /Page/Contents 1297 0 R/Resources 1296 0 R/MediaBox [ 0 0 612 792 ]/Parent 1301 0 R>>
Single keys can also be accessed directly via Document.xref_get_key(). The value always is a string together with type information, that helps interpreting it:
In [7]: doc.xref_get_key(page.xref, "MediaBox")Out[7]: ('array', '[0 0 612 792]')
Here is a full listing of the above page keys:
In [9]: for key in doc.xref_get_keys(page.xref):...: print("%s = %s" % (key, doc.xref_get_key(page.xref, key)))...:Type = ('name', '/Page')Contents = ('xref', '1297 0 R')Resources = ('xref', '1296 0 R')MediaBox = ('array', '[0 0 612 792]')Parent = ('xref', '1301 0 R')
An undefined key inquiry returns
('null', 'null')– PDF object typenullcorresponds toNonein Python. Similar for the booleanstrueandfalse.Let us add a new key to the page definition that sets its rotation to 90 degrees (you are aware that there actually exists Page.set_rotation() for this?):
In [11]: doc.xref_get_key(page.xref, "Rotate") # no rotation set:Out[11]: ('null', 'null')In [12]: doc.xref_set_key(page.xref, "Rotate", "90") # insert a new keyIn [13]: print(doc.xref_object(page.xref)) # confirm success<</Type /Page/Contents 1297 0 R/Resources 1296 0 R/MediaBox [ 0 0 612 792 ]/Parent 1301 0 R/Rotate 90>>
This method can also be used to remove a key from the xref dictionary by setting its value to
null: The following will remove the rotation specification from the page:doc.xref_set_key(page.xref, "Rotate", "null"). Similarly, to remove all links, annotations and fields from a page, usedoc.xref_set_key(page.xref, "Annots", "null"). BecauseAnnotsby definition is an array, setting en empty array with the statementdoc.xref_set_key(page.xref, "Annots", "[]")would do the same job in this case.PDF dictionaries can be hierarchically nested. In the following page object definition both,
FontandXObjectare subdictionaries ofResources:In [15]: print(doc.xref_object(page.xref))<</Type /Page/Contents 1297 0 R/Resources <</XObject <</Im1 1291 0 R>>/Font <</F39 1299 0 R/F40 1300 0 R>>>>/MediaBox [ 0 0 612 792 ]/Parent 1301 0 R/Rotate 90>>
The above situation is supported by methods Document.xref_set_key() and Document.xref_get_key(): use a path-like notation to point at the required key. For example, to retrieve the value of key
Im1above, specify the complete chain of dictionaries “above” it in the key argument:"Resources/XObject/Im1":In [16]: doc.xref_get_key(page.xref, "Resources/XObject/Im1")Out[16]: ('xref', '1291 0 R')
The path notation can also be used to directly set a value: use the following to let
Im1point to a different object:In [17]: doc.xref_set_key(page.xref, "Resources/XObject/Im1", "9999 0 R")In [18]: print(doc.xref_object(page.xref)) # confirm success:<</Type /Page/Contents 1297 0 R/Resources <</XObject <</Im1 9999 0 R>>/Font <</F39 1299 0 R/F40 1300 0 R>>>>/MediaBox [ 0 0 612 792 ]/Parent 1301 0 R/Rotate 90>>
Be aware, that no semantic checks whatsoever will take place here: if the PDF has no xref 9999, it won’t be detected at this point.
If a key does not exist, it will be created by setting its value. Moreover, if any intermediate keys do not exist either, they will also be created as necessary. The following creates an array
Dseveral levels below the existing dictionaryA. Intermediate dictionariesBandCare automatically created:In [5]: print(doc.xref_object(xref)) # some existing PDF object:<</A <<>>>>In [6]: # the following will create 'B', 'C' and 'D'In [7]: doc.xref_set_key(xref, "A/B/C/D", "[1 2 3 4]")In [8]: print(doc.xref_object(xref)) # check out what happened:<</A <</B <</C <</D [ 1 2 3 4 ]>>>>>>>>
When setting key values, basic PDF syntax checking will be done by MuPDF. For example, new keys can only be created below a dictionary. The following tries to create some new string item
Ebelow the previously created arrayD:In [9]: # 'D' is an array, no dictionary!In [10]: doc.xref_set_key(xref, "A/B/C/D/E", "(hello)")mupdf: not a dict (array)--- ... ---RuntimeError: not a dict (array)
It is also not possible, to create a key if some higher level key is an “indirect” object, i.e. an xref. In other words, xrefs can only be modified directly and not implicitely via other objects referencing them:
In [13]: # the following object points to an xrefIn [14]: print(doc.xref_object(4))<</E 3 0 R>>In [15]: # 'E' is an indirect object and cannot be modified here!In [16]: doc.xref_set_key(4, "E/F", "90")mupdf: path to 'F' has indirects--- ... ---RuntimeError: path to 'F' has indirects
Caution
These are expert functions! There are no validations as to whether valid PDF objects, xrefs, etc. are specified. As with other low-level methods there exists the risk to render the PDF, or parts of it unusable.
Journalling
Starting with version 1.19.0, journalling is possible when updating PDF documents.
Journalling is a logging mechanism which permits either reverting or re-applying changes to a PDF. Similar to LUWs “Logical Units of Work” in modern database systems, one can group a set of updates into an “operation”. In MuPDF journalling, an operation plays the role of a LUW.
Note
In contrast to LUW implementations found in database systems, MuPDF journalling happens on a per document level. There is no support for simultaneous updates across multiple PDFs: one would have to establish one’s own logic here.
Journalling must be enabled via a document method. Journalling is possible for existing or new documents. Journalling can be disabled only by closing the file.
Once enabled, every change must happen inside an operation – otherwise an exception is raised. An operation is started and stopped via document methods. Updates happening between these two calls form an LUW and can thus collectively be rolled back or re-applied, or, in MuPDF terminology “undone” resp. “redone”.
At any point, the journalling status can be queried: whether journalling is active, how many operations have been recorded, whether “undo” or “redo” is possible, the current position inside the journal, etc.
The journal can be saved to or loaded from a file. These are document methods.
When loading a journal file, compatibility with the document is checked and journalling is automatically enabled upon success.
For an exising PDF being journalled, a special new save method is available: Document.save_snapshot(). This performs a special incremental save that includes all journalled updates so far. If its journal is saved at the same time (immediately after the document snapshot), then document and journal are in sync and can lateron be used together to undo or redo operations or to continue journalled updates – just as if there had been no interruption.
The snapshot PDF is a valid PDF in every aspect and fully usable. If the document is however changed in any way without using its journal file, then a desynchronization will take place and the journal is rendered unusable.
Snapshot files are structured like incremental updates. Nevertheless, the internal journalling logic requires, that saving must happen to a new file. So the user should develop a file naming convention to support recognizable relationships between an original PDF, like
original.pdfand its snapshot sets, likeoriginal-snap1.pdf/original-snap1.log,original-snap2.pdf/original-snap2.log, etc.
Example Session 1
Description:
Make a new PDF and enable journalling. Then add a page and some text lines – each as a separate operation.
Navigate within the journal, undoing and redoing these updates and diplaying status and file results:
>>> import fitz>>> doc=fitz.open()>>> doc.journal_enable()>>> # try update without an operation:>>> page = doc.new_page()mupdf: No journalling operation started... omitted linesRuntimeError: No journalling operation started>>> doc.journal_start_op("op1")>>> page = doc.new_page()>>> doc.journal_stop_op()>>> doc.journal_start_op("op2")>>> page.insert_text((100,100), "Line 1")>>> doc.journal_stop_op()>>> doc.journal_start_op("op3")>>> page.insert_text((100,120), "Line 2")>>> doc.journal_stop_op()>>> doc.journal_start_op("op4")>>> page.insert_text((100,140), "Line 3")>>> doc.journal_stop_op()>>> # show position in journal>>> doc.journal_position()(4, 4)>>> # 4 operations recorded - positioned at bottom>>> # what can we do?>>> doc.journal_can_do(){'undo': True, 'redo': False}>>> # currently only undos are possible. Print page content:>>> print(page.get_text())Line 1Line 2Line 3>>> # undo last insert:>>> doc.journal_undo()>>> # show combined status again:>>> doc.journal_position();doc.journal_can_do()(3, 4){'undo': True, 'redo': True}>>> print(page.get_text())Line 1Line 2>>> # our position is now second to last>>> # last text insertion was reverted>>> # but we can redo / move forward as well:>>> doc.journal_redo()>>> # our combined status:>>> doc.journal_position();doc.journal_can_do()(4, 4){'undo': True, 'redo': False}>>> print(page.get_text())Line 1Line 2Line 3>>> # line 3 has appeared again!
Example Session 2
Description:
Similar to previous, but after undoing some operations, we now add a different update. This will cause:
permanent removal of the undone journal entries
the new update operation will become the new last entry.
>>> doc=fitz.open()>>> doc.journal_enable()>>> doc.journal_start_op("Page insert")>>> page=doc.new_page()>>> doc.journal_stop_op()>>> for i in range(5):doc.journal_start_op("insert-%i" % i)page.insert_text((100, 100 + 20*i), "text line %i" %i)doc.journal_stop_op()
>>> # combined status info:>>> doc.journal_position();doc.journal_can_do()(6, 6){'undo': True, 'redo': False}
>>> for i in range(3): # revert last three operationsdoc.journal_undo()>>> doc.journal_position();doc.journal_can_do()(3, 6){'undo': True, 'redo': True}
>>> # now do a different update:>>> doc.journal_start_op("Draw some line")>>> page.draw_line((100,150), (300,150))Point(300.0, 150.0)>>> doc.journal_stop_op()>>> doc.journal_position();doc.journal_can_do()(4, 4){'undo': True, 'redo': False}
>>> # this has changed the journal:>>> # previous last 3 text line operations were removed, and>>> # we have only 4 operations: drawing the line is the new last one