Hello, World!
This section will show you how to build and run your first Rust and WebAssemblyprogram: a Web page that alerts "Hello, World!"
Make sure you have followed the setup instructions before beginning.
Clone the Project Template
The project template comes pre-configured with sane defaults, so you can quicklybuild, integrate, and package your code for the Web.
Clone the project template with this command:
cargo generate --git https://github.com/rustwasm/wasm-pack-template
This should prompt you for the new project's name. We will use"wasm-game-of-life".
wasm-game-of-life
What's Inside
Enter the new wasm-game-of-life project
cd wasm-game-of-life
and let's take a look at its contents:
wasm-game-of-life/├── Cargo.toml├── LICENSE_APACHE├── LICENSE_MIT├── README.md└── src├── lib.rs└── utils.rs
Let's take a look at a couple of these files in detail.
wasm-game-of-life/Cargo.toml
The Cargo.toml file specifies dependencies and metadata for cargo, Rust'spackage manager and build tool. This one comes pre-configured with awasm-bindgen dependency, a few optional dependencies we will dig into later,and the crate-type properly initialized for generating .wasm libraries.
wasm-game-of-life/src/lib.rs
The src/lib.rs file is the root of the Rust crate that we are compiling toWebAssembly. It uses wasm-bindgen to interface with JavaScript. It imports thewindow.alert JavaScript function, and exports the greet Rust function, whichalerts a greeting message.
# #![allow(unused_variables)]#fn main() {mod utils;use wasm_bindgen::prelude::*;// When the `wee_alloc` feature is enabled, use `wee_alloc` as the global// allocator.#[cfg(feature = "wee_alloc")]#[global_allocator]static ALLOC: wee_alloc::WeeAlloc = wee_alloc::WeeAlloc::INIT;#[wasm_bindgen]extern {fn alert(s: &str);}#[wasm_bindgen]pub fn greet() {alert("Hello, wasm-game-of-life!");}#}
wasm-game-of-life/src/utils.rs
The src/utils.rs module provides common utilities to make working with Rustcompiled to WebAssembly easier. We will take a look at some of these utilitiesin more detail later in the tutorial, such as when we look at debugging our wasmcode, but we can ignore this file for now.
Build the Project
We use wasm-pack to orchestrate the following build steps:
- Ensure that we have Rust 1.30 or newer and the
wasm32-unknown-unknowntarget installed viarustup, - Compile our Rust sources into a WebAssembly
.wasmbinary viacargo, - Use
wasm-bindgento generate the JavaScript API for using our Rust-generatedWebAssembly.
To do all of that, run this command inside the project directory:
wasm-pack build
When the build has completed, we can find its artifacts in the pkg directory,and it should have these contents:
pkg/├── package.json├── README.md├── wasm_game_of_life_bg.wasm├── wasm_game_of_life.d.ts└── wasm_game_of_life.js
The README.md file is copied from the main project, but the others arecompletely new.
wasm-game-of-life/pkg/wasm_game_of_life_bg.wasm
The .wasm file is the WebAssembly binary that is generated by the Rustcompiler from our Rust sources. It contains the compiled-to-wasm versions of allof our Rust functions and data. For example, it has an exported "greet"function.
wasm-game-of-life/pkg/wasm_game_of_life.js
The .js file is generated by wasm-bindgen and contains JavaScript glue forimporting DOM and JavaScript functions into Rust and exposing a nice API to theWebAssembly functions to JavaScript. For example, there is a JavaScript greetfunction that wraps the greet function exported from the WebAssemblymodule. Right now, this glue isn't doing much, but when we start passing moreinteresting values back and forth between wasm and JavaScript, it will helpshepherd those values across the boundary.
import * as wasm from './wasm_game_of_life_bg';// ...export function greet() {return wasm.greet();}
wasm-game-of-life/pkg/wasm_game_of_life.d.ts
The .d.ts file contains TypeScript type declarations for the JavaScriptglue. If you are using TypeScript, you can have your calls into WebAssemblyfunctions type checked, and your IDE can provide autocompletions andsuggestions! If you aren't using TypeScript, you can safely ignore this file.
export function greet(): void;
wasm-game-of-life/pkg/package.json
The package.json file contains metadata about the generated JavaScript andWebAssembly package. This is used by npm and JavaScript bundlersto determine dependencies across packages, package names, versions, and a bunchof other stuff. It helps us integrate with JavaScript tooling and allows us topublish our package to npm.
{"name": "wasm-game-of-life","collaborators": ["Your Name <your.email@example.com>"],"description": null,"version": "0.1.0","license": null,"repository": null,"files": ["wasm_game_of_life_bg.wasm","wasm_game_of_life.d.ts"],"main": "wasm_game_of_life.js","types": "wasm_game_of_life.d.ts"}
Putting it into a Web Page
To take our wasm-game-of-life package and use it in a Web page, we use thecreate-wasm-app JavaScript project template.
Run this command within the wasm-game-of-life directory:
npm init wasm-app www
Here's what our new wasm-game-of-life/www subdirectory contains:
wasm-game-of-life/www/├── bootstrap.js├── index.html├── index.js├── LICENSE-APACHE├── LICENSE-MIT├── package.json├── README.md└── webpack.config.js
Once again, let's take a closer look at some of these files.
wasm-game-of-life/www/package.json
This package.json comes pre-configured with webpack and webpack-dev-serverdependencies, as well as a dependency on hello-wasm-pack, which is a versionof the initial wasm-pack-template package that has been published to npm.
wasm-game-of-life/www/webpack.config.js
This file configures webpack and its local development server. It comespre-configured, and you shouldn't have to tweak this at all to get webpack andits local development server working.
wasm-game-of-life/www/index.html
This is the root HTML file for the Web page. It doesn't do much other thanload bootstrap.js, which is a very thin wrapper around index.js.
<!DOCTYPE html><html><head><meta charset="utf-8"><title>Hello wasm-pack!</title></head><body><script src="./bootstrap.js"></script></body></html>
wasm-game-of-life/www/index.js
The index.js is the main entry point for our Web page's JavaScript. It importsthe hello-wasm-pack npm package, which contains the defaultwasm-pack-template's compiled WebAssembly and JavaScript glue, then it callshello-wasm-pack's greet function.
import * as wasm from "hello-wasm-pack";wasm.greet();
Install the dependencies
First, ensure that the local development server and its dependencies areinstalled by running npm install within the wasm-game-of-life/wwwsubdirectory:
npm install
This command only needs to be run once, and will install the webpackJavaScript bundler and its development server.
Note that
webpackis not required for working with Rust and WebAssembly, it is just the bundler and development server we've chosen for convenience here. Parcel and Rollup should also support importing WebAssembly as ECMAScript modules. You can also use Rust and WebAssembly without a bundler if you prefer!
Using our Local wasm-game-of-life Package in www
Rather than use the hello-wasm-pack package from npm, we want to use our localwasm-game-of-life package instead. This will allow us to incrementally developour Game of Life program.
Open up wasm-game-of-life/www/package.json and next to "devDependencies", add the "dependencies" field,including a "wasm-game-of-life": "file:../pkg" entry:
{// ..."dependencies": { // Add this three lines block!"wasm-game-of-life": "file:../pkg"},"devDependencies": {//...}}
Next, modify wasm-game-of-life/www/index.js to import wasm-game-of-lifeinstead of the hello-wasm-pack package:
import * as wasm from "wasm-game-of-life";wasm.greet();
Since we declared a new dependency, we need to install it:
npm install
Our Web page is now ready to be served locally!
Serving Locally
Next, open a new terminal for the development server. Running the server in anew terminal lets us leave it running in the background, and doesn't block usfrom running other commands in the meantime. In the new terminal, run thiscommand from within the wasm-game-of-life/www directory:
npm run start
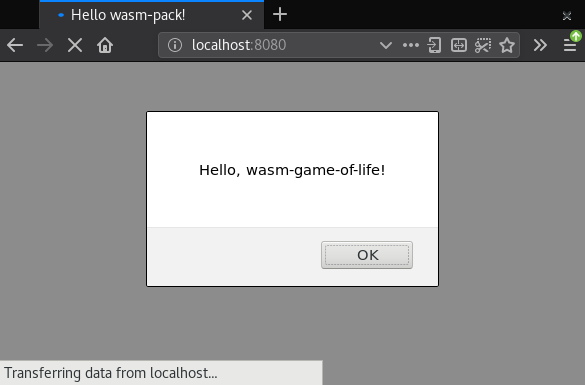
Navigate your Web browser to http://localhost:8080/and you should be greeted with an alert message:
Anytime you make changes and want them reflected onhttp://localhost:8080/, just re-run the wasm-pack build command within the wasm-game-of-life directory.
Exercises
- Modify the
greetfunction inwasm-game-of-life/src/lib.rsto take aname: &strparameter that customizes the alerted message, and pass your name to thegreetfunction from insidewasm-game-of-life/www/index.js. Rebuild the.wasmbinary withwasm-pack build, then refreshhttp://localhost:8080/ in your Web browser and youshould see a customized greeting!
Answer
New version of the greet function in wasm-game-of-life/src/lib.rs:
# #![allow(unused_variables)]#fn main() {#[wasm_bindgen]pub fn greet(name: &str) {alert(&format!("Hello, {}!", name));}#}
New invocation of greet in wasm-game-of-life/www/index.js:
wasm.greet("Your Name");