工作流程 & 范例
Simple Drivers can be configured from the pop-over that appears when adding a new Driver. When adding multiple Drivers or for more advanced configurations, it is useful to have open the Drivers Editor.
变换驱动器
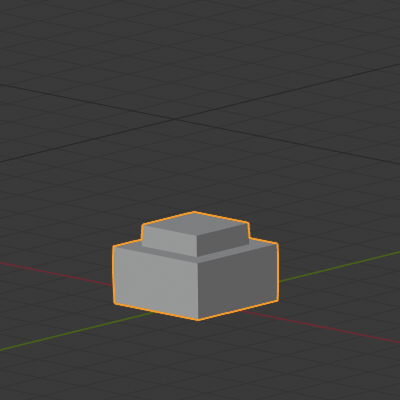
Control a property with an object’s transform. In this example, the Y rotation of Object 2 will be driven by the X position of Object 1. Starting from a simple setup with two objects:
通过上下文菜单(右键菜单)或使用快捷键 Ctrl-D ,在第二个物体的Y轴旋转属性上添加驱动器。

打开 驱动器编辑器 ,然后在左侧通道里选择 Y欧拉旋转 。
按下 N 打开侧栏,选择 驱动器 选项卡。
驱动器类型选择平均化值,选择 变换通道 ,在 物体一栏里选择第一个物体。
试着移动物体1,并注意它是如何影响物体2的。
脚本表达式——轨道点
Orbit an object’s position around a point with a custom Scripted Expression. The object’s position will change when scrubbing the timeline. Using trigonometry, circular motion can be defined in 2D using the sine and cosine functions. (See Unit Circle.) In this example, the current frame is used as the variable that induces the motion. frame is a Simple Expression that corresponds to bpy.context.scene.frame_current.
在物体X轴位置属性上添加驱动器。
将驱动器 类型 设置为 脚本表达式 。
添加表达式
0 + (sin(frame / 8) * 4):frame/8: 是但前帧数除以8,除8是为了减速。(sin( )*4): 将结果sin(frame/8)乘以4得到一个更大的圆形。0 +: 控制偏移量。
用同样的方法,在物体Y轴位置属性上添加驱动器,脚本公式为
0 + (sin(frame / 8) * 4)。移动时间轴观察物体位移变化,尝试改变变量来影响轨道大小和中心。
自定义函数 - 数值平方
Create a custom function to get the square of a value (i.e. value2). Adding the function to the Driver Namespace allows it to be used from driver expressions. The Driver Namespace has a list of built-in functions for use in driver expressions, as well as constants such as π and e. These can be inspected via the Python Console:
>>> bpy.app.driver_namespace[' <tab>acos']acosh']asin']asinh']atan']...
要向 [驱动器命名空间 添加新函数,需要实现该函数本身,然后添加到 bpy.app.driver_namespace。
将以下内容添加到 Blender 内的文本编辑器中,然后按下 运行脚本。:
import bpydef square(val):"""Returns the square of the given value"""return val * val# Add function to driver_namespace.bpy.app.driver_namespace['square'] = square
添加带有 脚本表达式 的驱动器,如
square(frame)。观察滑动时间线时的效果。
There are more custom function examples available in Blender’s Text Editor Templates ‣ Python ‣ Driver Functions. Since Simple Expressions cannot access custom functions, using them only makes sense for complex computations.
形态键驱动器
改进网络变形
修复在使用骨骼和绘制权重时发生的交叉点问题,特别是在关节处。形态键可以调整和改进物体,例如形成肌肉。在该示例中,形态键用于改善手臂弯曲时肘部的变形。
左:网络变形未修正。 右:应用形态键修正
安装
添加一个物体(此例中,圆柱体进行了环切)。
添加骨骼链。
在物体上添加权重。
(注意:先选择物体,按住shift,再选择骨骼,按下 Ctrl-P ,选择自动权重。)
尝试改变骨骼姿态并观察关节处的形变。要修复看起来不满的交叉点或角度,可以将 形态键 与姿态关联。
形态键
调整骨骼姿态,把骨骼调整带你需要弯曲的最大值。
选择物体,添加形态键,除 Basis 外再添加一个形态 Key 1 。. Properties ‣ Mesh tab ‣ Shape Keys
要在骨架变形基础上创作形态键,请启用骨架修改器中的 编辑模式显示 和 编辑模式。属性 ‣ 修改器选项卡 ‣ 骨架修改器 ‣ 标题栏
进入编辑模式,然后在属性面板中选择新的形态键“Key1”,根据需要调整顶点。选择 Basis 键可在原始形状和编辑之后的形状之间切换。(注意:只对需要调整的地方进行编辑,而不是对原始网络或其它形态键进行编辑。)
当你调整好形状后,要配置一个驱动器,以便可以平滑的改变形状。
驱动器
在形态键的值上添加驱动器。
打开驱动器编辑器并选择驱动通道。
方法1 — 直接映射到骨骼旋转值
一种简单的方法是将骨骼的旋转属性直接与形态键 值 对应。缺点是依赖单一数值,不足以精确的控制形态键的激活条件。
In the Drivers tab, select the Averaged Value of the rotation of the bone you are posing.
Understand the rotation axis that you are interested in by enabling axes display in the armature or by observing the bone’s transform values in the Properties.
选择旋转通道,间隔设置为自身空间,即骨骼相对于父骨骼的旋转值。
选择曲线控制柄并拖动它或者在 函数曲线 选项卡中输入数值。Y轴表示形态键的 值 ,范围是0.0到1.0。X轴通常是帧数,但在此驱动器中它表示以弧度制的旋转值。曲线中有两个以上的点,使用曲线视图中的控制柄调整过度 (G 抓取)。
要验证驱动器是否正确运行,请取消选择选项以仅显示所选物体的驱动器。这样,你可以摆好骨架,并留意驱动器。
方法二:与目标骨骼的旋转差值
这种方法需要额外的 目标 或 矫正 骨骼,但它能更好地表示骨骼在3D空间中的条件。
在骨骼编辑模式中,从骨骼1中挤出新骨骼,在骨骼2形态键值为1的位置。目标骨骼通常有约定的命名方法,例如“TAR-”(目标)或“COR-”(矫正)。
In the Drivers tab, select the Averaged Value of the rotational difference between the bone you are rotating and the target bone. A rotational difference is the minimum angle between two objects in World Space. It is therefore important that the bones have the same root, so that the only thing affecting the angle between the bones is the rotation of one of them. When the deformation bone (Bone 2) reaches the target rotation (TAR-Bone 2) the rotational difference will be 0°.
手动调整函数曲线,使当旋转差(X轴)为0°时,形态键值(Y轴)为1.0。当臂伸直时,形态键值为0.0,此时旋转差值约为90°或更大(以弧度制表示)。
请参照方法1中有关如何调整控制柄并确认功能正确的步骤。调整骨骼查看设置范围是否正常。
链式相对形态键
连续激活不同的形态键。在此例中,移动单个骨骼将激活第一个 Key 1 后激活 Key 2 。另参见 相对或绝对形态键 。
形态键
除了 Basis 之外,还为物体添加了两个形态键。
 Basis. |  键1:顶面向上移动1米. | 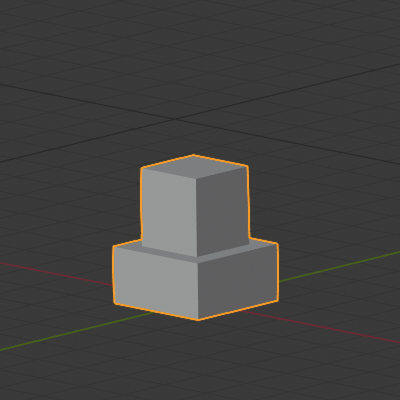 键2:内顶面向上移动1米。 |
驱动程序
添加单段骨骼用来控制形态键。目的是骨骼向上移动的过程中连续激活形态键。
如上图所示,当骨骼处于一半位置时, Key 1 和 Key 2 都会产生影响。这是一个偏好问题,如果 Key 1 在达到最大值之前, Key 2 便被激活,那这俩还是多少有些重叠的部分。此例是无缝混合。
对于有重叠的无缝混合,当骨骼在低位置时, Key 1 的值为0.0,随着骨骼升高到中点高度,线性增加至1.0。 Key 2 在骨骼到达中点高度之前的值为0.0,然后与 Key 1 相同的速率增加,直到骨骼到达最高点,其值变为1.0.
在 Key 1 和 Key 2 上添加驱动器。在“ 驱动器 ”选项卡中,类型选择“平均化值”,驱动器变量类型为”变换通道“,物体为骨骼,类型Z位置。
Determine the range of the bone’s motion in the World Z axis by moving it up so that it is aligned with the top of the mesh when both keys are active. Here we will use [0.0, 2.5].
配置驱动器,形态键(Y轴)与骨骼期望的高度(X轴)对应。
驱动函数应该是线性的,因此,它们可以脚本表达式来定义 \(y = a + bx\) ,其中 \(b\) 是斜率, :math:`` 是截距。
在 修改器 选项卡中,为两个驱动器添加 生成器 修改器。
Play with the values of \(a\) and \(b\) so that the curves go from [0.0, 1.0] in the Y axis and from [0.0, 2.5] in the X axis. The curves should overlap in the mid area of the X axis and they should have the same slope (\(b\)).
得出公式 Key 1 :: \(y = 0.0 + 0.6x\) 和 Key 2: \(y = -0.5 + 0.6x\) 。
Note that the functions go outside the range [0.0, 1.0] for the shape keys’ Value, but that has no effect because Value is clamped in a Range in the Shape Keys panel.