配置外设
显示器
推荐使用全高清或更高配置的显示器。支持多显示器,可以配置工作区来扩展到多个显示器。

Blender多显示器支持示例。
输入设备
Blender支持各种类型的输入设备:
键盘 (推荐: 有数字键区的键盘,最好是英文布局)
鼠标 (推荐: 带滚轮的三键鼠标)
NDOF 设备 (也称作 3D鼠标)
绘图板
Note
If you don’t have a middle mouse button or numpad, you can emulate these in the Input Preferences.
鼠标
鼠标按键模拟
如果没有三键鼠标,你需要在 用户设置 勾选模拟三键鼠标的选项。
下面的表格列出了组合键的模拟用法:
三键鼠标 | LMB | MMB | RMB |
|---|---|---|---|
两键鼠标 | LMB | Alt-LMB | RMB |
键盘
数字键盘模拟
If you do not have a numpad on the side of your keyboard, you may want to emulate one. You can then use the number row at the top of the keyboard instead, but will no longer have access to these keys’ original functions (such as switching between vertex/edge/face selection in Edit Mode).
See also
更多关于 数字键区模拟 见 用户设置。
非英文键盘
If you use a keyboard with a non-English layout, you may still benefit from switching to the UK or US layout while working with Blender.
Note
You can also change the keymap from the Preferences. However, this manual assumes you are using the default keymap.
绘图板
因为数位板有笔这个元素,所以使用它可以用更为传统的方式控制鼠标指针。这为习惯于涂绘的艺术工作者提供了更为相近的体验,而且数位板还能提供诸如压感之类的其他控制方式。
Note
如果你用数位板代替鼠标工作的时候,发现数位板的压感不正常,你可以试着先把指针放置在Blender界面中,再把数位板的线头拔出来吹吹灰插回去,这也许能管用。
NDOF (3D鼠标)
3D mice or NDOF devices are hardware that you can use to navigate a scene in Blender. Currently only devices made by 3Dconnexion are supported. These devices allow you to explore a scene, and make Fly/Walk Navigation easier to control. The NDOF device can be configured in the Preferences. These settings can also be accessed directly from the viewport using the NDOFMenu button on the NDOF device.
See also
更多的外设配置信息请看 输入设置。
头戴式显示器(虚拟现实)
HDMs 使用户能够处在一个交互式的虚拟环境中。将它们系在头部,将会跟踪头部的运动,将一个看似周围的世界投射到用户眼前的屏幕上。如果系统工作良好,就好像真正处于虚拟环境中一样。
支持的平台
Blender 中的虚拟现实支持是通过多平台 OpenXR 标准实现的。此标准是较新的,因此对它的支持仍然有限。
平台 | 操作系统 | 注意 |
|---|---|---|
Windows | ||
Windows | ||
GNU/Linux | 一般 不 推荐使用。 | |
Oculus (Rift and Quest) | Windows | Requires Oculus v31 Software Update. Oculus Link required for Quest. |
Windows, GNU/Linux | Requires SteamVR 1.16 or greater. | |
Windows | — | |
Windows | 需要Windows 10 2019 五月更新(1903) |
入门
以下各节介绍如何设置HMD以在 支持的平台 上使用。如果不这样做,则Blender在尝试启动虚拟现实会话时将报告错误。
HTC Vive Cosmos
The dedicated platform for the HTC Vive Cosmos is currently targeted at developers and may lack features found in other platforms.
Follow the steps from the Vive Developer Forums.
在Blender中, 启用 VR场景检测插件。
HTC Vive Focus 3
The dedicated platform for the HTC Vive Focus 3 is currently targeted at developers and may lack features found in other platforms.
Follow the steps from the Vive Developer Forums.
在Blender中, 启用 VR场景检测插件。
Monado
Monado is a free and open source XR platform for Linux. It is not yet ready for production usage and should only be used for testing purposes.
软件包可用于以下发行版:
Ubuntu (Eoan, Focal)
对于其他系统,必须从源代码进行编译,在这种情况下,不建议对软件编译经验不足的人使用。仍想这样做,请遵循Monado上的 入门指南。
在Blender中, 启用 VR场景检测插件。
Oculus
Oculus provides full support for OpenXR as of the Oculus v31 Software Update.
Download and install the Oculus Rift/Oculus Link software.
Set Oculus as the active OpenXR runtime via the General tab in the Oculus App Settings.
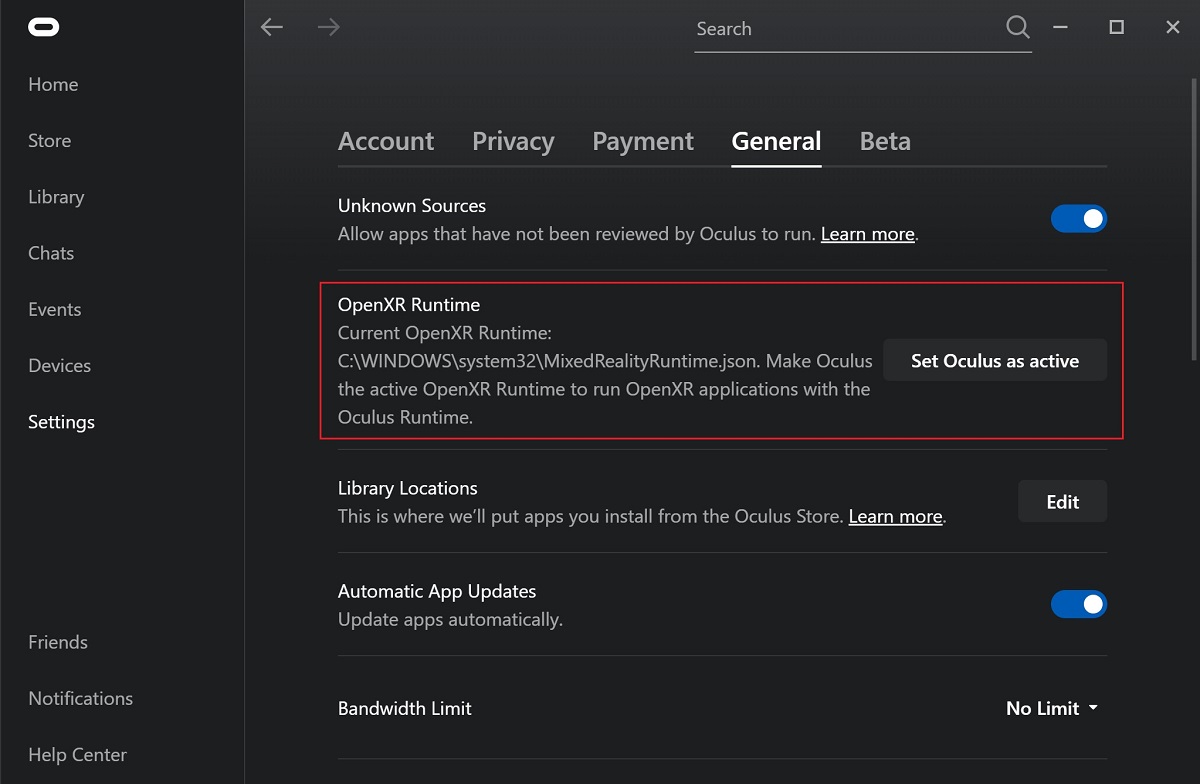
- 在Blender中, 启用 VR场景检测插件。
SteamVR
SteamVR provides full support for OpenXR as of SteamVR 1.16.
- Set SteamVR as the active OpenXR runtime via the Developer tab in the SteamVR Settings.
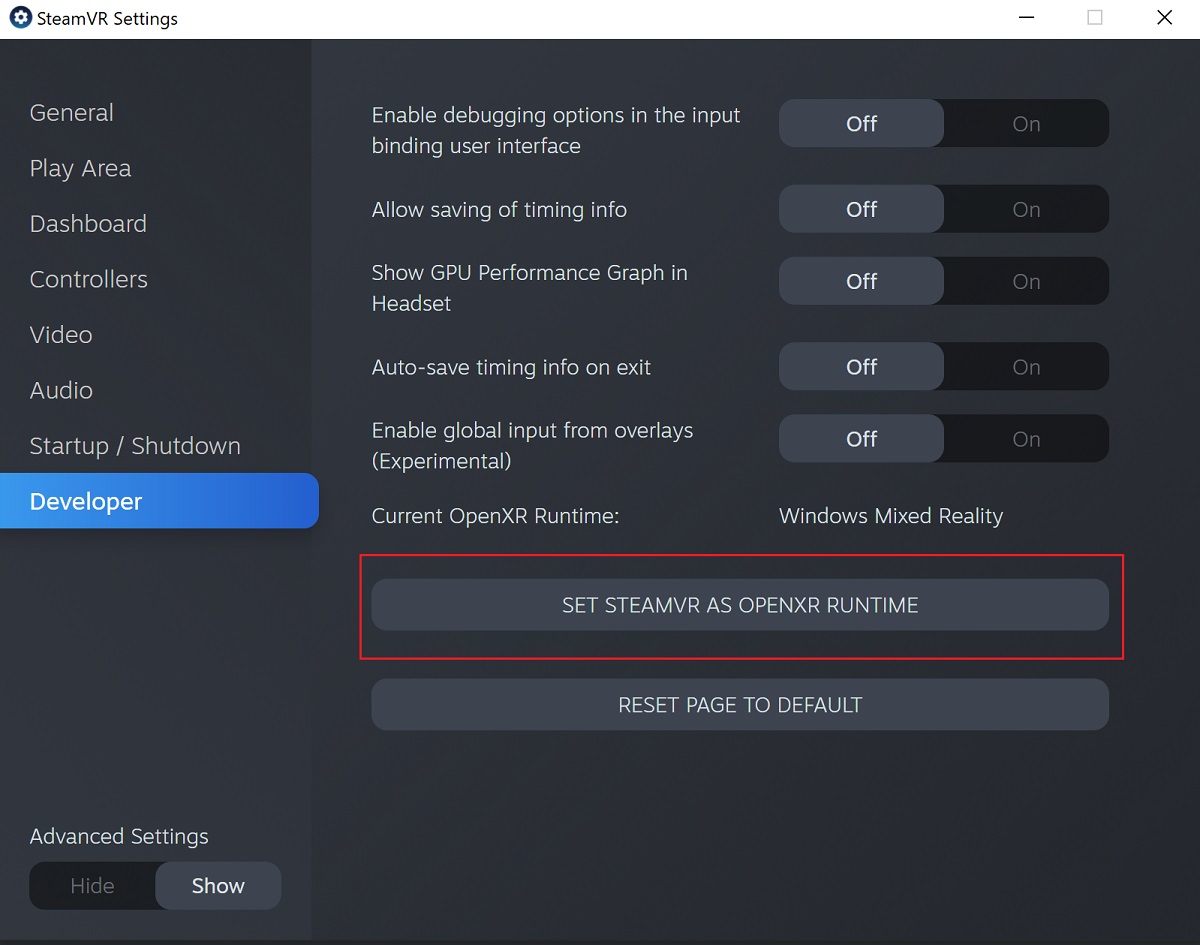
- 在Blender中, 启用 VR场景检测插件。
Note
The SteamVR runtime can also be used for HTC Vive Cosmos, Oculus, and Windows Mixed Reality HMDs.
Varjo
Varjo includes full OpenXR support with its required Varjo Base software.
- 在Blender中, 启用 VR场景检测插件。
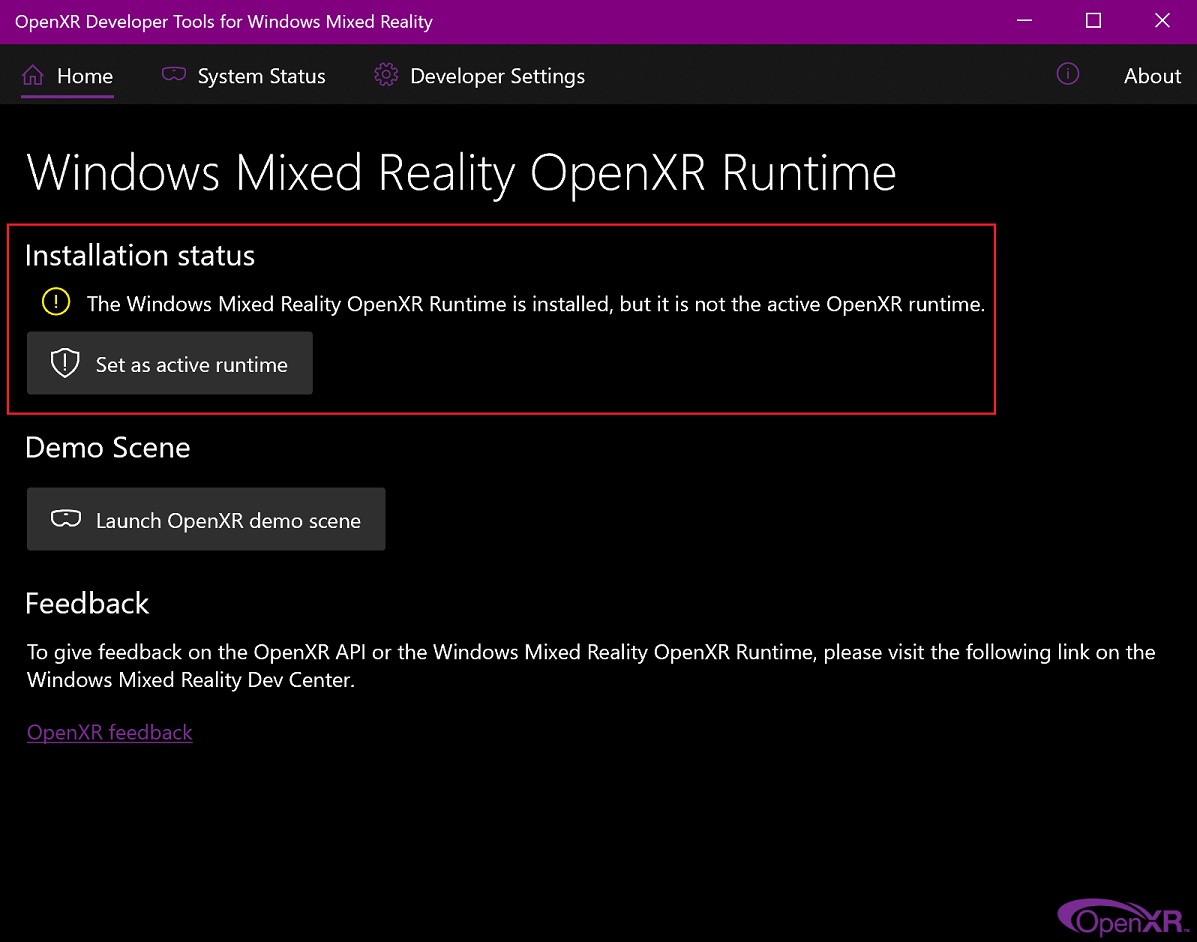
Windows Mixed Reality
Windows Mixed Reality provides full support for OpenXR. To check if a PC meets the requirements to run the software, Microsoft offers the Windows Mixed Reality PC Check application.
确保已安装Windows 10 May 2019更新(1903)。
如果系统满足所有要求,则应该已经安装了Mixed Reality Portal。在 Microsoft Store 中也可以找到它。
启动 Mixed Reality Portal。点击左下角的菜单按钮
...。在打开的菜单中,选择 设置OpenXR。在Blender中, 启用 VR场景检测插件。
Note
To switch to Windows Mixed Reality from another OpenXR runtime (e.g. SteamVR), download the OpenXR Developer Tools from the Microsoft Store and set Windows Mixed Reality as the active runtime.