绘画辅助尺
Krita 的绘画辅助尺工具可以在你绘制直线、圆形等几何图形,甚至透视关系时提供一定的辅助。
你可以把它们用作目标形状的预览图,也可以把手绘笔刷等工具吸附到它们上面。要启用笔刷吸附功能,可在手绘笔刷工具的工具选项里面勾选 吸附到辅助尺 。
Krita’s vanishing point assistants in action.
接下来我们将介绍 Krita 提供的各种绘画辅助尺。
辅助尺类型
Krita 的绘画辅助尺工具可以创建几种不同的形状,你可以在它的工具选项面板按需选用。
椭圆
用来绘制椭圆和圆形的辅助尺。
此辅助尺有三个控制点:前两个点控制椭圆的轴长,最后一个点控制椭圆的宽度。
同轴椭圆
和椭圆类似,但可以绘制多个相互同轴的椭圆。使用此辅助尺时,你只需先创建一个参考椭圆,然后切换到笔刷工具,在工具选项中勾选“吸附到辅助尺”,即可画出与参考椭圆同轴的新椭圆。
If you press the Shift key while holding the first two handles, they will snap to perfectly horizontal or vertical lines. Press the Shift key while holding the third handle, and it’ll snap to a perfect circle.
透视
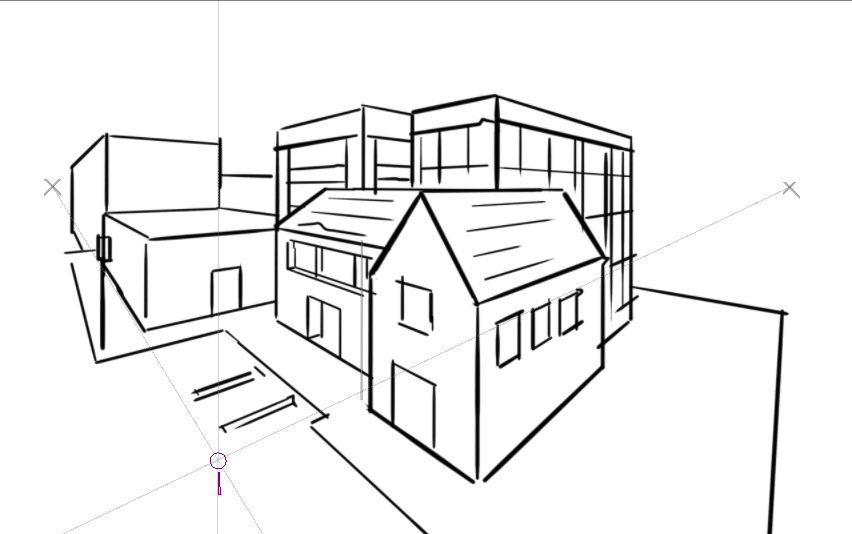
This ruler allows you to draw and manipulate grids on the canvas that can serve as perspective guides for your painting. A grid can be added to your canvas by first clicking the tool in the toolbar and then clicking four points on the canvas which will serve as the four corners of your grid.

此辅助尺创建的网格可以和“透视”传感器配合使用,该传感器会影响笔刷的空间效果。
The grid can be manipulated by pulling on any of its four corners. The grid can be extended by clicking and dragging a midpoint of one of its edges. This will allow you to expand the grid at other angles. This process can be repeated on any subsequent grid or grid section.
If you press the Shift key while holding any of the corner handles, they’ll snap to one of the other corner handles, in sets. You can delete any grid by clicking on the cancel button at its center. This tool can be used to build reference for complex scenes.
直线
这个组别里面有三种辅助尺:
直线
辅助绘制两点之间的一条直线。
无限直线
辅助绘制穿过两点横贯画布的一条直线。
平行直线
先创建一条参考直线,然后切换为笔刷工具,打开吸附功能,即可绘制该参考直线的平行线。
If you press the Shift key while holding the first two handles, they will snap to perfectly horizontal or vertical lines.
曲线
This assistant allows you to position and adjust four points to create a cubic bézier curve. You can then draw along the curve, snapping your brush stroke directly to the curve line. Perfect curves every time!
If you press the Shift key while holding the first two handles, they will snap to perfectly horizontal or vertical lines. Press the Shift key while holding the third or fourth handle, they will snap relative to the handle they are attached to.
消失点
此辅助尺可以创建一个消失点,通常放在地平线上。放置消失点后切换至笔刷工具,辅助尺将为你显示透视预览线,你绘制的笔画也会被吸附到预览线上。
每个辅助尺代表一个消失点,它还带有 4 个控制点用来对齐之前创建的透视线。
你可以用 绘画辅助尺工具 来创建和修改这些消失点。
If you press the Shift key while holding the center handle, they will snap to perfectly horizontal or vertical lines depending on the position of where it previously was.
在 4.1 版更改: 消失点辅助尺可以显示额外的参考线。
当你选中一个消失点辅助尺时,可以在工具选项面板里修改 绘画辅助尺工具 显示的参考线数量。
鱼眼点
和消失点辅助尺一样,此辅助尺会在一个立体空间中显示一组平行线。它有下面几种典型用法:第一种,创建两个垂直且互相重合的鱼眼点辅助尺;第二种,在鱼眼点中间添加一个消失点辅助尺;第三种,用一个鱼眼点、一条平行直线和一个消失点辅助尺配合使用。你可以搭配其他辅助尺使用鱼眼点,大胆地进行实验吧!
此辅助尺不仅可以在它的两个消失点之间的位置提供反馈和吸附,还可以在它们的左右两侧提供反馈和吸附,你可以利用这个特性来绘制全景透视。
If you press the Shift key while holding the first two handles, they will snap to perfectly horizontal or vertical lines. Press the Shift key while holding the third handle, and it’ll snap to a perfect circle.
二点透视
5.0 新版功能.
This assistant simplifies the setup of a two point perspective by putting the two vanishing points and the parallel vertical ruler into one single assistant. This allows it to draw a grid of squares. It requires 3 points at minimum: 2 for perspective, and the final for the mid-point of the vanishing points, which controls how the grid is drawn.
Density
An extra option in the tool options, this controls how dense the grid is.
Enable Vertical Ruler
This allows you to disable the vertical ruler, so that the assistant is only two vanishing points and a grid.
In the above image, a two point perspective with an area limiter is enough to draw an indoor area. The assistant is colored blue here.
相关教程
有关此功能的深入探讨和视频教程,可访问:https://www.youtube.com/watch?v=OhEv2pw3EuI
技术图纸透视设置范例
我们在前面已经介绍了 Krita 提供的各种绘画辅助尺。接下来我们将示范如何使用它们来绘制技术图纸风格的画面。
如果你想绘制某些类型的技术图纸风格画面,你可以在本教程找到对应的绘画辅助尺配置方式。
如果你想要学习真正的透视投影原理,可参考 透视投影原理分类文章。
正交投影
正交投影是一种从物体的正面或者侧面进行观察的方式。在典型情况下你要保持前后物体的比例相同,不要发生透视变形。
这种扁平的图纸主要使用平行直线辅助尺。在水平方向和垂直方向各放置一组平行线,即可形成笔刷可以吸附的平面网格。
轴测图
轴测图有许多种,但都可以通过平行直线辅助尺实现。
斜轴测
如需制作斜轴测图,可先在水平方向和垂直方向上各放置一个平行直线辅助尺,然后在倾斜方向上再放置一个平行直线辅助尺来代表深度。
二轴测和等轴测
等轴测透视就是把斜轴测的三条平行直线辅助尺以 120° 的夹角摆放。游戏常用的二轴测透视在这个基础上有一点变化,即两条斜线和垂直线之间的夹角为 116.565°,这可以通过把辅助尺吸附到网格来实现。
三轴测
在此透视法下,三条参考线之间的夹角都不一样。可以把它看作是稍微倾斜的等轴测透视。
线性透视
单点透视
要组建单点透视,先在画面中间放置一个消失点辅助尺,然后在水平和垂直方向上各放置一条平行直线辅助尺。
二点透视
A 2 point perspective is set up using 2 vanishing point and 1 vertical parallel ruler. Often, putting the vanishing points outside the frame a little can decrease the strength of it. You can also use a 二点透视 Ruler to set this one up very quickly.
三点透视
三点透视通过三个消失点辅助尺进行构建。
消失点的原理和用法
一个消失点是空间中两条平行线交汇的点。这是一个非常有用的知识点,但许多透视教程往往会忽略它。它意味着单点透视和二点透视实际上是一回事。(注意:由于原文省略了太多步骤,译者并没有真正领会最后这句话的意思,译文已经按照标准二点透视原理尽可能地补充了缺少的步骤)
我们可以通过一个小实验来证明这种说法。这个实验便是我们永恒的课题:画一条通向地平线的铁路。
你可能对将要遇到的困难并不陌生:怎么确定下一根枕木的位置呢?透视原理决定了它们离得越远,挤得越近。你当然可以依靠直觉来描绘,但怎么画才能得到精确的效果呢?
一般来说,解决方案是画面左侧外部的地平线上建立一个消失点,从该消失点引出一条斜线,连接到到第一根枕木与右侧铁轨的交点。然后在两条铁轨位于地平线的交汇点上画一根垂直线,把它与之前所画的斜线相交在一点。最后通过这个点画一根水平线。这条水平线便是第二根枕木所在的位置了。后面的枕木如此类推。
不过因为枕木是平行的,所以我们可以使用消失点辅助尺的对齐线功能。把其中一条对齐线的两个控制点各自放在枕木在对角线上的两个点上,把另一条对齐线放在地平线的铁轨交点 (如图红线所示)。
这样我们便利用了横穿第一根枕木对角线的斜线来确定其他枕木的位置:
Because any given set of lines has a vanishing point (outside the ones flat on the view-plane), there can be an infinite amount of vanishing points in a linear perspective. Therefore, Krita allows you to set vanishing points yourself instead of forcing you to only use a few.
鱼眼透视
鱼眼透视和线性透视的工作原理大体上是一致的,最大的不同是在鱼眼透视里面任何平行的线条都具有两个消失点,一边一个。
要构建一组鱼眼透视,最简单的办法就是在水平和垂直方向上建立两个位置重合的鱼眼点辅助尺,然后把一个消失点辅助尺放置在它们的正中间。
你还可以把两个水平方向的鱼眼点辅助尺以画面中间线为界并排放置: